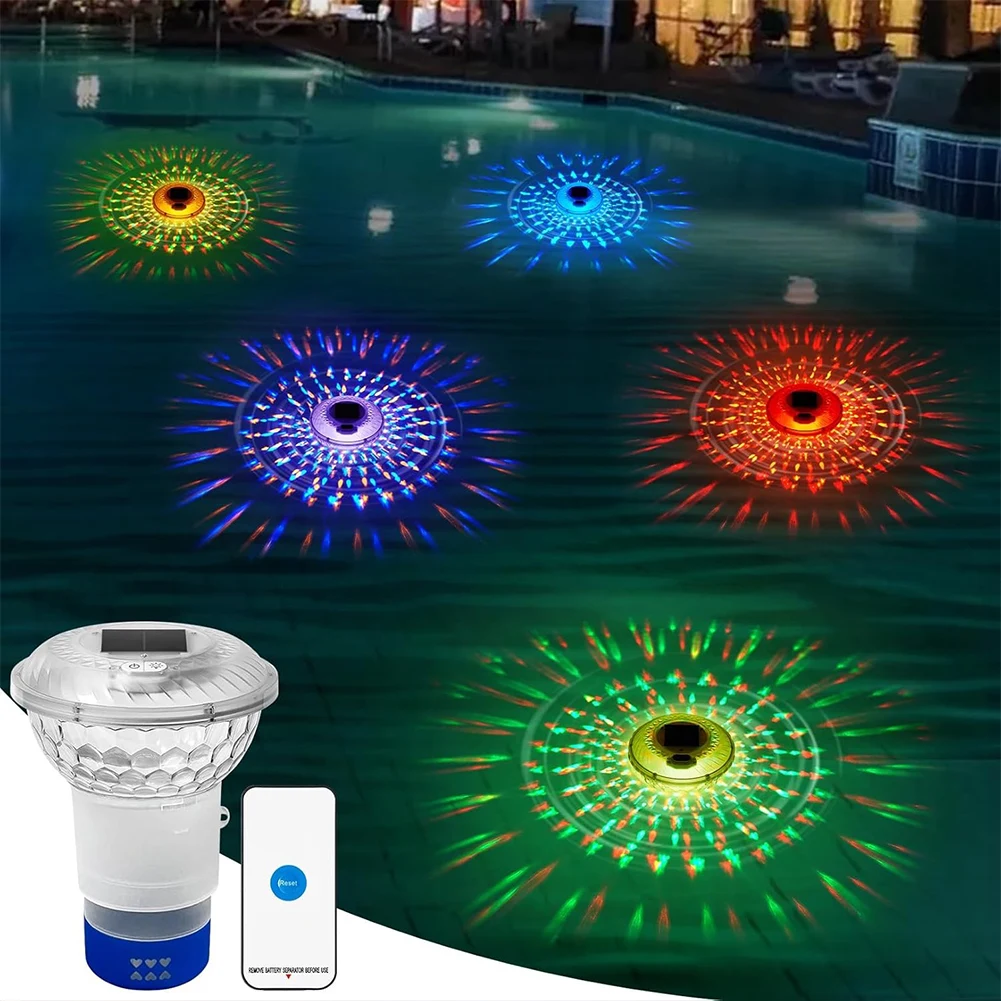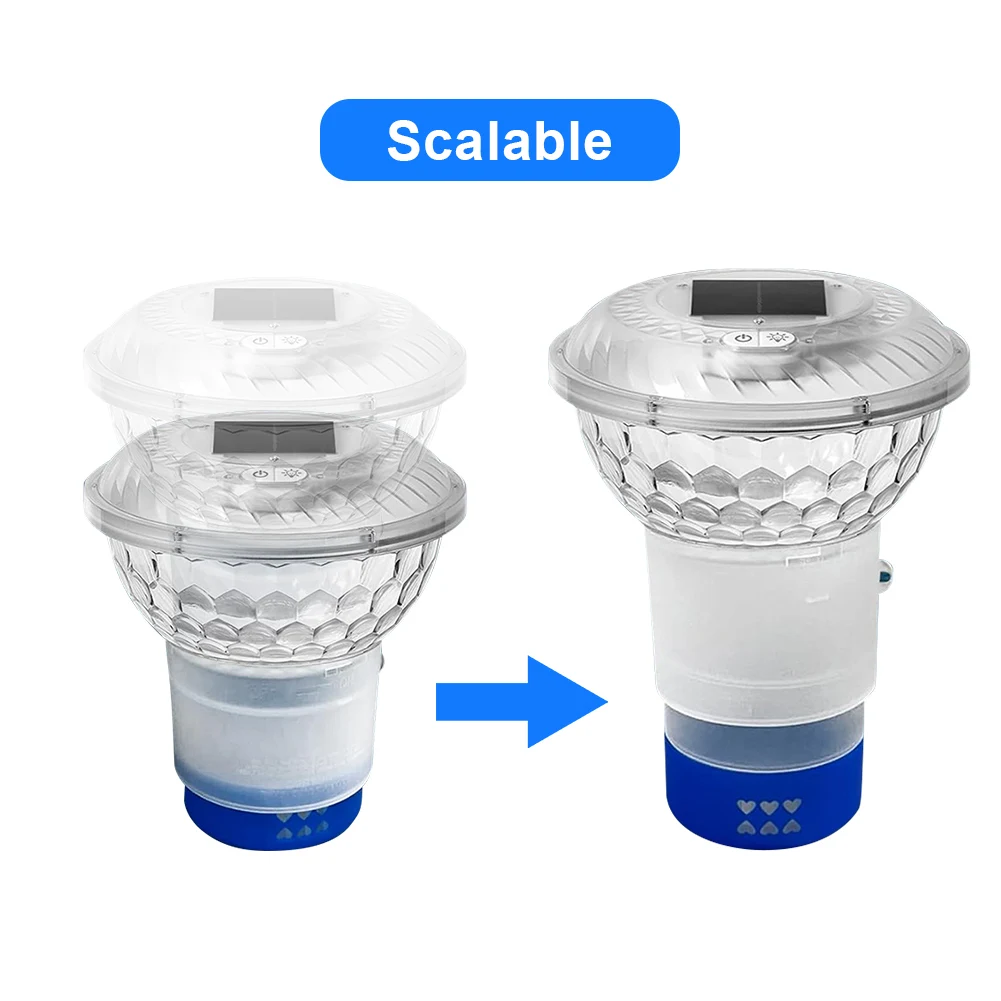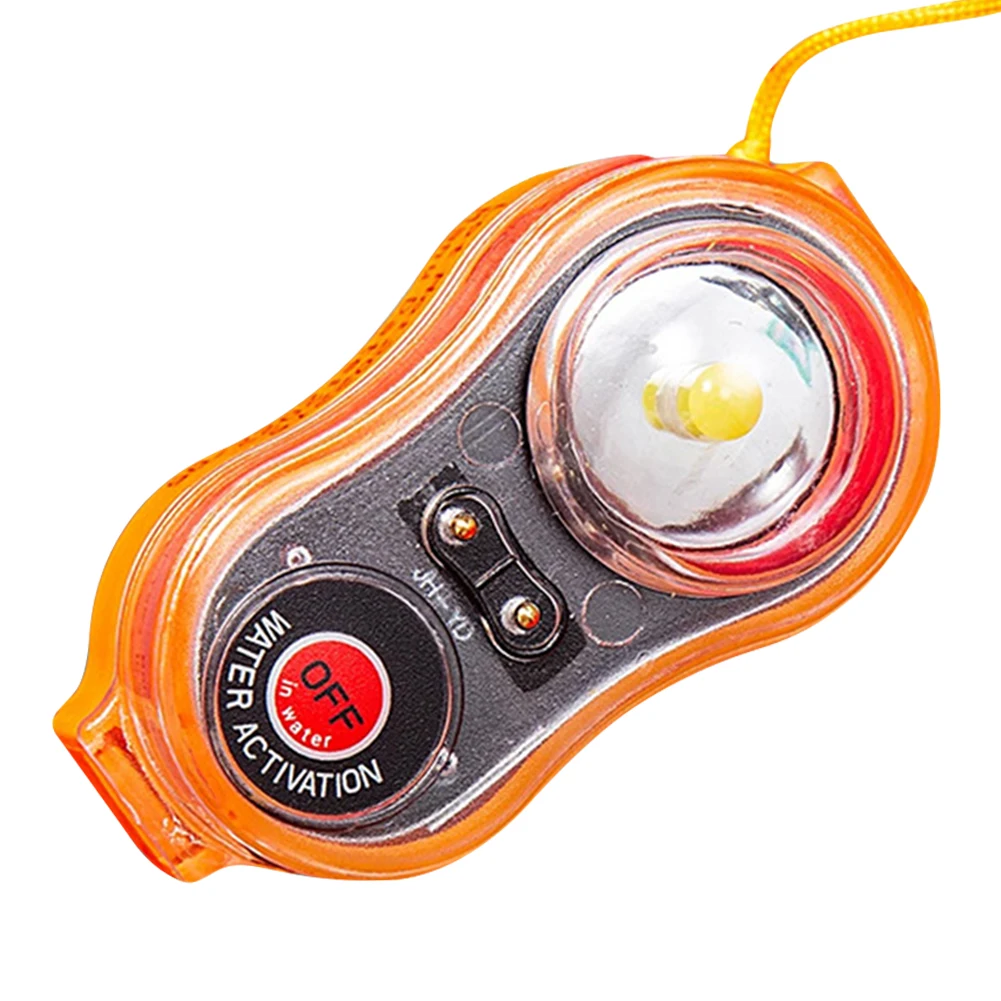

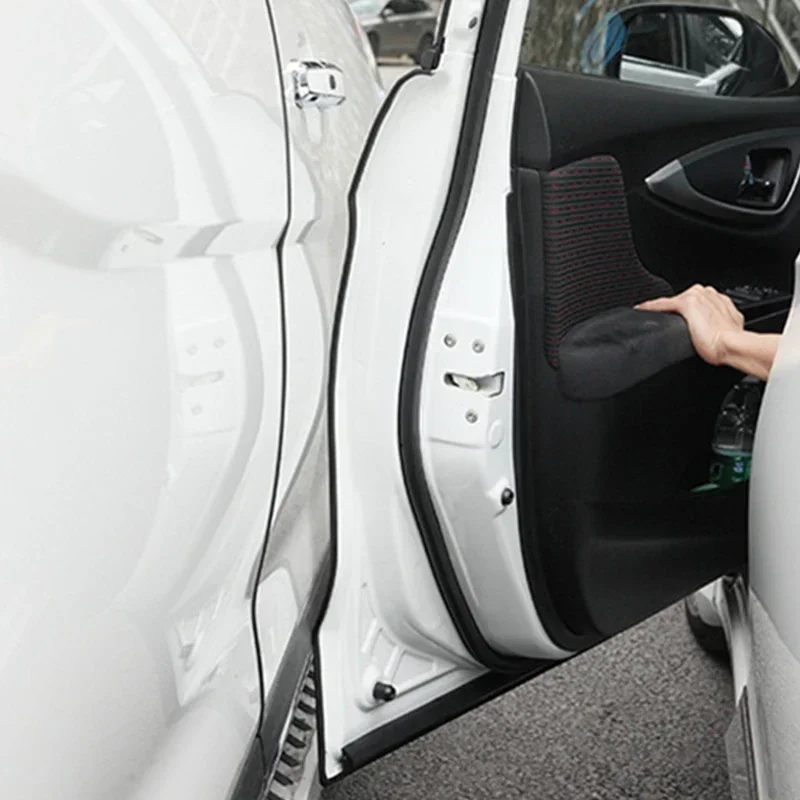
5m Adhesive Scratch Tools New Car Door Edge Rubber Scratch Protector Strips Car Styling Mouldings Protection Side Doors Moldings
<div class="detailmodule_html"><div class="detail-desc-decorate-richtext"><html>
<head></head>
<body>
<div>
<div>
<p>Installation process:</p>
<div>
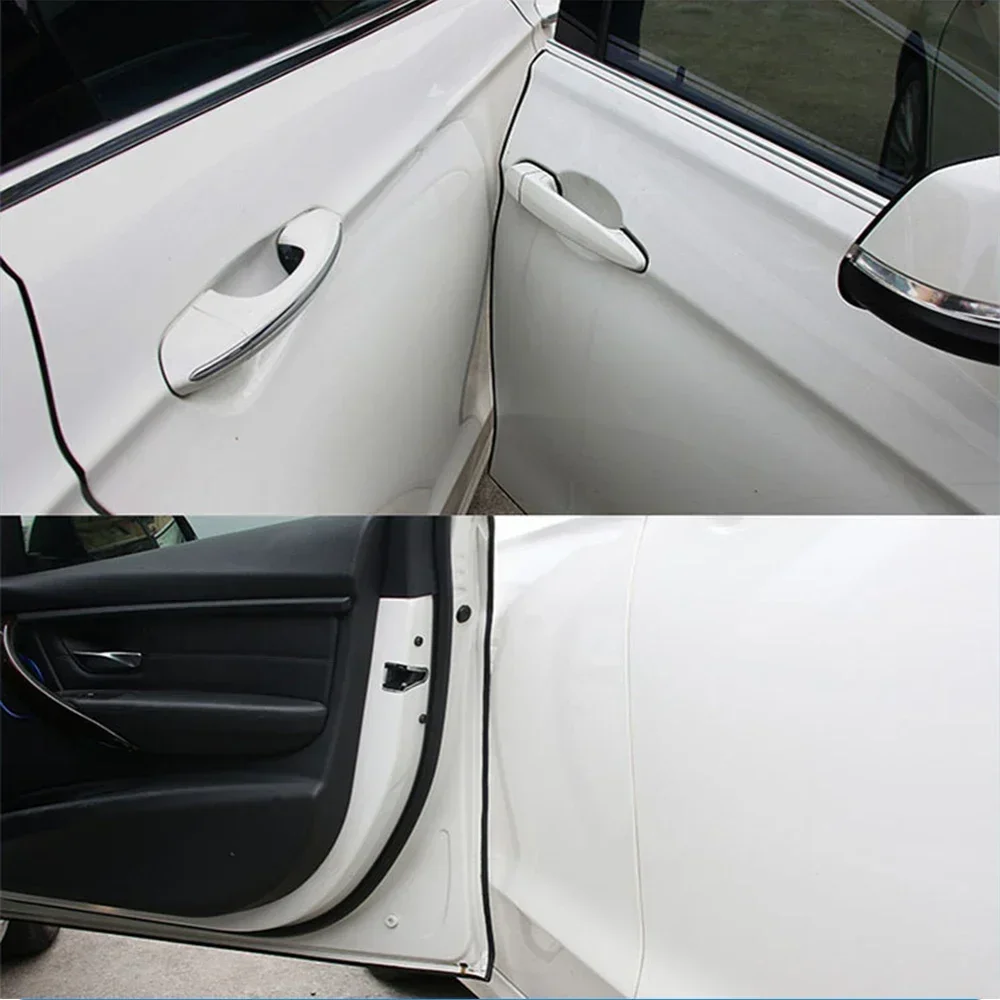
<p>(1) - Measure your door length (Measure Twice Cut Once)</p>
<p>(2) - Cut the Door Guard to the length you just measured</p>
<p>(3) - Slip the Door Guard into your door</p>
<p>(4) - Repeat the process around each door.</p>
<p>How to install:</p>
<p>1. Place the trim under the sun for about 3-5 minutes (This step make the trim more flexible)</p>
<p>2. Gently place the door edge guard on the door so as to line it up with the contour of the door</p>
<p>3. Measure the length of the door edge, and cut the door guard to the length you just measured</p>
<p>4. Slip the door guard into your door</p>
<p>5. Make sure the position of the door edge guard is correct.</p>
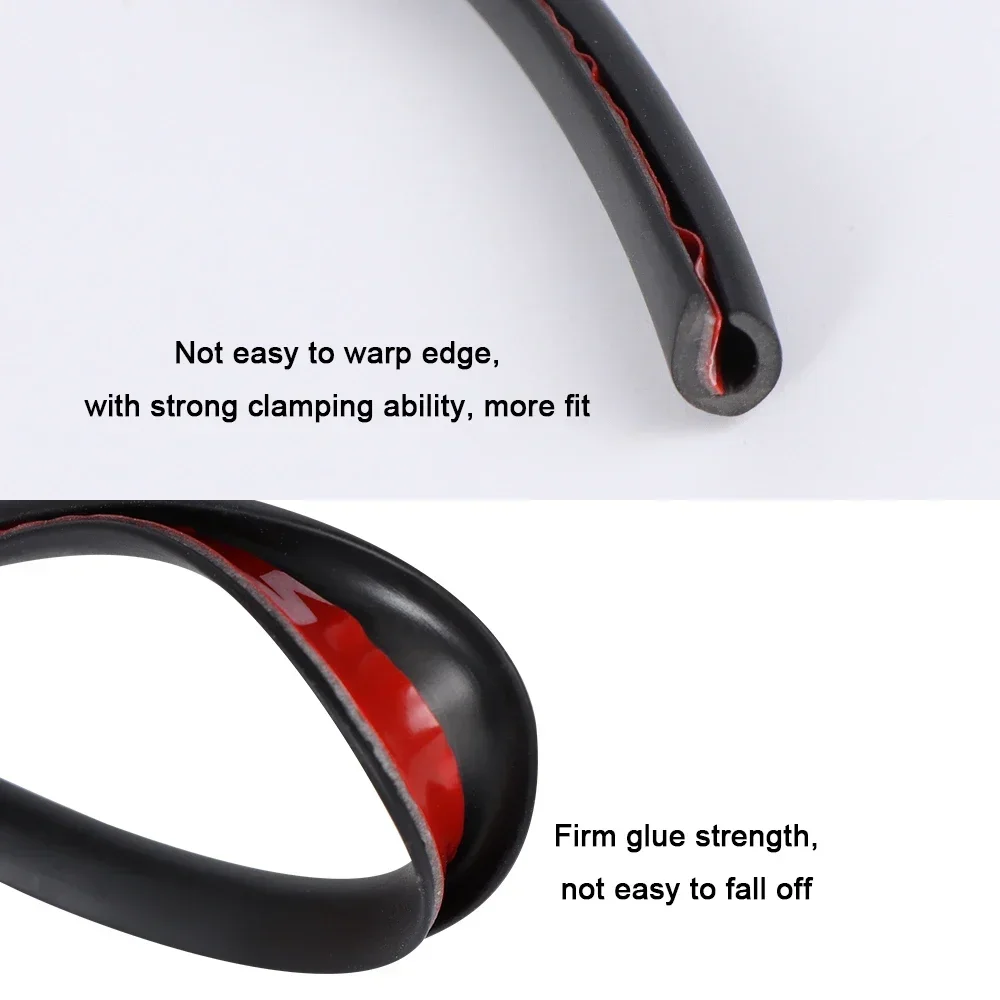
<p>The guard will slowly bend into the proper position as you apply taps. Once in place, do not remove, reposition, or reinstall the door edge guard</p>
<div>
<br>
</div>
<p>How to choose the size:</p>
<div>
<br>
</div>
<p>Ordinary Car:</p>
<div>
<br>
</div>
<p>5 meters for 4 doors vertical edge</p>
<div>
<br>
</div>
<p>8 meters for 4 doors vertical edge+bottom horizontal side</p>
<div>
<br>
</div>
<p>13 meters for 4 doors vertical edge+bottom horizontal side+bottom side of the trunk</p>
<p>Off-road Vehicle SUV:</p>
<div>
<br>
</div>
<p>5 meters for 4 doors;</p>
<div>
<br>
</div>
<p>8 meters for 4 doors+bottom side of the trunk</p>
<div>
<br>
</div>
<p>10 meters for 4 doors+bottom side of the trunk+the hood</p>
<p>Package List:</p>
<p>1 x protective strips for the car door</p>
<div style="text-align:start" align="start">
<br>
</div>
<div style="text-align:start" align="start">
<br>
<br>
<br>
</div>
<div style="text-align:start" align="start">
<br>
<br>
</div>
</div>
</div>
</div>
<p><br></p>
</body>
</html></div></div>
$12.2
$6.995
- Category : Motorcycle Equipments & Parts
- Brand : shop1105158303_store Shop1105158303 Store
Colors
Sizes
-
+
<div class="detailmodule_html"><div class="detail-desc-decorate-richtext"><html>
<head></head>
<body>
<div>
<div>
<p>Installation process:</p>
<div>
<p>(1) - Measure your door length (Measure Twice Cut Once)</p>
<p>(2) - Cut the Door Guard to the length you just measured</p>
<p>(3) - Slip the Door Guard into your door</p>
<p>(4) - Repeat the process around each door.</p>
<p>How to install:</p>
<p>1. Place the trim under the sun for about 3-5 minutes (This step make the trim more flexible)</p>
<p>2. Gently place the door edge guard on the door so as to line it up with the contour of the door</p>
<p>3. Measure the length of the door edge, and cut the door guard to the length you just measured</p>
<p>4. Slip the door guard into your door</p>
<p>5. Make sure the position of the door edge guard is correct.</p>
<p>The guard will slowly bend into the proper position as you apply taps. Once in place, do not remove, reposition, or reinstall the door edge guard</p>
<div>
<br>
</div>
<p>How to choose the size:</p>
<div>
<br>
</div>
<p>Ordinary Car:</p>
<div>
<br>
</div>
<p>5 meters for 4 doors vertical edge</p>
<div>
<br>
</div>
<p>8 meters for 4 doors vertical edge+bottom horizontal side</p>
<div>
<br>
</div>
<p>13 meters for 4 doors vertical edge+bottom horizontal side+bottom side of the trunk</p>
<p>Off-road Vehicle SUV:</p>
<div>
<br>
</div>
<p>5 meters for 4 doors;</p>
<div>
<br>
</div>
<p>8 meters for 4 doors+bottom side of the trunk</p>
<div>
<br>
</div>
<p>10 meters for 4 doors+bottom side of the trunk+the hood</p>
<p>Package List:</p>
<p>1 x protective strips for the car door</p>
<div style="text-align:start" align="start">
<br>
</div>
<div style="text-align:start" align="start">
<br>
<br>
<br>
</div>
<div style="text-align:start" align="start">
<br>
<br>
</div>
</div>
</div>
</div>
<p><br></p>
</body>
</html></div></div>
Related Product
Browse The Collection of Top Products.