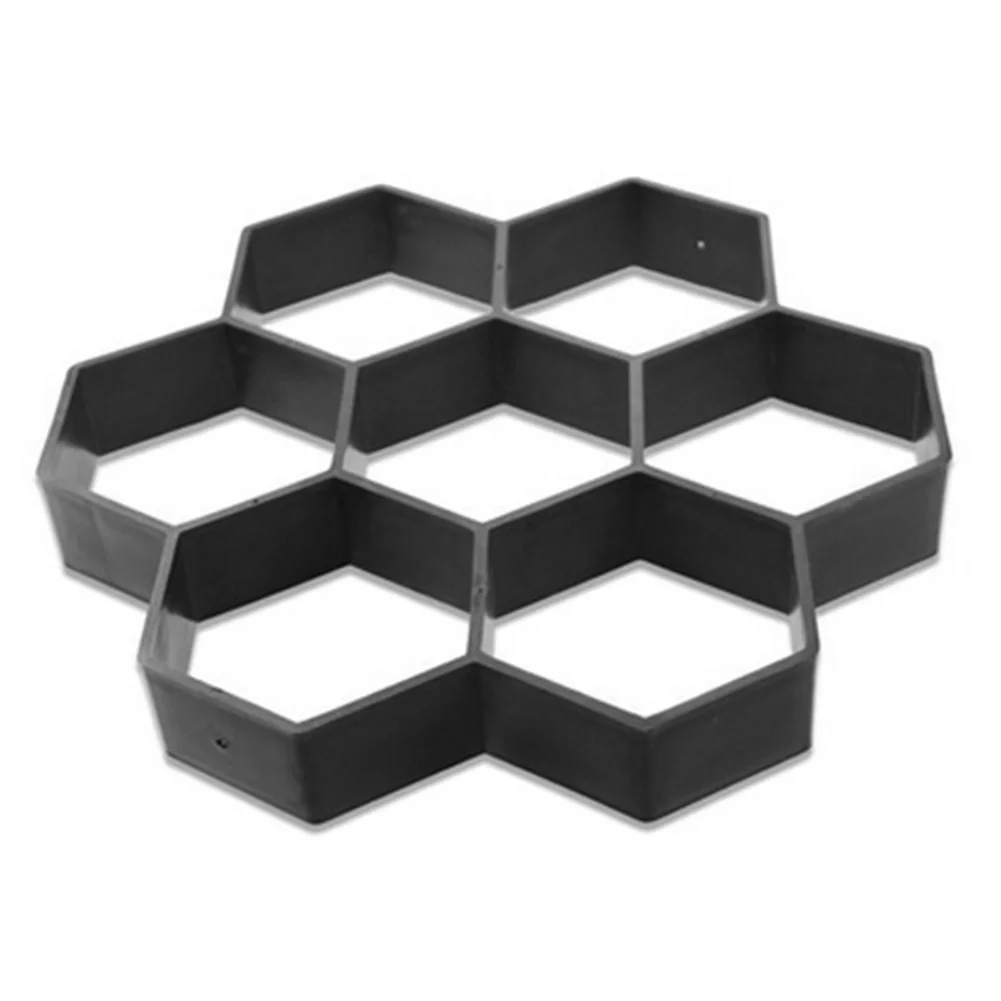


7 Grid Garden Pavement Mold DIY Manually Paving Cement Mould PP Resin Material for Home Garden Yard Resuable Tool
<div class="detailmodule_html"><div class="detail-desc-decorate-richtext"><p>
<span> </span>
</p>
<p>
<br />
</p>
<h2>
<span style="font-size:14px;font-family:Arial;"></span>
</h2>
<table class="ke-zeroborder" width="100%" cellspacing="0" cellpadding="0" border="0">
<tbody>
<tr>
<td>
<br />
<div style="padding:15px;border:1px solid #AEAEAE;">
<p>
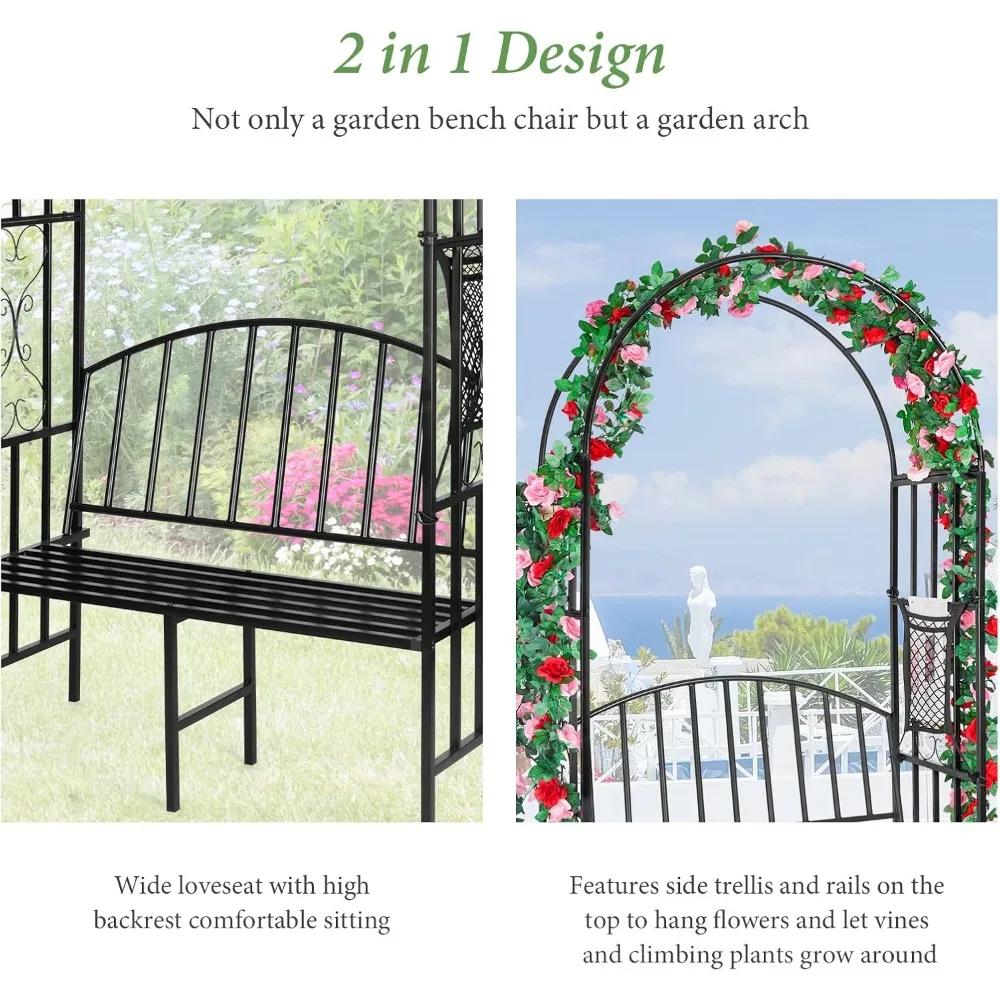
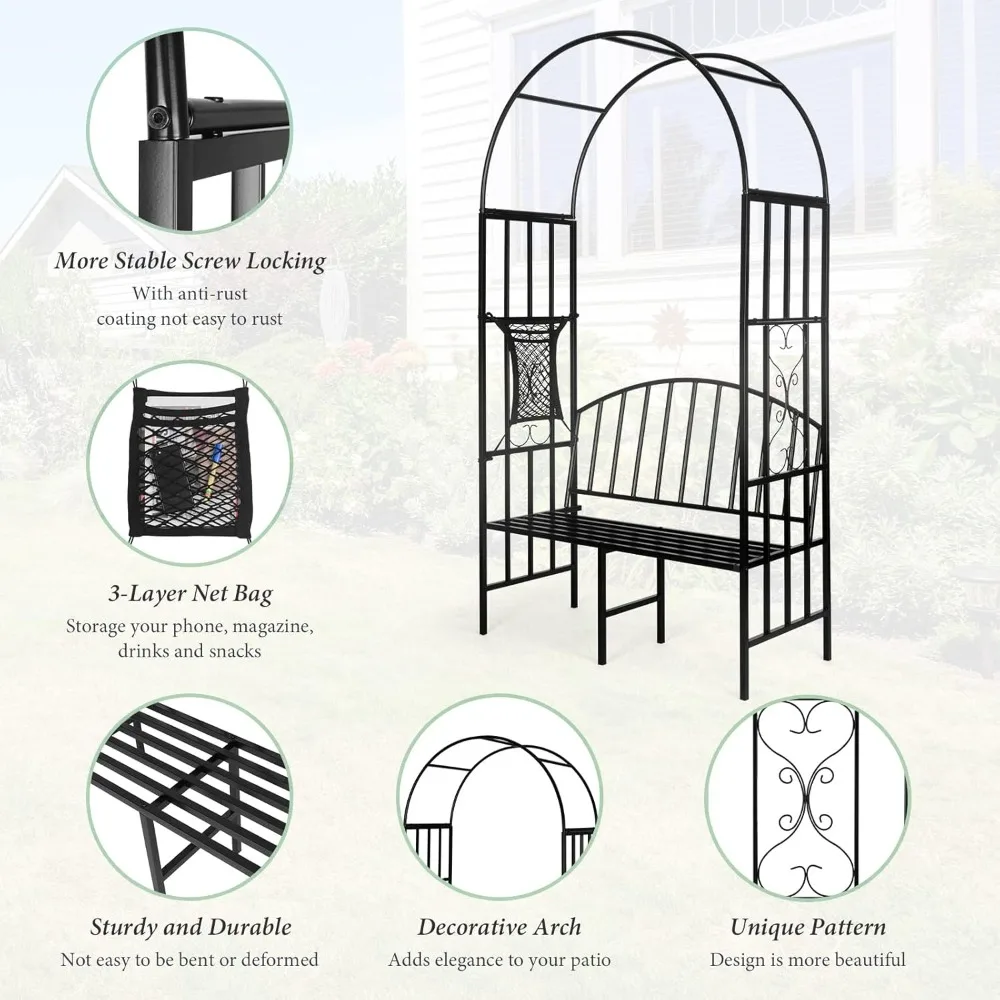
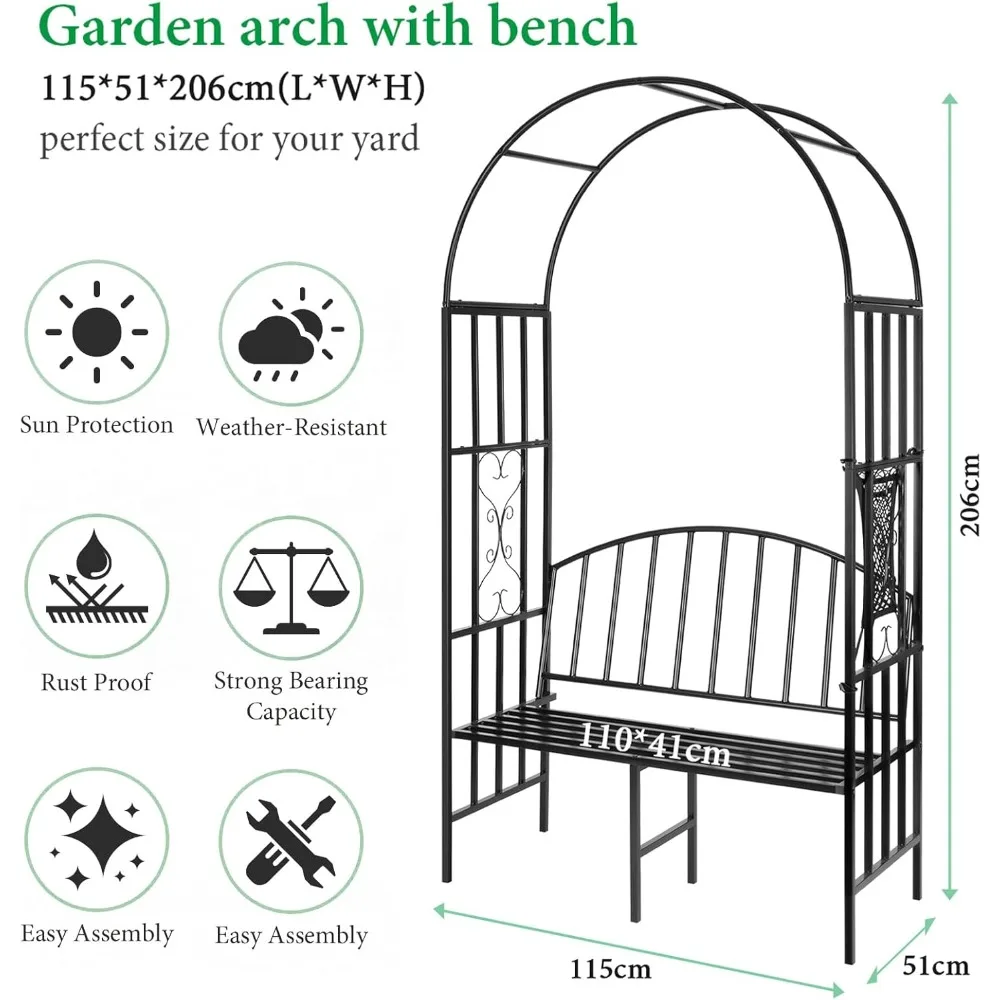
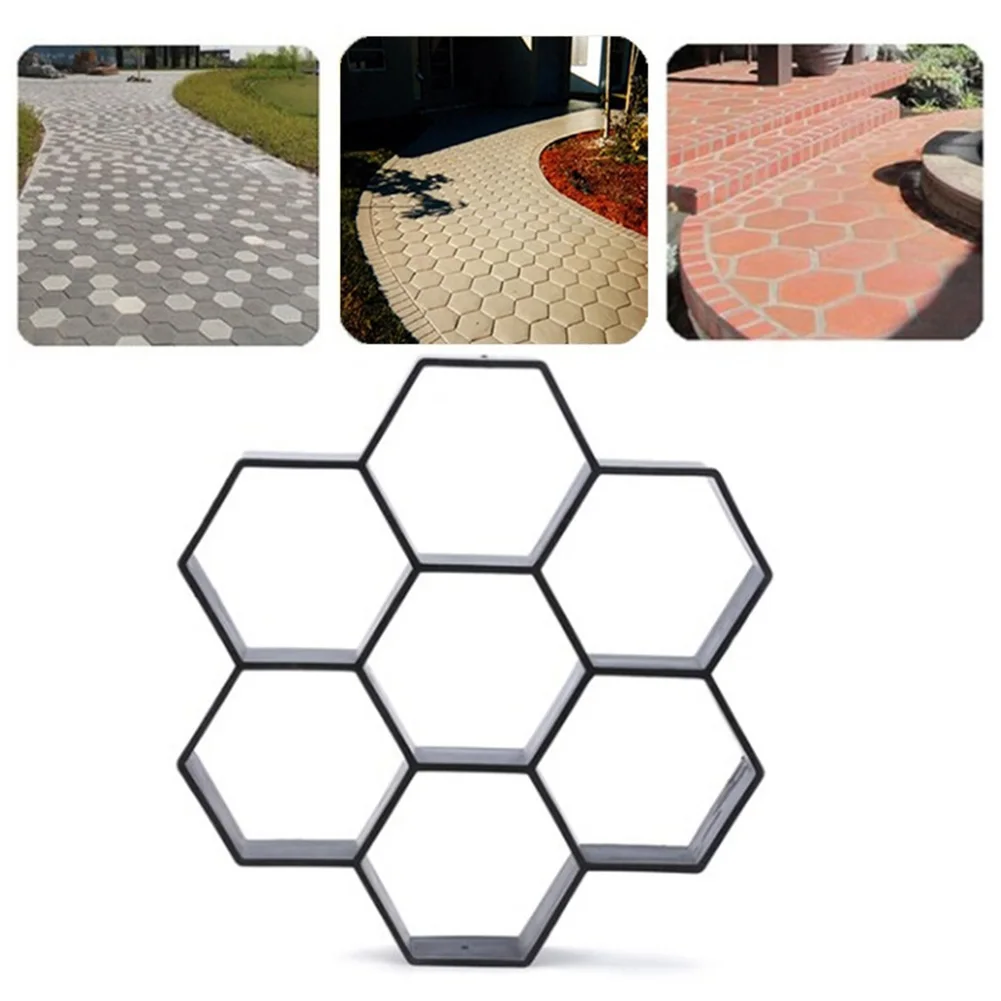
<strong>Reusable Garden Pavement Mold Garden Walk Pavement Concrete Mould DIY Manually Paving Cement Brick Path Maker Road Concrete Molds</strong><br />
<strong>Specifications:</strong><br />
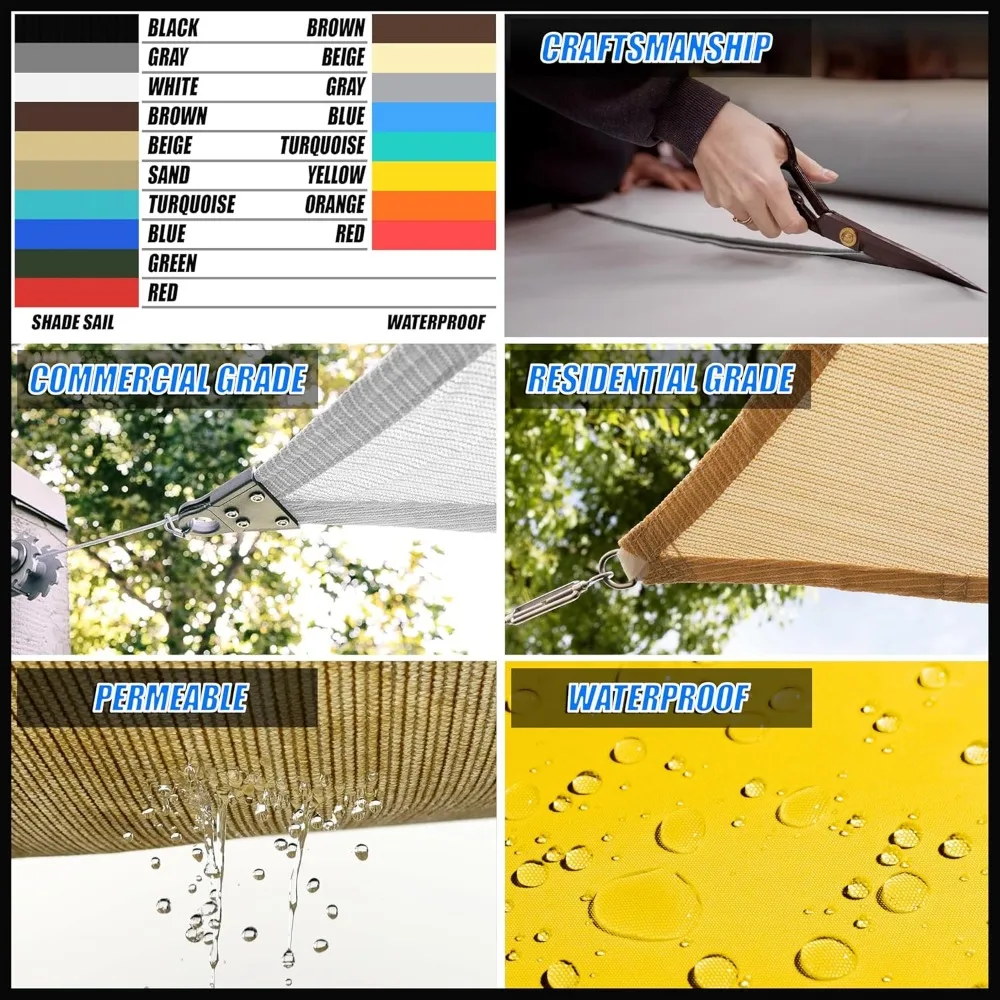
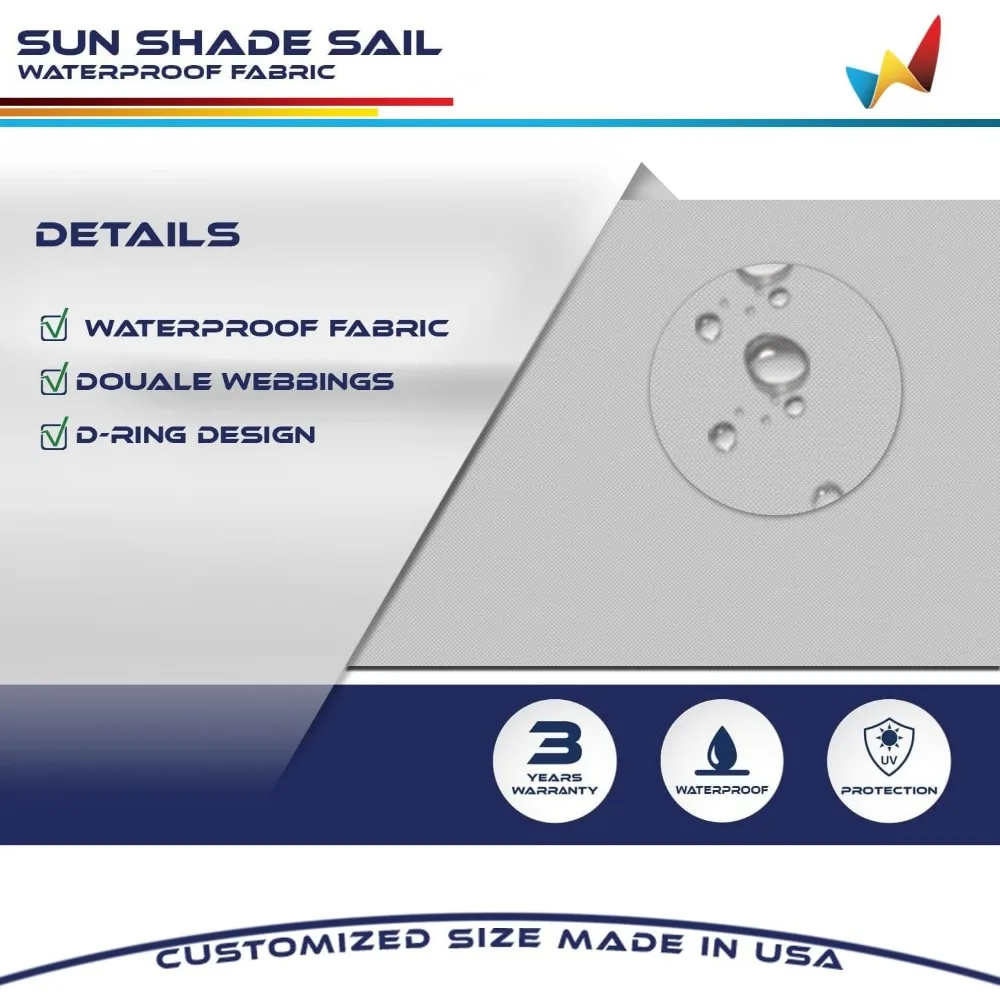
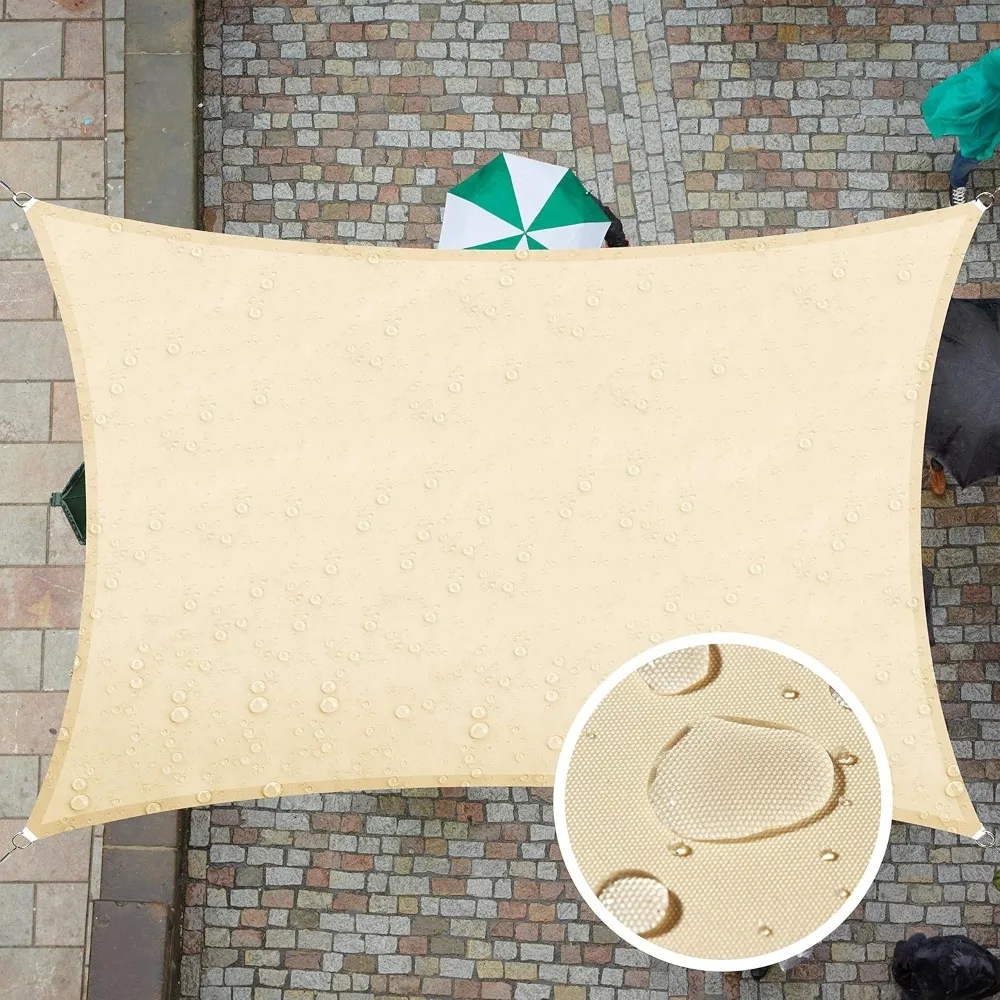
Material: PP resin<br />
Irregular size: 30*30*4.2cm/11.81*11.81*1.65''<br />
<br />
<strong>Applicable to:</strong><br />
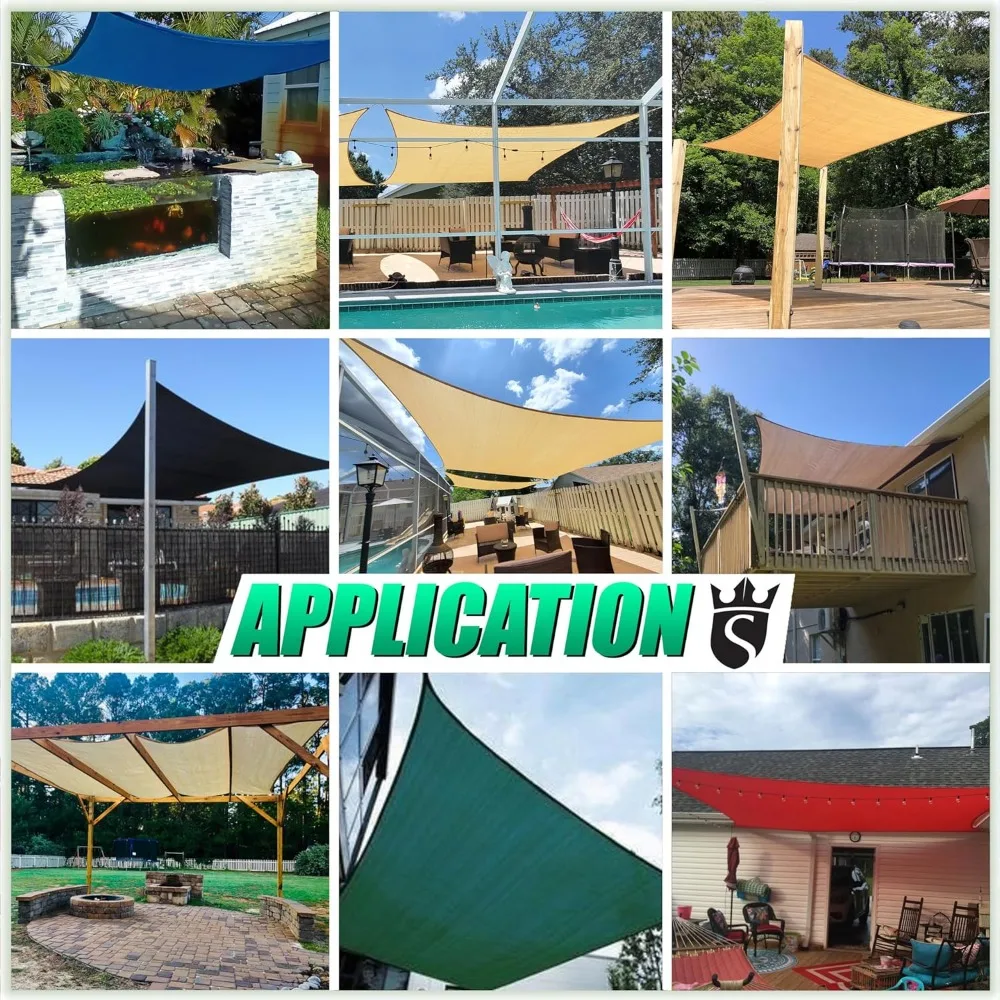
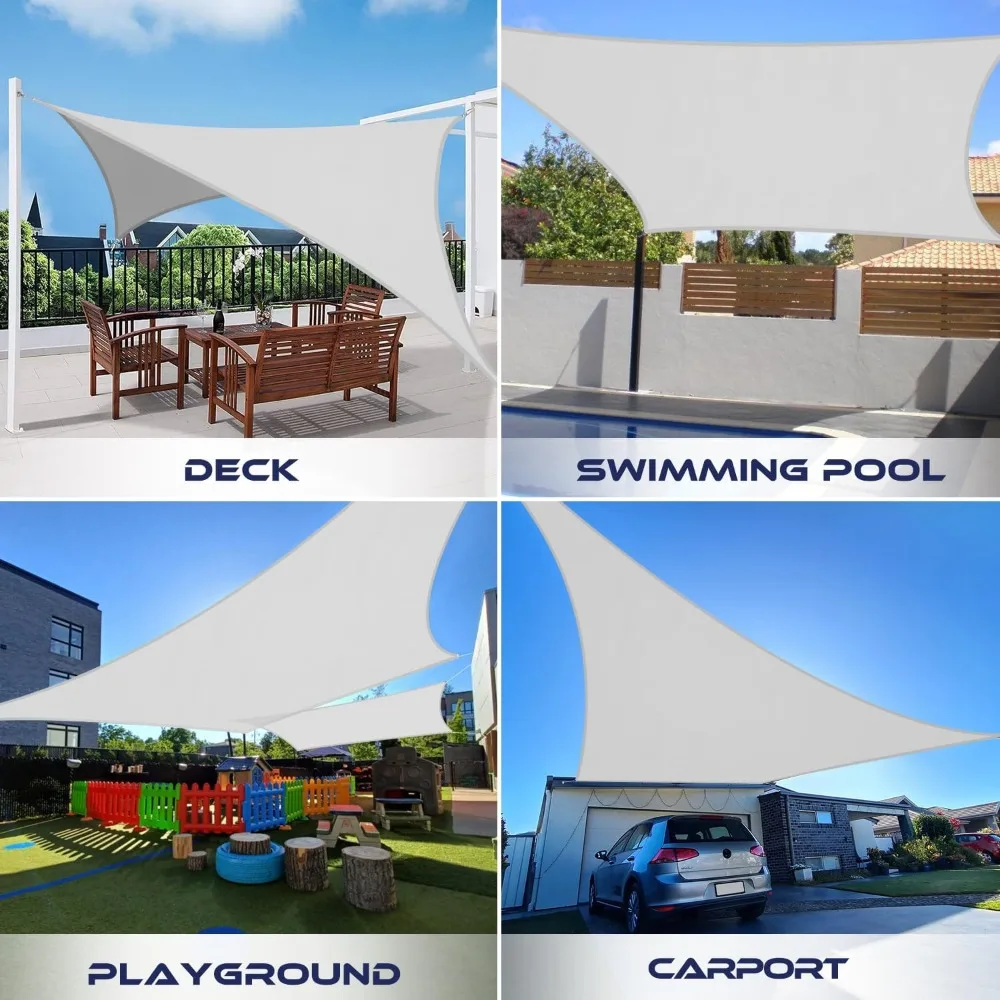
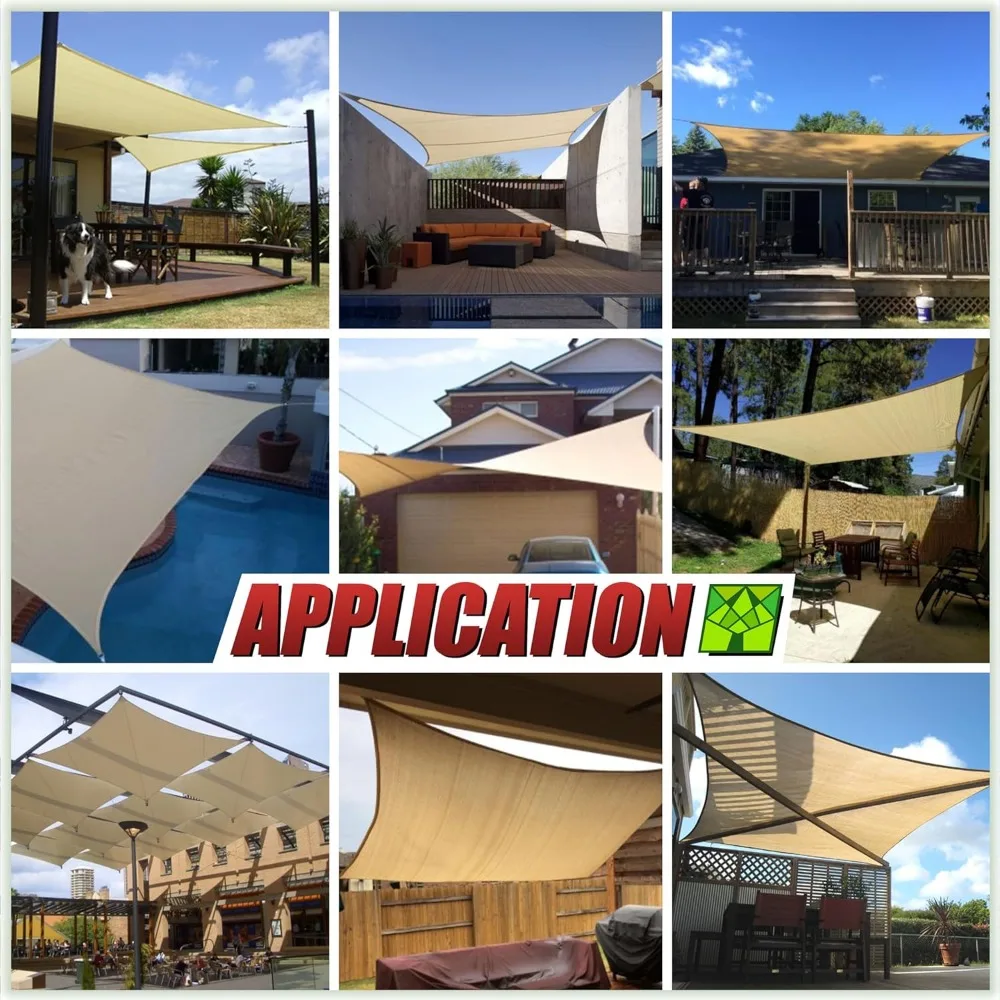
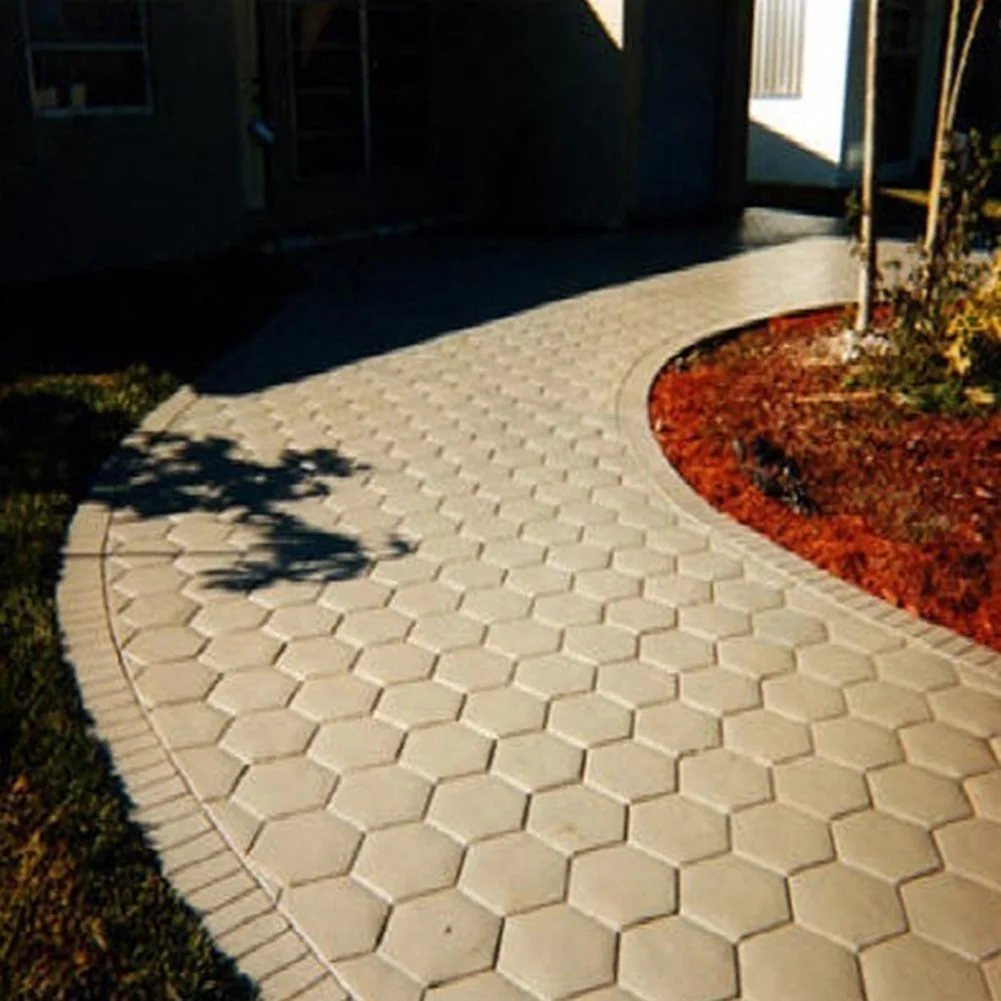
1. Self-built houses, DIY design corridors, home roads, balconies, courtyards, gardens, vegetable plots, landscapes, swimming pools, art floors.<br />
2. Villas, plazas, municipalities, companies, factories, hotels, resorts, cafes, clubs, spas, building designers and builders.<br />
3. Booth to set up the set designer.<br />
4. An advertising company that temporarily set up a set because of the need for advertising photography.<br />
<br />
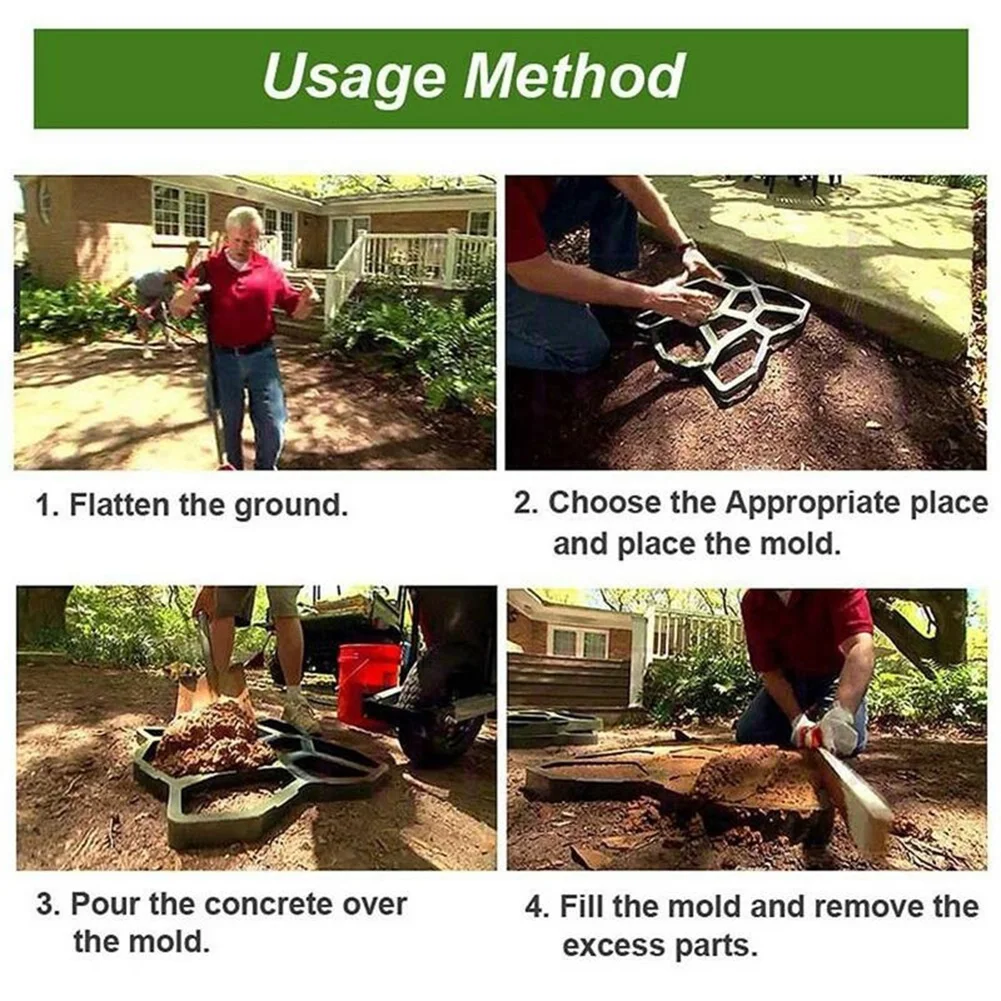
<strong>Instructions: </strong><br />
step 1:<br />
Mix the cement with water according to the packing instructions. When ready for use, the concrete will be the consistency of the oatmeal and thick enough to hold the edges when cut with a shovel.<br />
Step 2:<br />
Fill the paver mold, plow the concrete with a shovel and make sure to fill each area.<br />
Step 3:<br />
Use rubber gloves to spread the concrete around the mold and fill any or low points. Tap the mold by hand to remove any air bubbles.<br />
Step 4:<br />
Smooth the concrete according to the <span style="background-color:red;">CONTOUR</span> of the mold and wipe off the excess.<br />
Step 5:<br />
Allow the concrete to set up to five minutes and carefully remove the mold. For the next stretch, rotate the mold a quarter turn and place it next to the paver you just finished. If you are creating a curved path, tilt it slightly.<br />
Step 6:<br />
After allowing the concrete to solidify overnight, fill the crack with dirt and rinse off the excess. Wet the ground around the newly formed paver to help them settle.<br />
<br />
<strong>Tips:</strong><br />
1. Clean the concrete garden molds for reuse and spray with garden hoses.<br />
2. After pouring the first garden stepping stone, you can use the garden stone mold again so you don't have to wait.<br />
<br />
<strong>Notes:</strong><br />
Please allow 1-3mm differs due to manual measurement.<br />
Due to the different display and different light, the picture may not show the actual color of the item. Thanks for your understanding.<br />
</p>
</div>
<br />
<div>
<br />
</div>
<div style="padding:15px;border:1px solid #AEAEAE;">
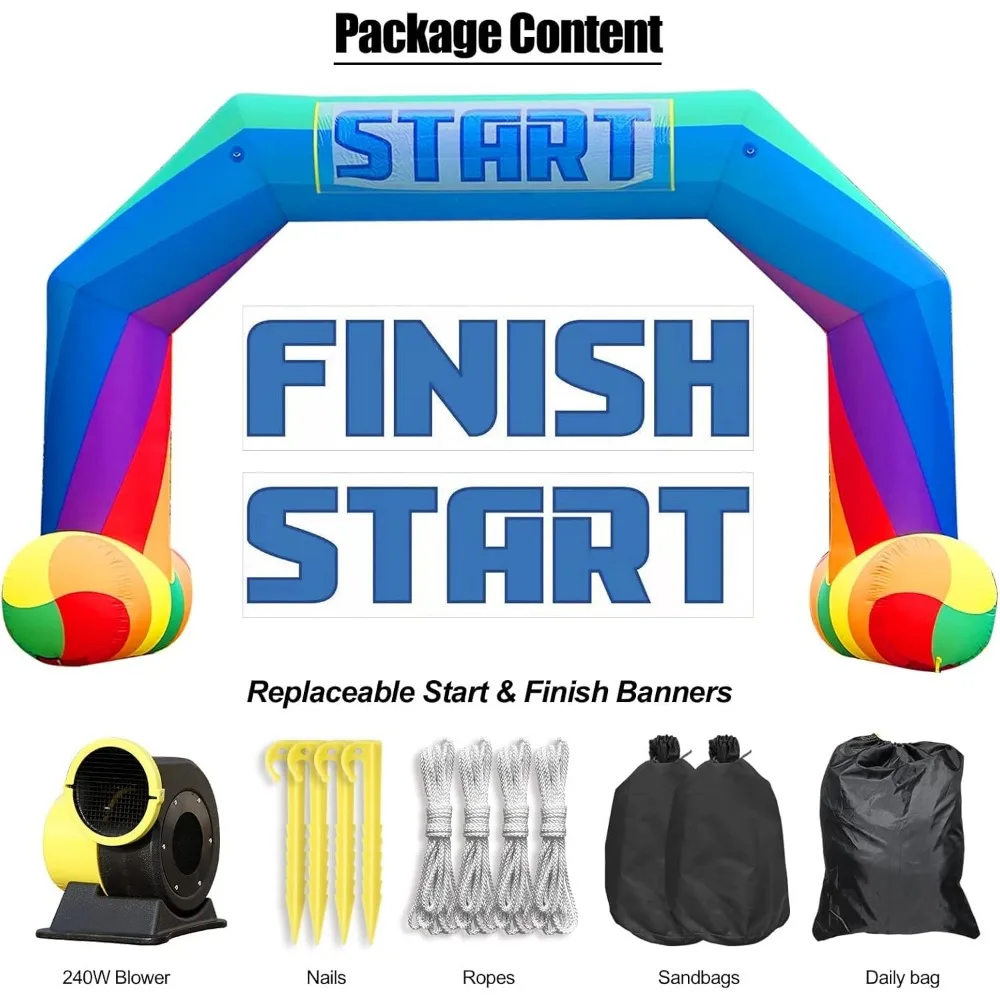
1 X Pavement Mold <br />
</div>
<br />
<div style="text-align:center;">
</div>
<br />
<div>
<br />
</div>
<div style="padding:15px;border:1px solid #AEAEAE;">
[relateproductdetail/]
</div>
<br />
<p>
<br />
</p>
<p>
</p>
</td>
</tr>
</tbody>
</table>
<p>
<br />
</p></div></div>
$54.2
$19.13
- Category : Home & Garden
- Brand : us_local_delivery_store_store US Local Delivery Store Store
Colors
Sizes
-
+
<div class="detailmodule_html"><div class="detail-desc-decorate-richtext"><p>
<span> </span>
</p>
<p>
<br />
</p>
<h2>
<span style="font-size:14px;font-family:Arial;"></span>
</h2>
<table class="ke-zeroborder" width="100%" cellspacing="0" cellpadding="0" border="0">
<tbody>
<tr>
<td>
<br />
<div style="padding:15px;border:1px solid #AEAEAE;">
<p>
<strong>Reusable Garden Pavement Mold Garden Walk Pavement Concrete Mould DIY Manually Paving Cement Brick Path Maker Road Concrete Molds</strong><br />
<strong>Specifications:</strong><br />
Material: PP resin<br />
Irregular size: 30*30*4.2cm/11.81*11.81*1.65''<br />
<br />
<strong>Applicable to:</strong><br />
1. Self-built houses, DIY design corridors, home roads, balconies, courtyards, gardens, vegetable plots, landscapes, swimming pools, art floors.<br />
2. Villas, plazas, municipalities, companies, factories, hotels, resorts, cafes, clubs, spas, building designers and builders.<br />
3. Booth to set up the set designer.<br />
4. An advertising company that temporarily set up a set because of the need for advertising photography.<br />
<br />
<strong>Instructions: </strong><br />
step 1:<br />
Mix the cement with water according to the packing instructions. When ready for use, the concrete will be the consistency of the oatmeal and thick enough to hold the edges when cut with a shovel.<br />
Step 2:<br />
Fill the paver mold, plow the concrete with a shovel and make sure to fill each area.<br />
Step 3:<br />
Use rubber gloves to spread the concrete around the mold and fill any or low points. Tap the mold by hand to remove any air bubbles.<br />
Step 4:<br />
Smooth the concrete according to the <span style="background-color:red;">CONTOUR</span> of the mold and wipe off the excess.<br />
Step 5:<br />
Allow the concrete to set up to five minutes and carefully remove the mold. For the next stretch, rotate the mold a quarter turn and place it next to the paver you just finished. If you are creating a curved path, tilt it slightly.<br />
Step 6:<br />
After allowing the concrete to solidify overnight, fill the crack with dirt and rinse off the excess. Wet the ground around the newly formed paver to help them settle.<br />
<br />
<strong>Tips:</strong><br />
1. Clean the concrete garden molds for reuse and spray with garden hoses.<br />
2. After pouring the first garden stepping stone, you can use the garden stone mold again so you don't have to wait.<br />
<br />
<strong>Notes:</strong><br />
Please allow 1-3mm differs due to manual measurement.<br />
Due to the different display and different light, the picture may not show the actual color of the item. Thanks for your understanding.<br />
</p>
</div>
<br />
<div>
<br />
</div>
<div style="padding:15px;border:1px solid #AEAEAE;">
1 X Pavement Mold <br />
</div>
<br />
<div style="text-align:center;">
</div>
<br />
<div>
<br />
</div>
<div style="padding:15px;border:1px solid #AEAEAE;">
[relateproductdetail/]
</div>
<br />
<p>
<br />
</p>
<p>
</p>
</td>
</tr>
</tbody>
</table>
<p>
<br />
</p></div></div>
Related Product
Browse The Collection of Top Products.