

Aluminum Alloy Suction Tin Gun Manual Removal Vacuum Strong High Temperature Hand Welding Tools Desolder Desoldering Pum
<div class="detailmodule_html"><div class="detail-desc-decorate-richtext"><div>
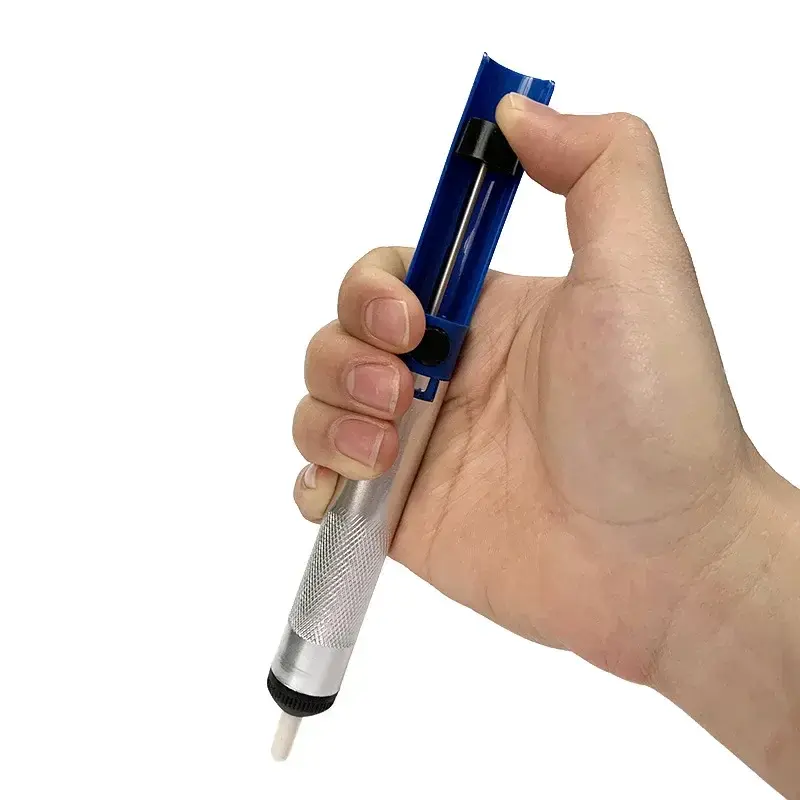
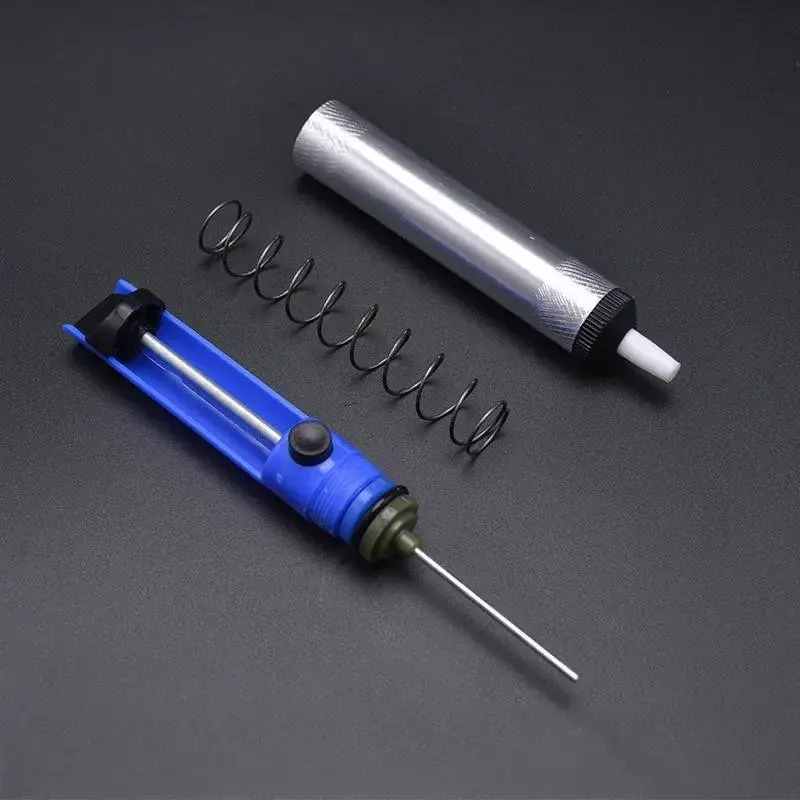
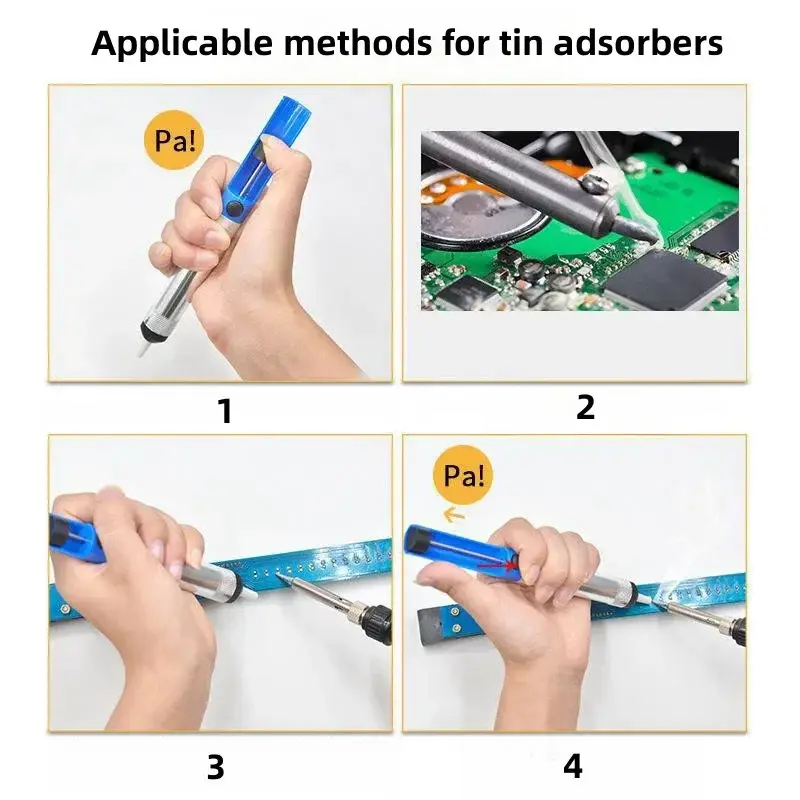
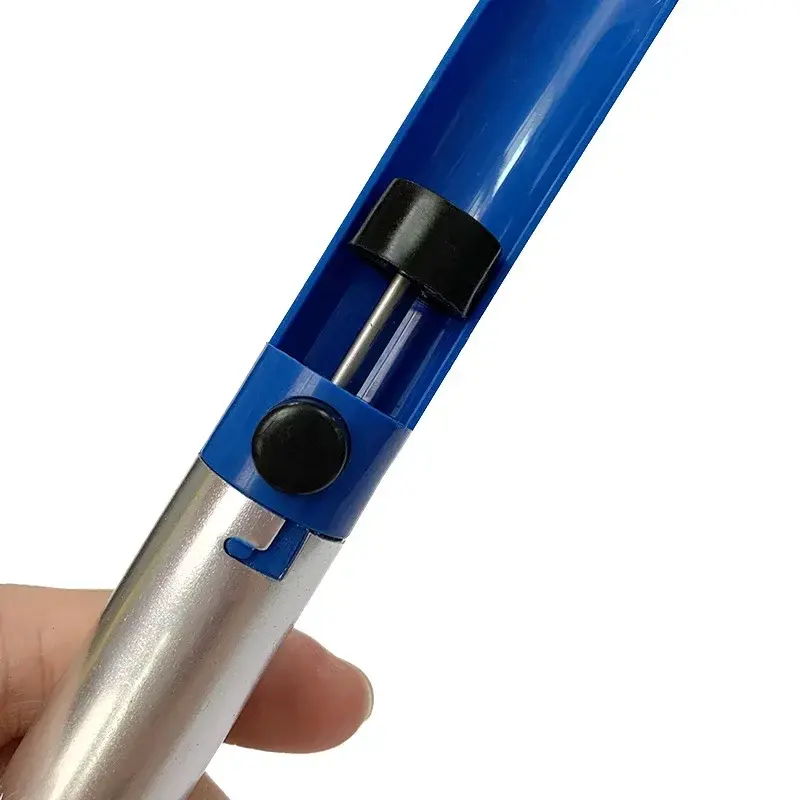
<div><strong>Usage of solder absorber:</strong><br>1. First, press the solder absorber piston down until it clicks.<br>2. Heat the solder joint with an electric soldering iron until the solder melts.<br>3. While removing the soldering iron, quickly attach the solder nozzle to the solder joint and press the solder button.<br>4. If it cannot be sucked clean at once, it can be repeated multiple times.<br><strong>Tips for using tin absorbers:</strong><br>(1) Ensure that the solder absorber piston is well sealed. Before powering on, use your fingers to block the small hole in the tin suction head, press the button, and if the piston is not easily ejected into place, it indicates that the seal is good.<br>(2) The aperture of the solder absorber head varies in size, so it is important to choose the appropriate specification for use.<br>(3) After the solder absorber head is worn out, it should be replaced with a new one in a timely manner.<br>(4) Before touching the solder joint, dip a little rosin every time to improve the fluidity of the solder.<br>(5) The time for the head to contact the solder joint is slightly longer. After the solder melts, draw a circle clockwise with the solder joint pin as the center, and then press the solder absorber button.<br>
<p style="text-align: left;margin:0;"></p>
</div>
</div>
</div></div>
$10.37
$5.765
- Category : Tools
- Brand : export_trade_store Export Trade Store
Colors
Sizes
-
+
<div class="detailmodule_html"><div class="detail-desc-decorate-richtext"><div>
<div><strong>Usage of solder absorber:</strong><br>1. First, press the solder absorber piston down until it clicks.<br>2. Heat the solder joint with an electric soldering iron until the solder melts.<br>3. While removing the soldering iron, quickly attach the solder nozzle to the solder joint and press the solder button.<br>4. If it cannot be sucked clean at once, it can be repeated multiple times.<br><strong>Tips for using tin absorbers:</strong><br>(1) Ensure that the solder absorber piston is well sealed. Before powering on, use your fingers to block the small hole in the tin suction head, press the button, and if the piston is not easily ejected into place, it indicates that the seal is good.<br>(2) The aperture of the solder absorber head varies in size, so it is important to choose the appropriate specification for use.<br>(3) After the solder absorber head is worn out, it should be replaced with a new one in a timely manner.<br>(4) Before touching the solder joint, dip a little rosin every time to improve the fluidity of the solder.<br>(5) The time for the head to contact the solder joint is slightly longer. After the solder melts, draw a circle clockwise with the solder joint pin as the center, and then press the solder absorber button.<br>
<p style="text-align: left;margin:0;"></p>
</div>
</div>
</div></div>