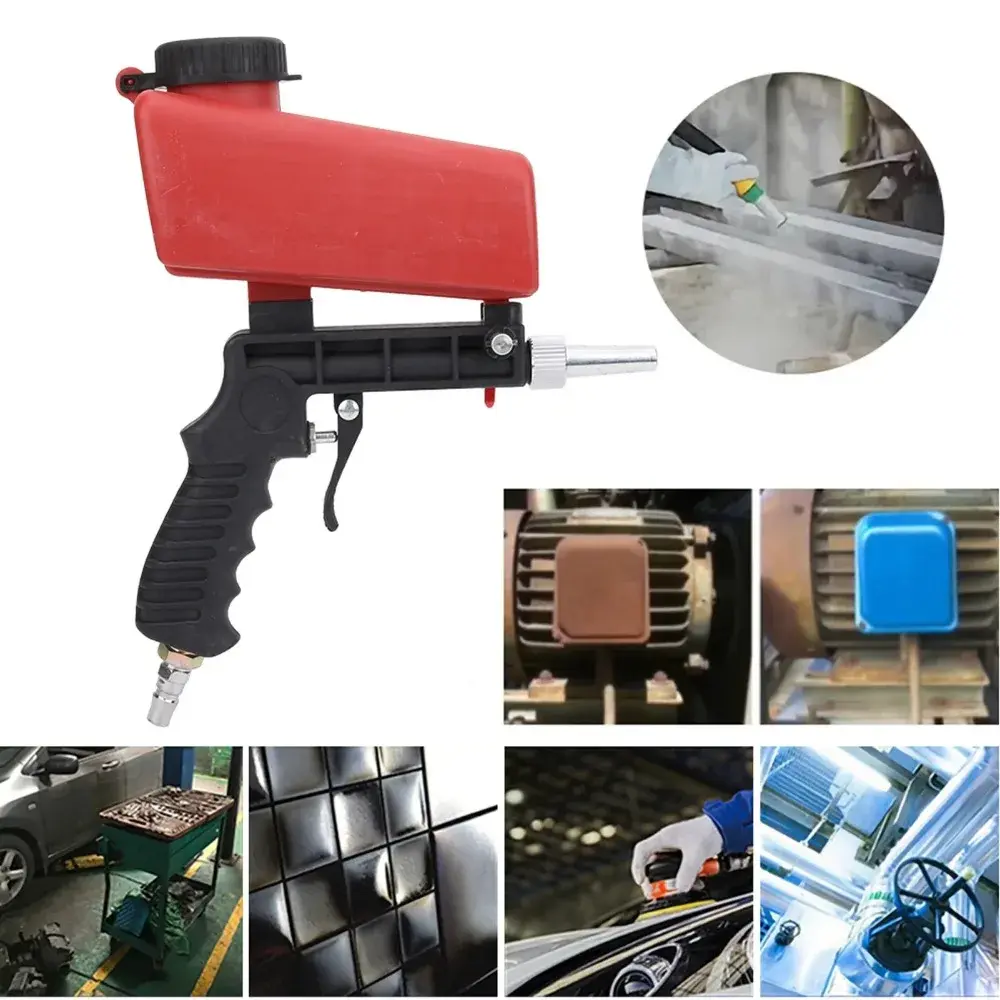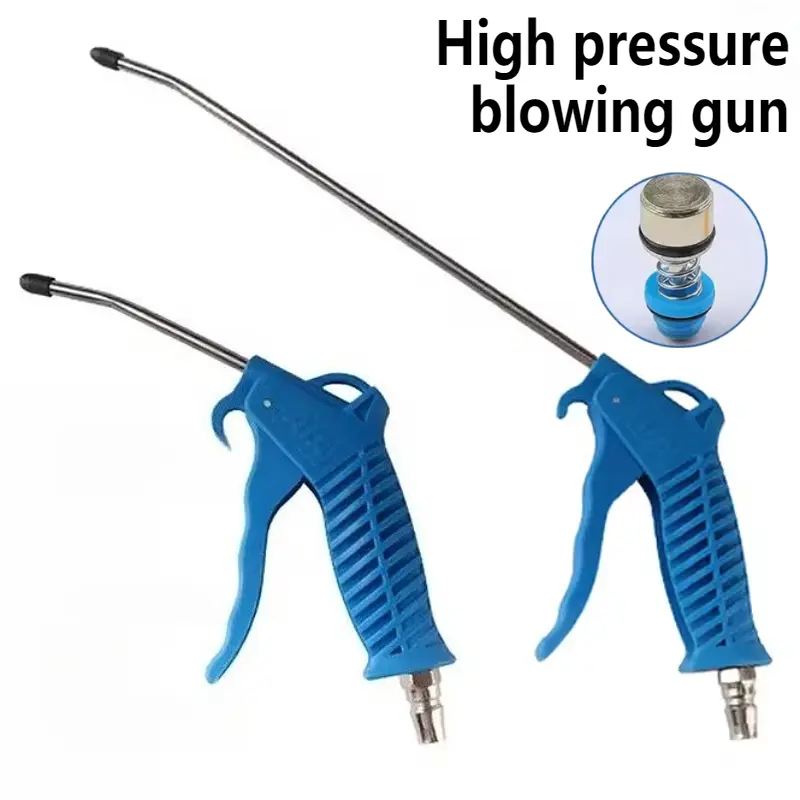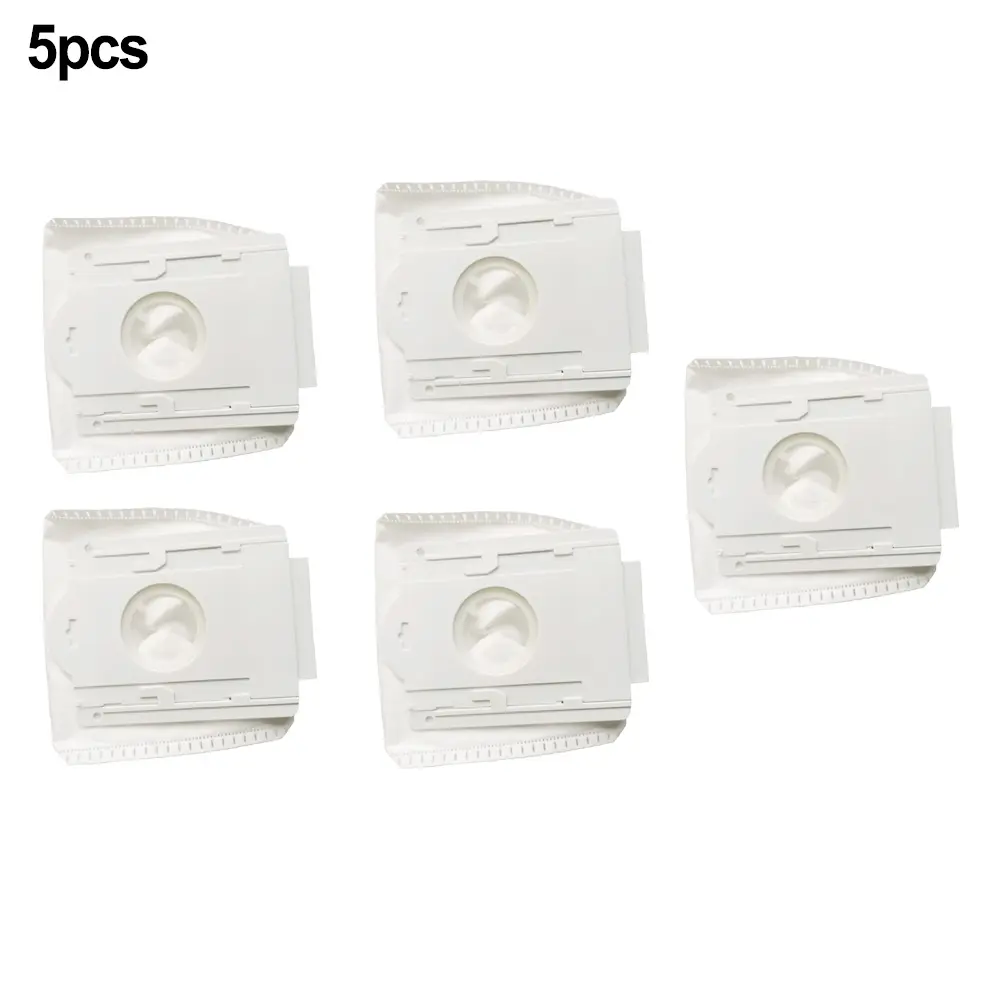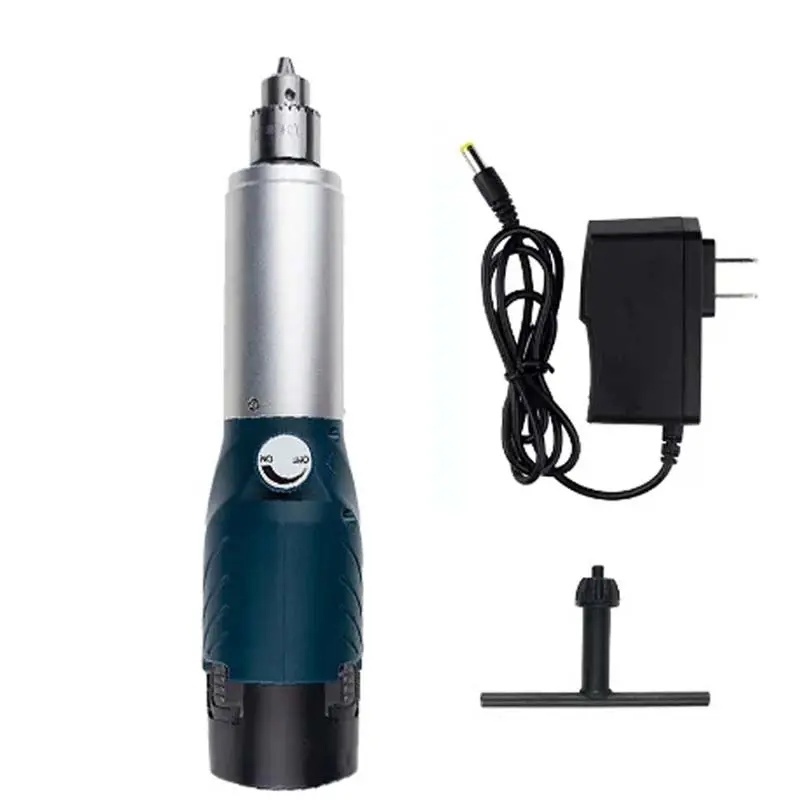


Cordless Drill Battery Rechargeable Drill Electric Engraving Pen Woodworking Engraving DIY Engraving Machine
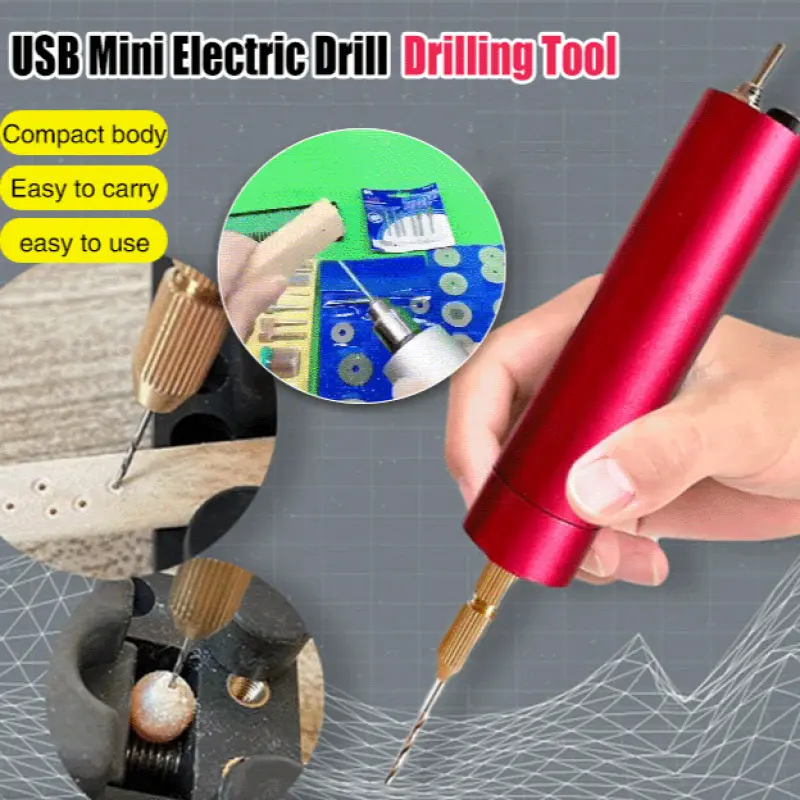
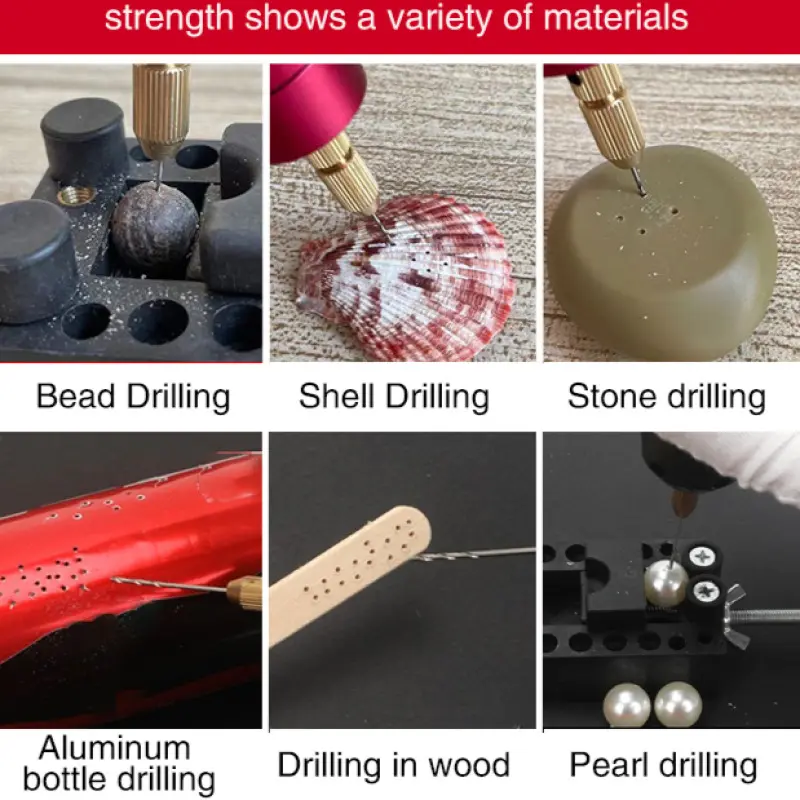
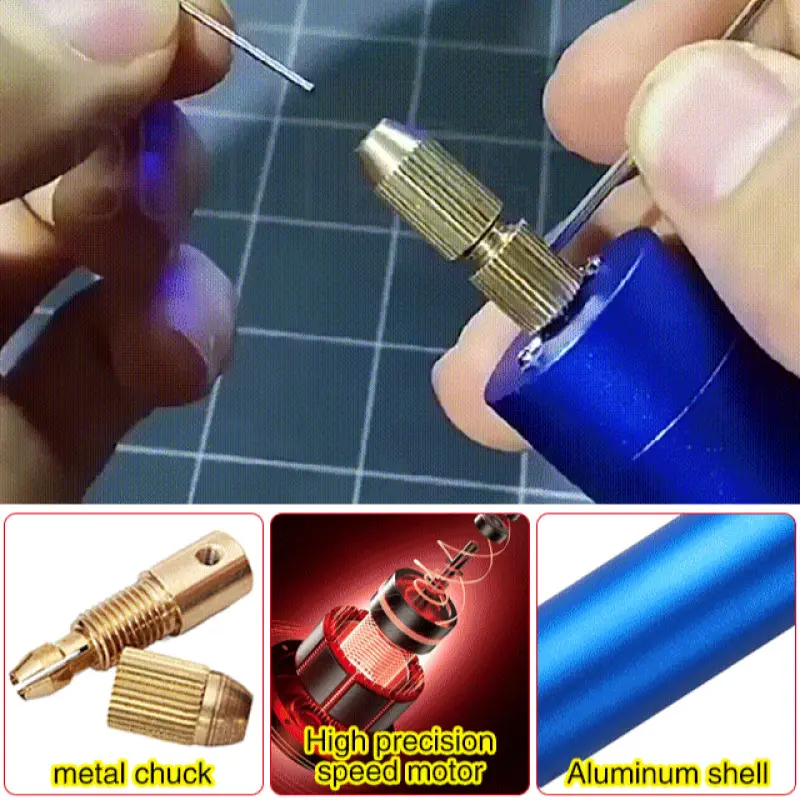
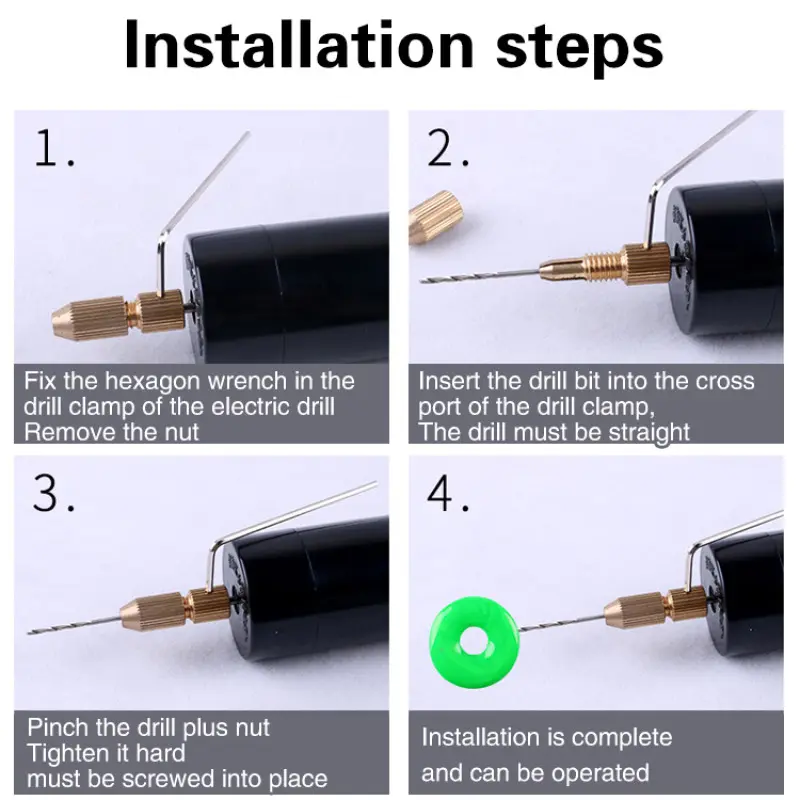
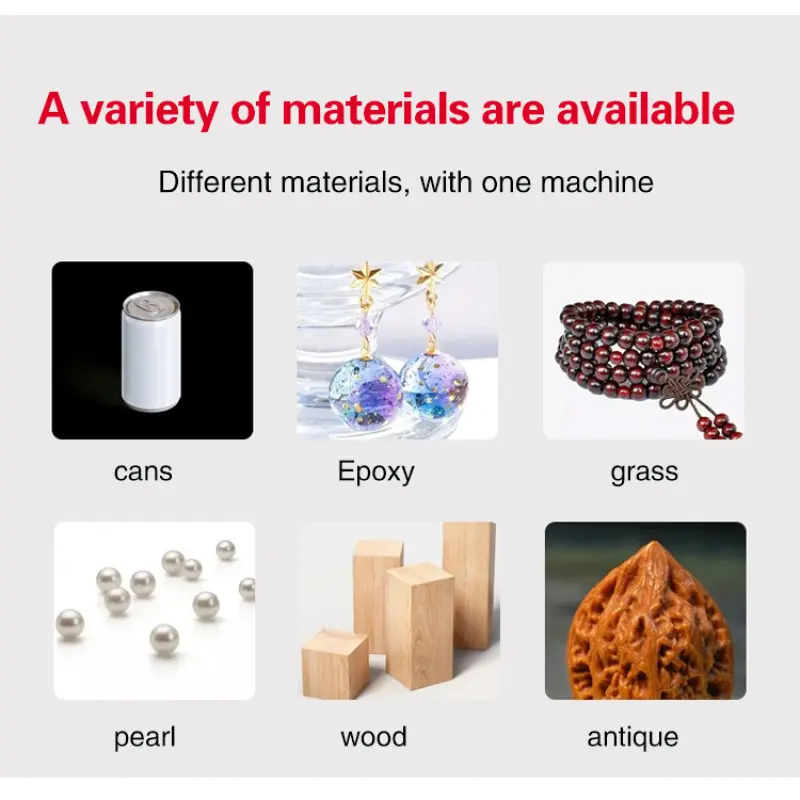
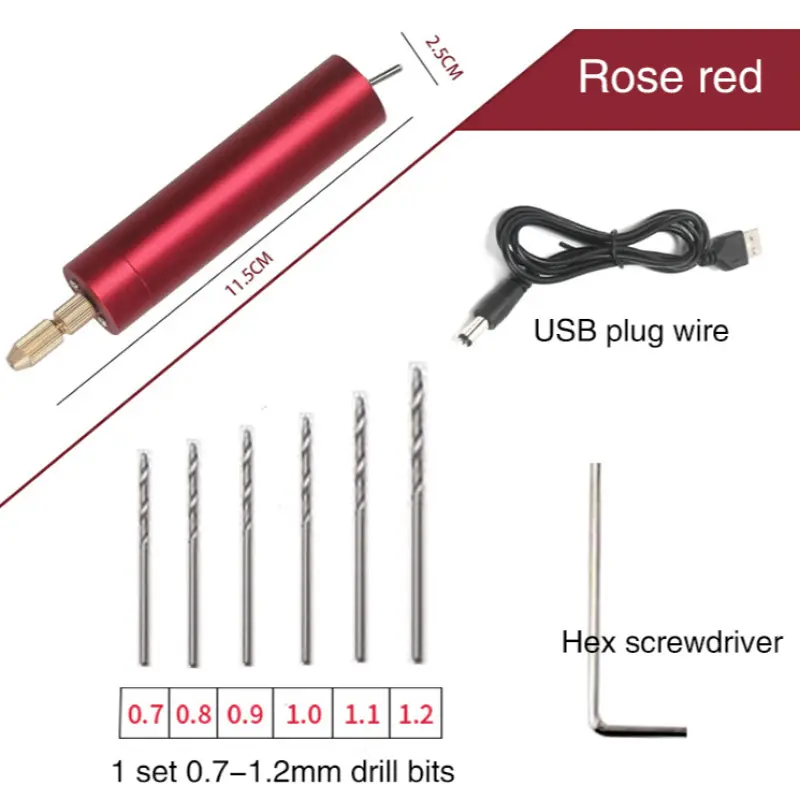
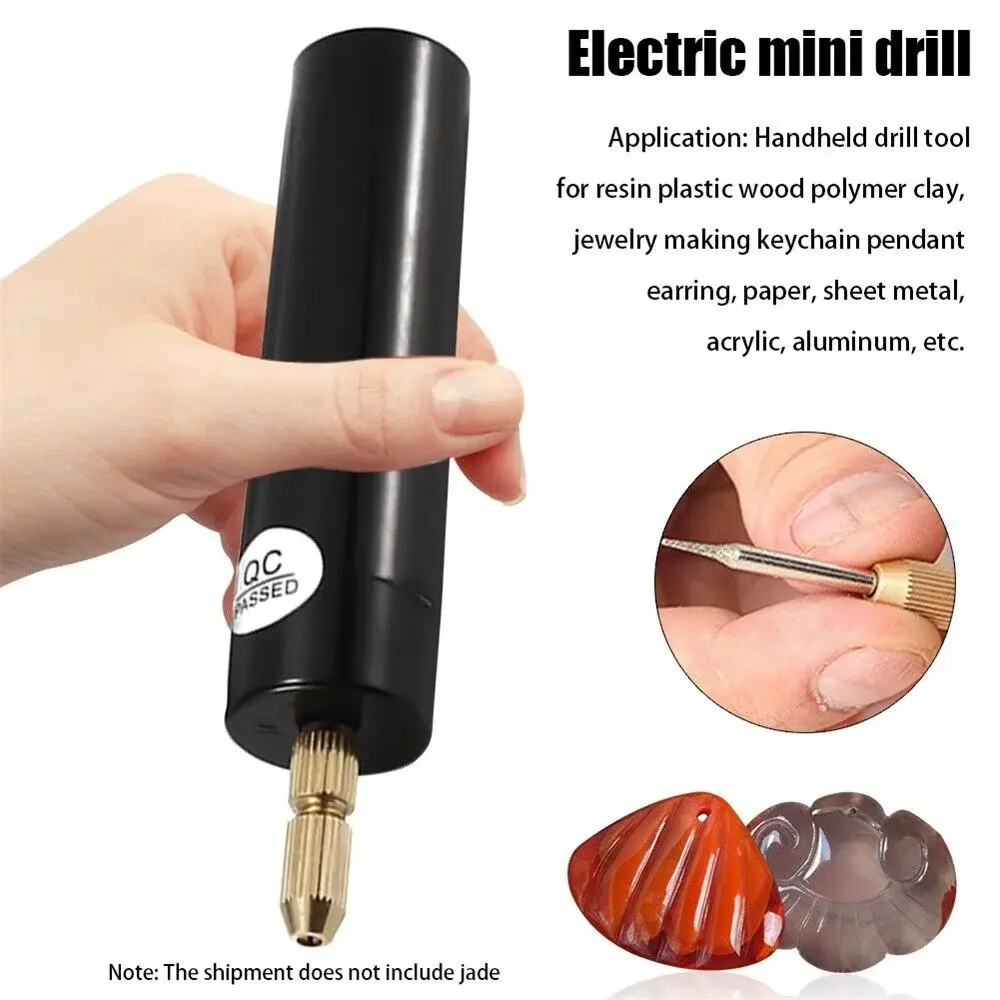
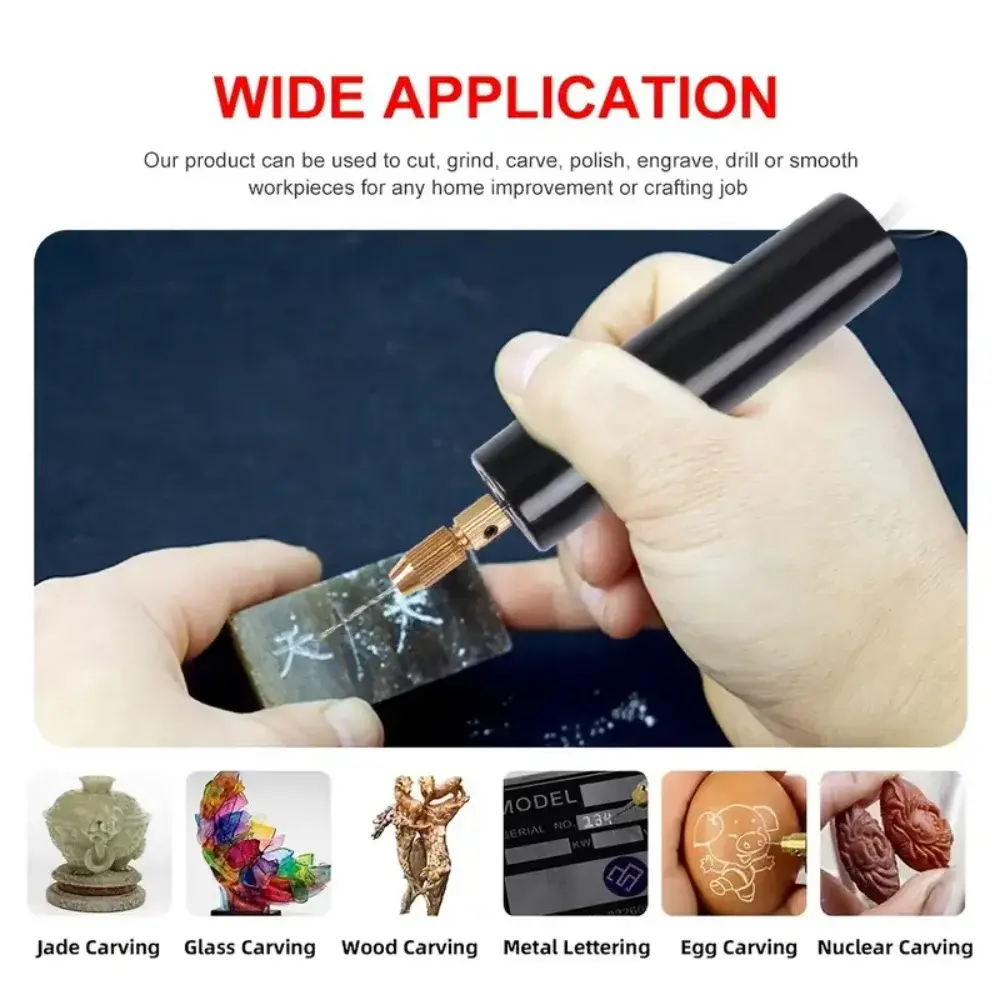
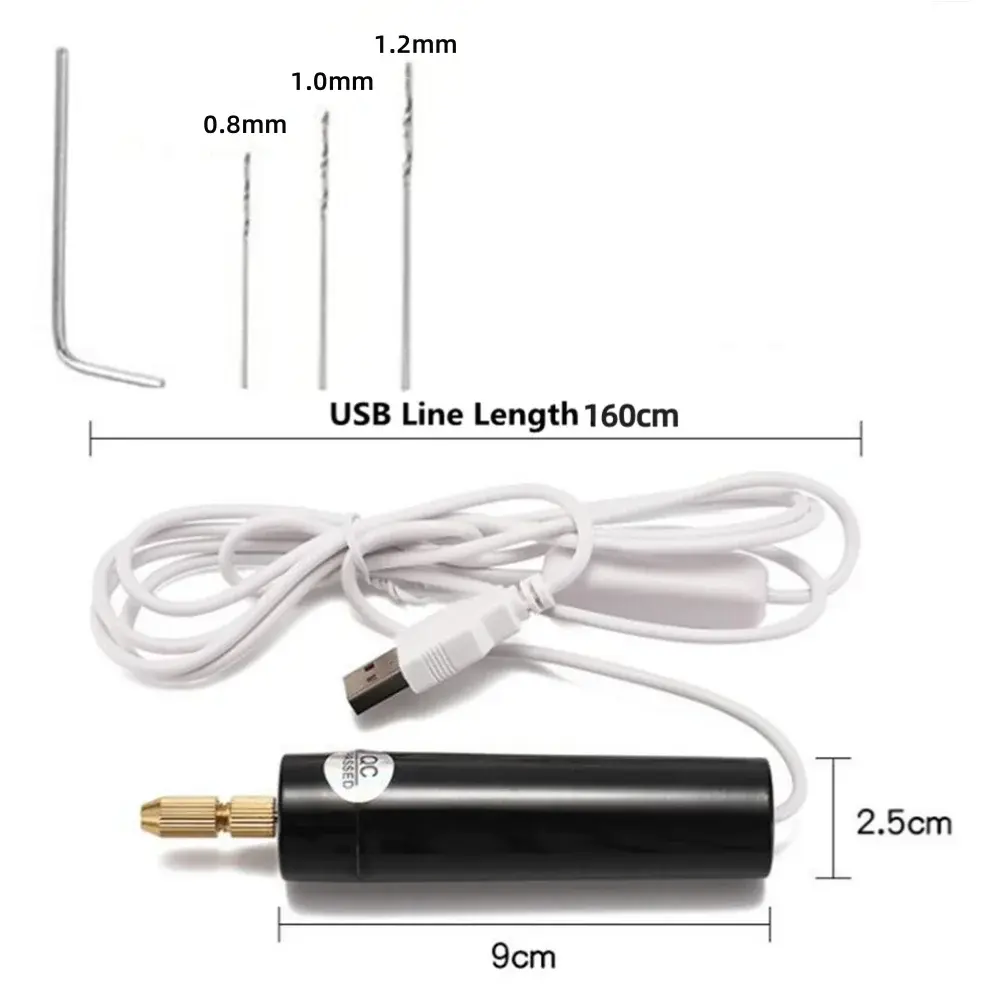
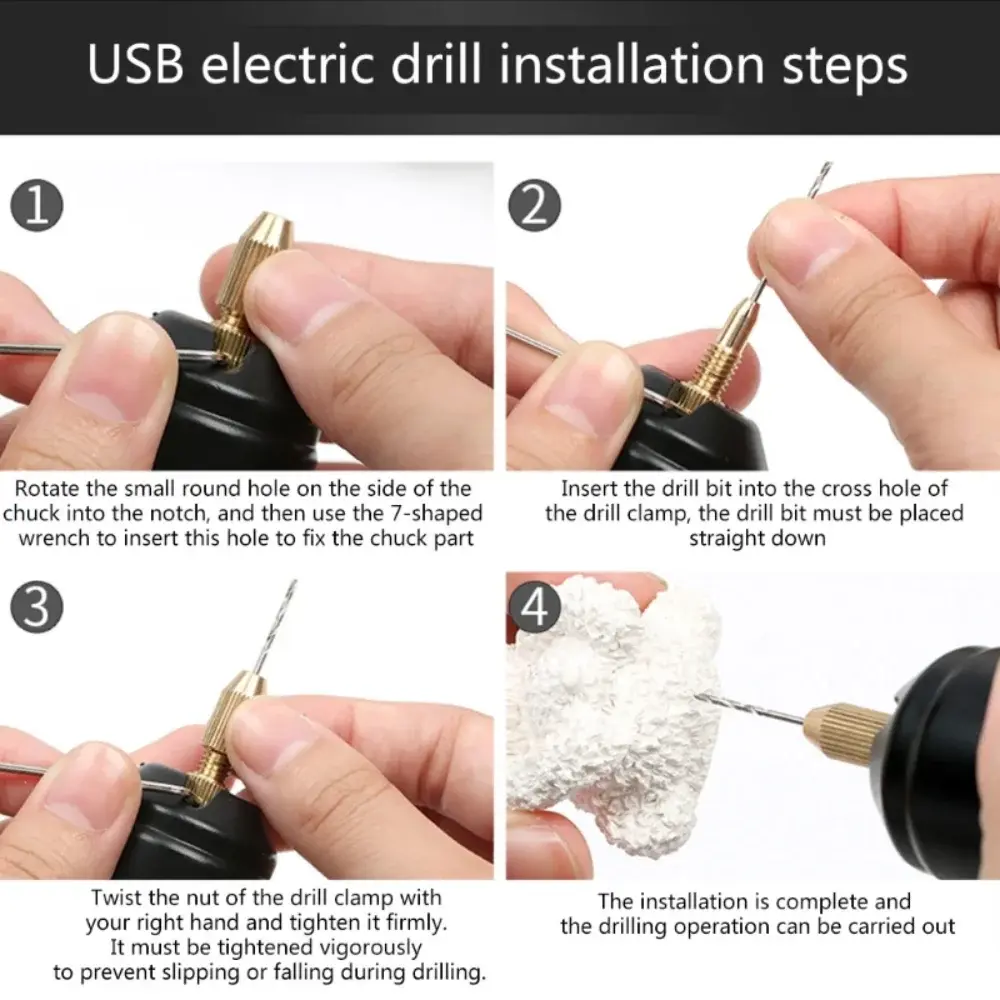
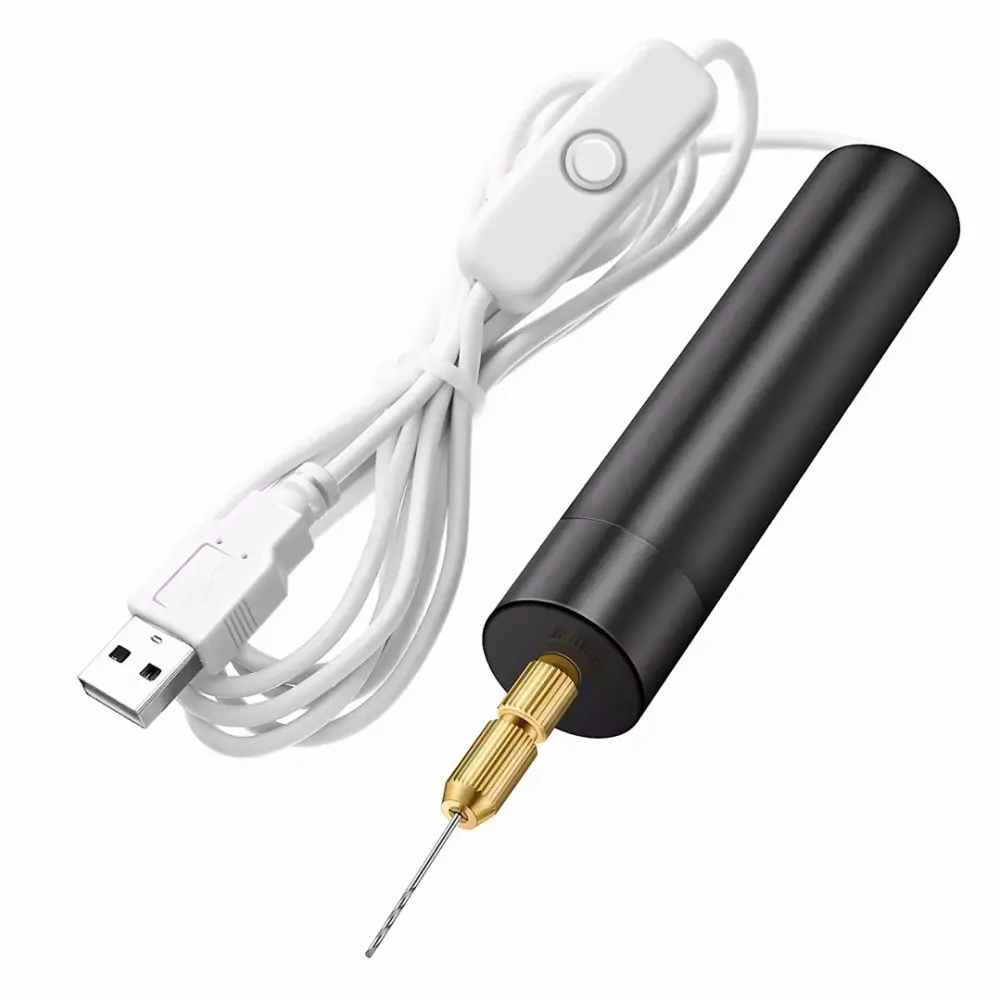
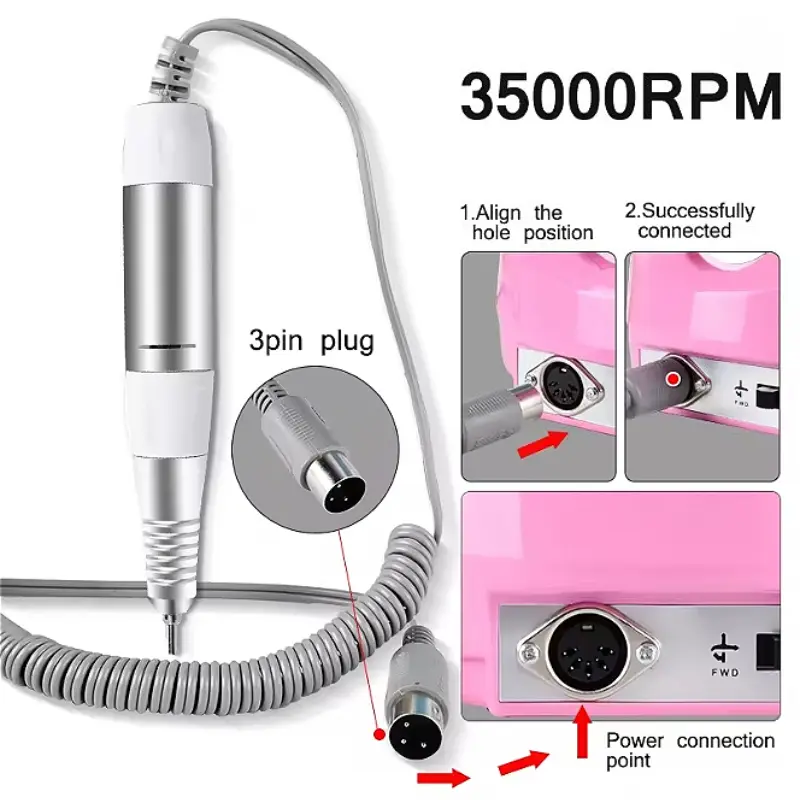
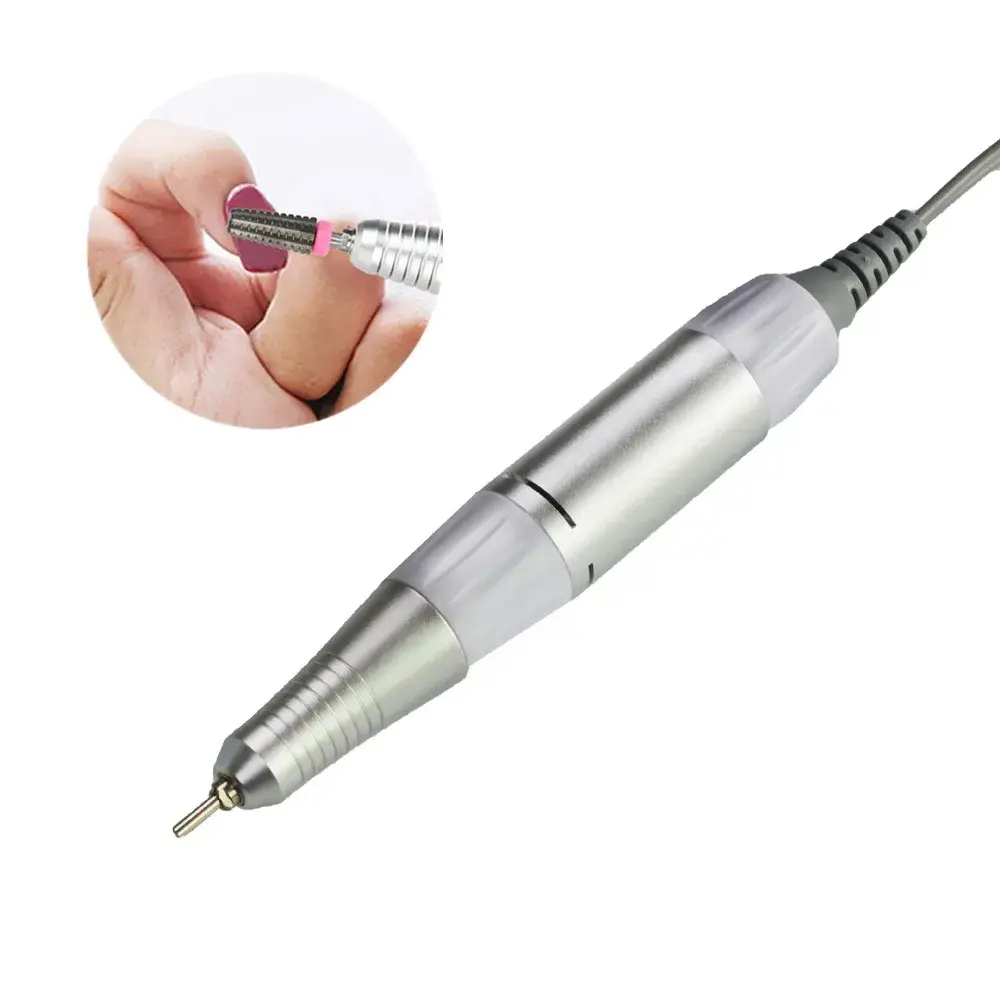
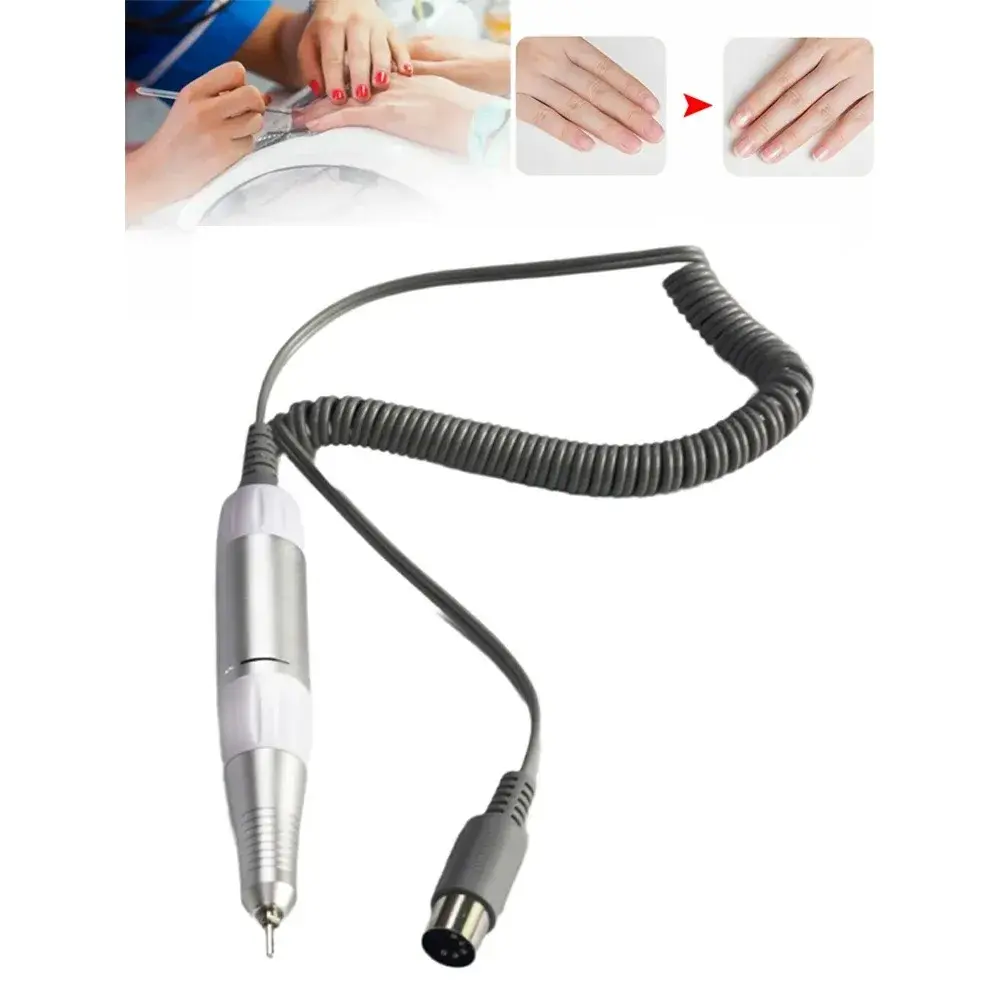
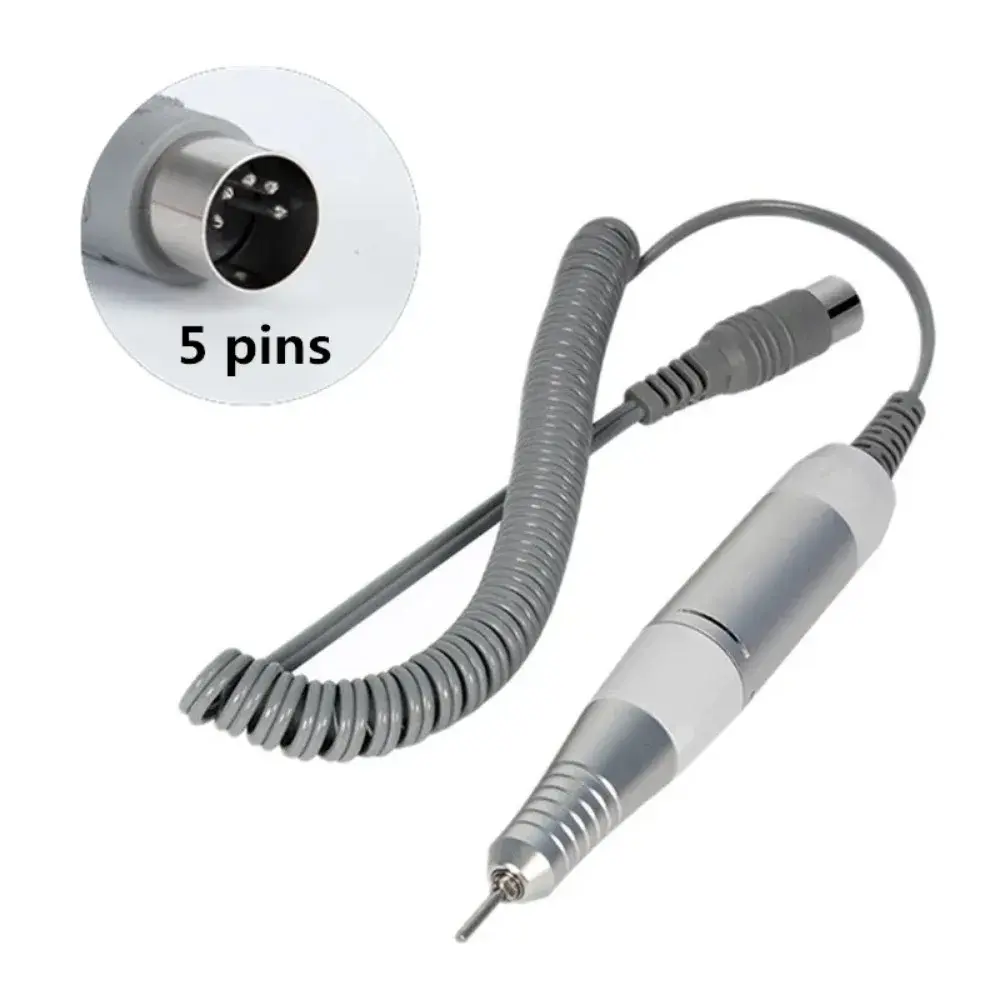
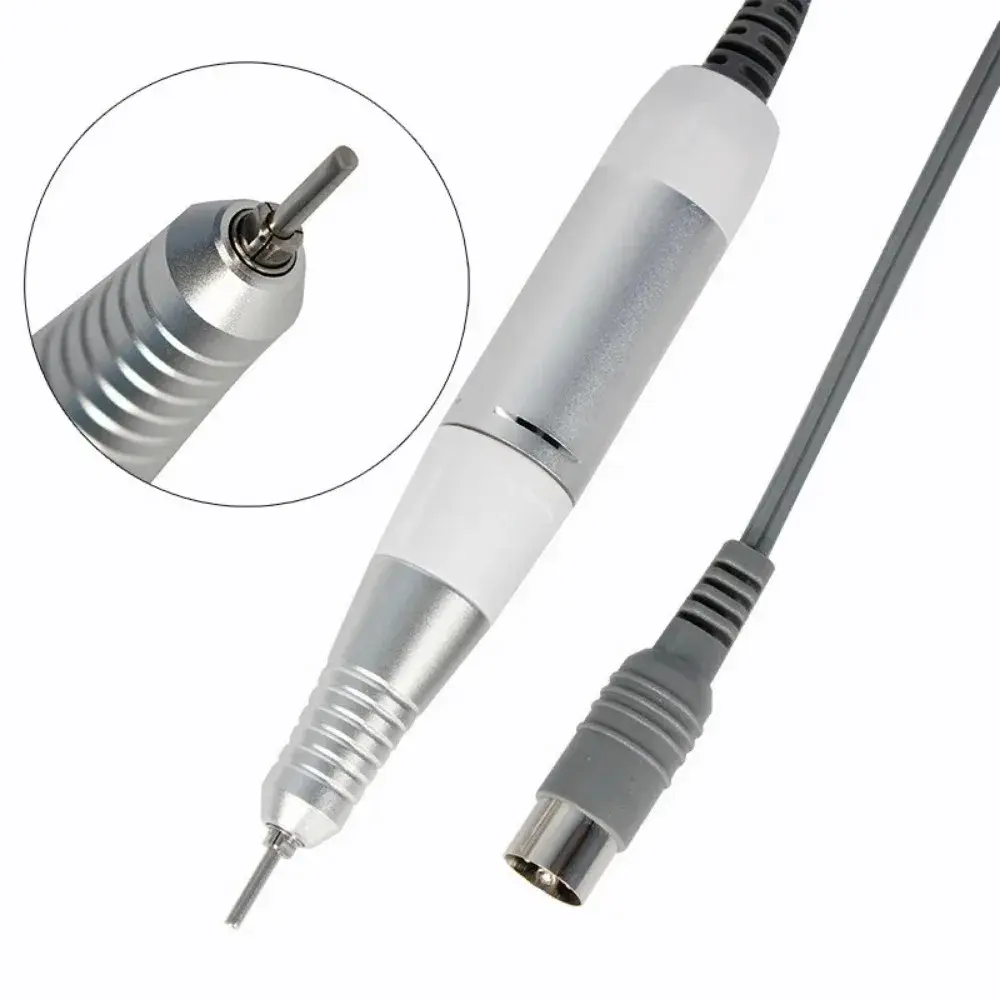
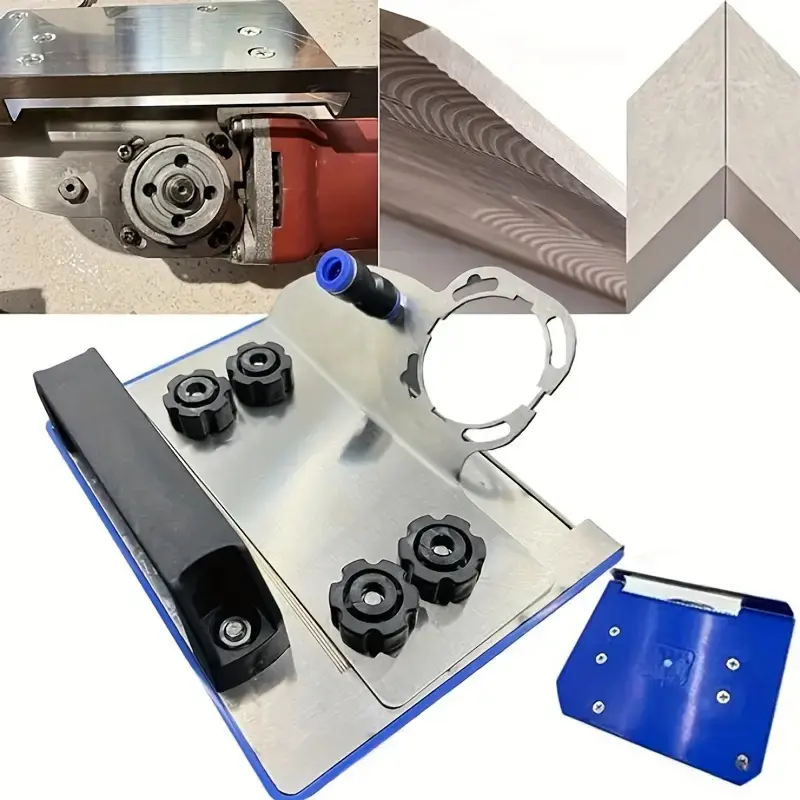
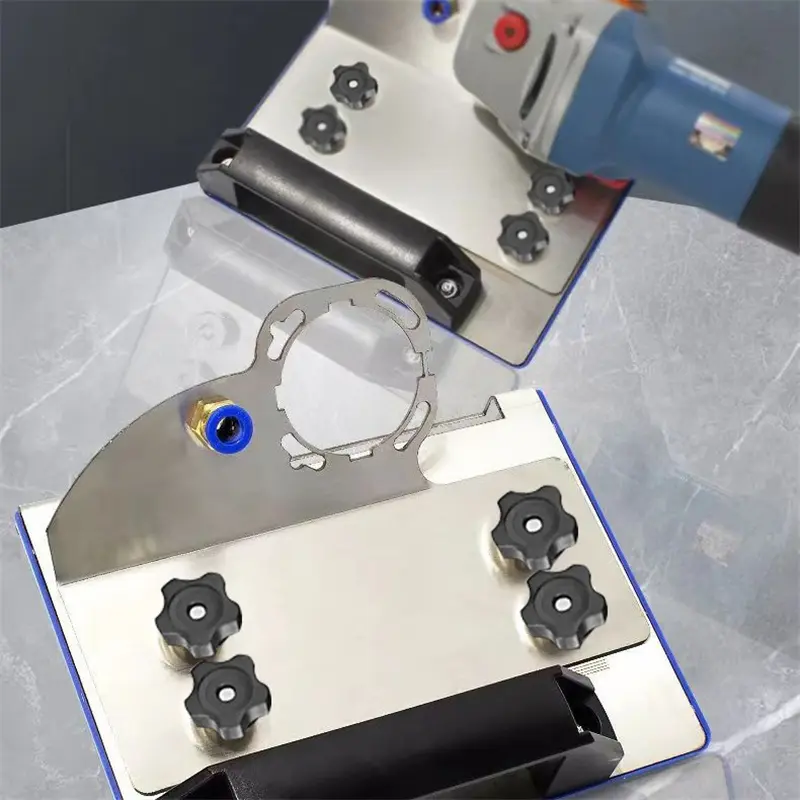
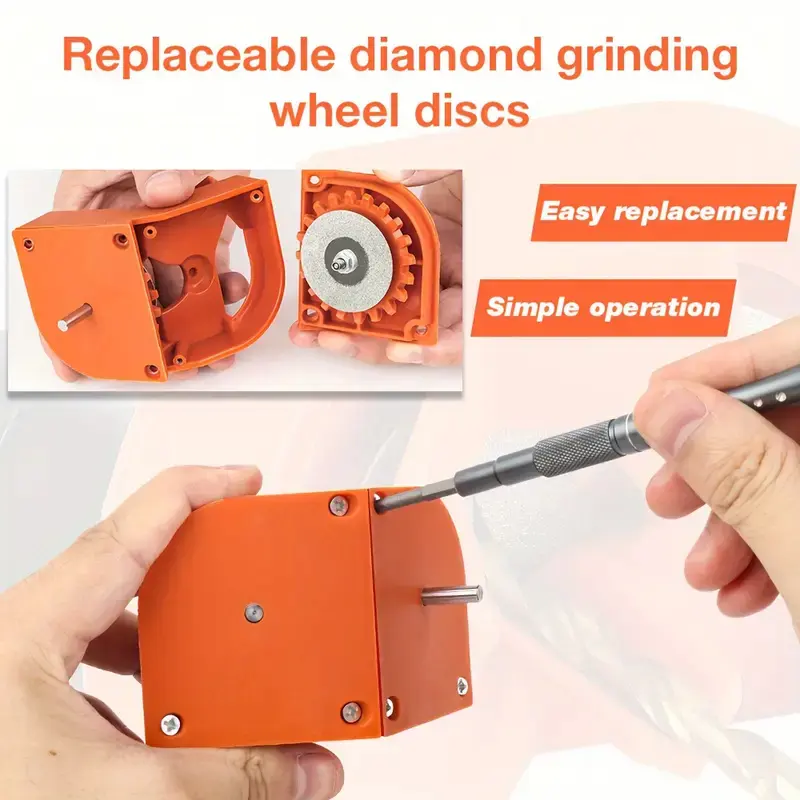
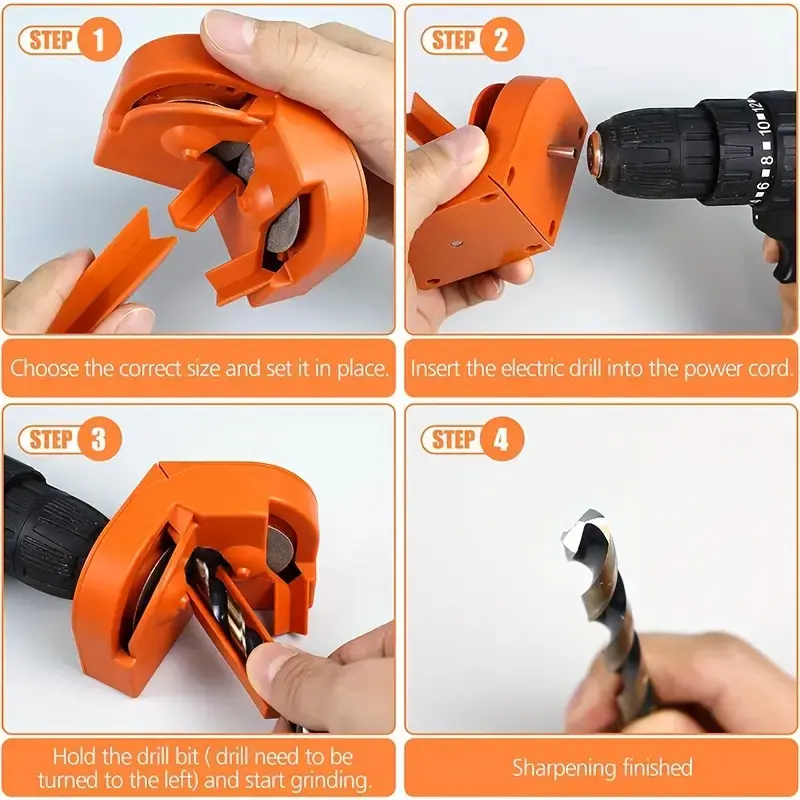
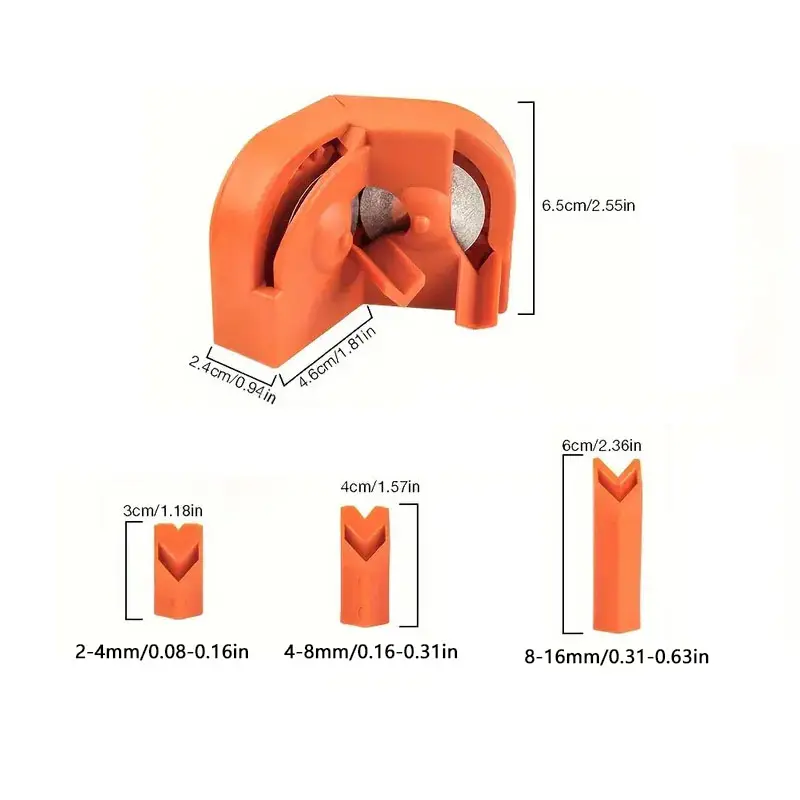
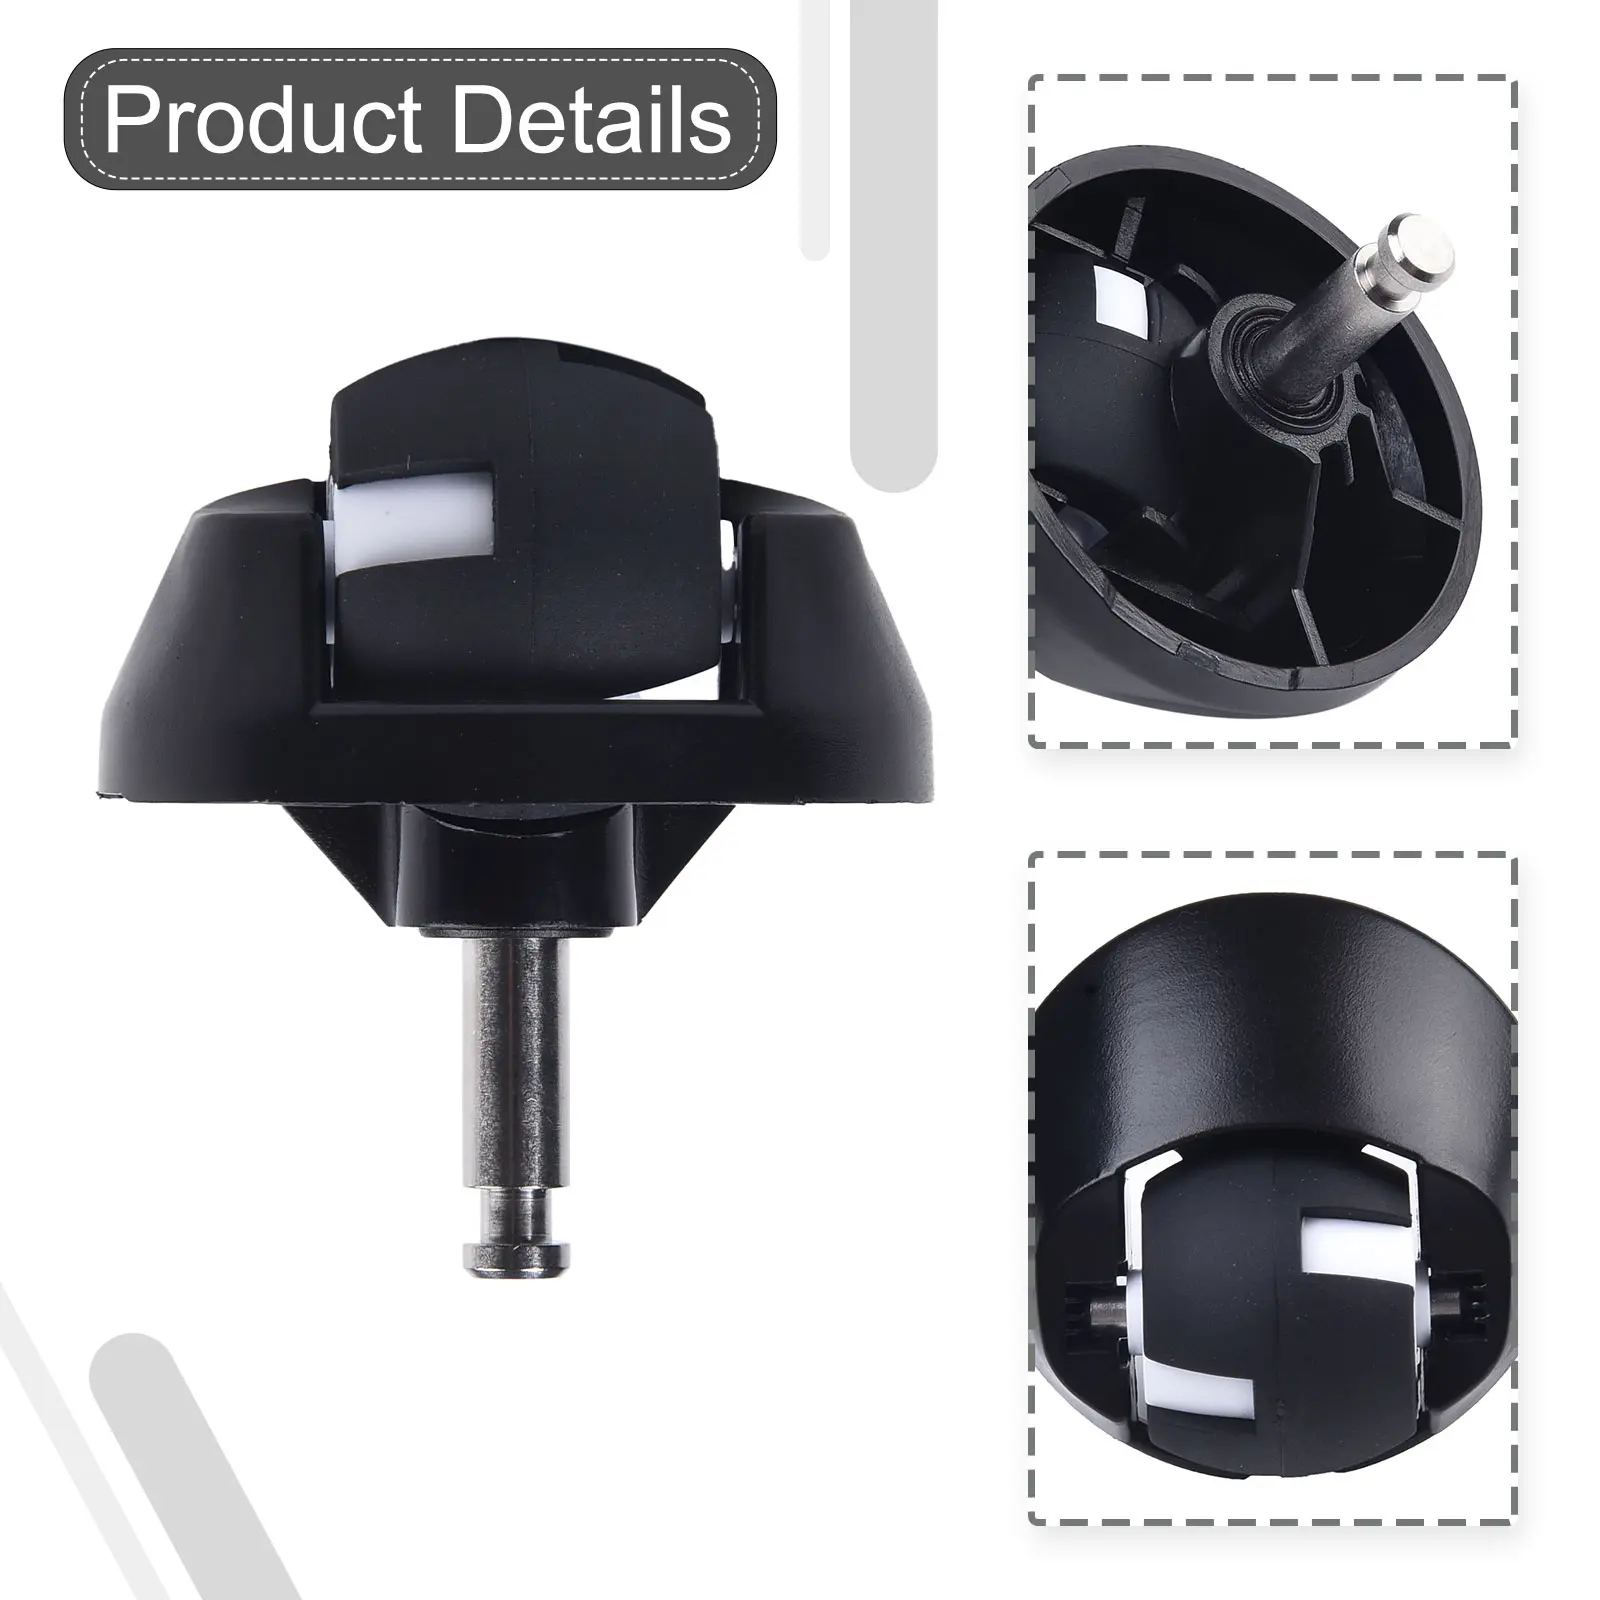
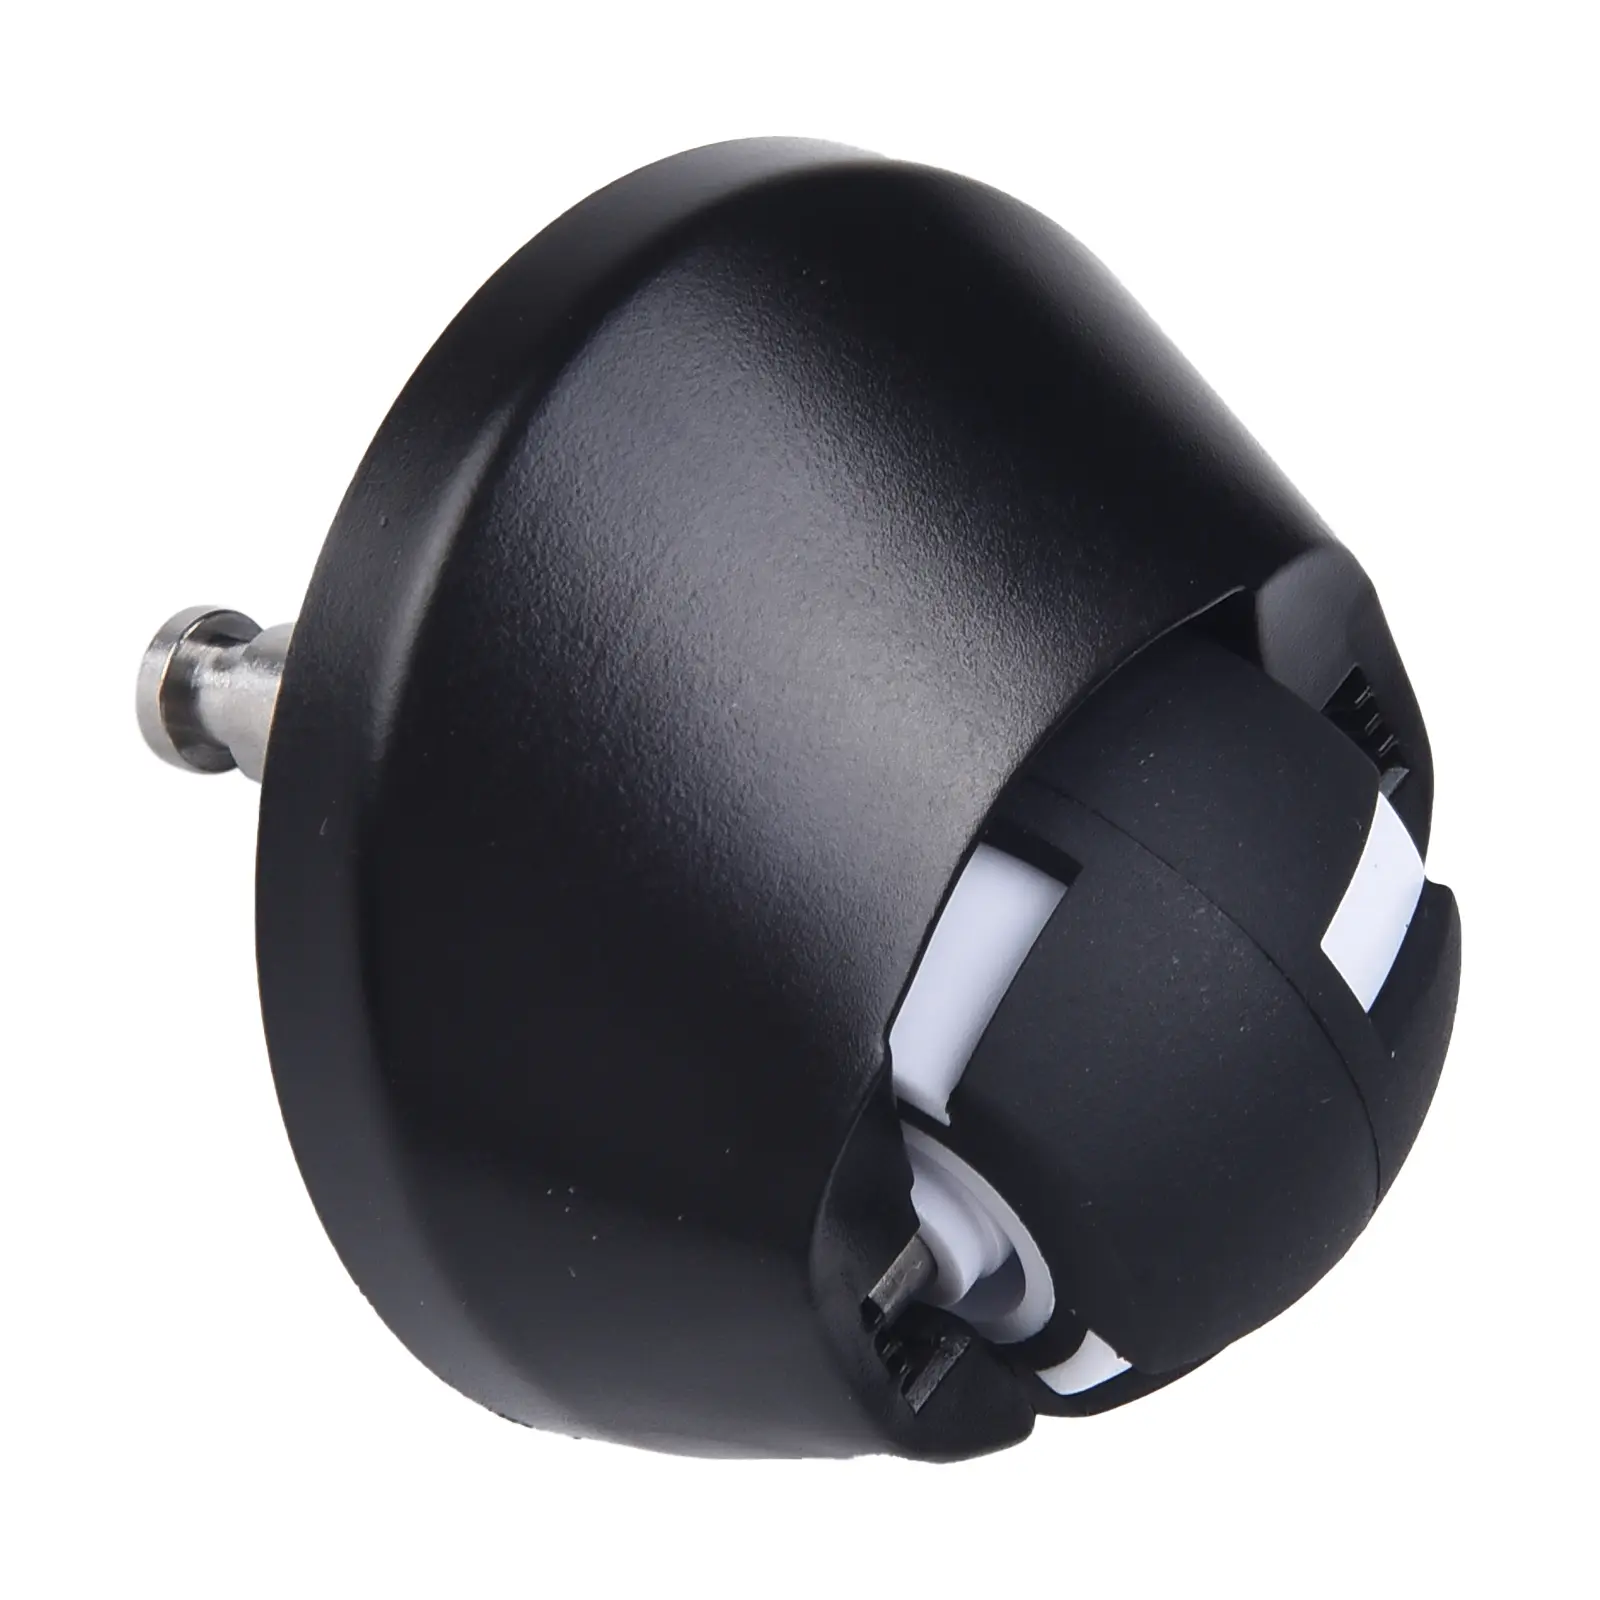
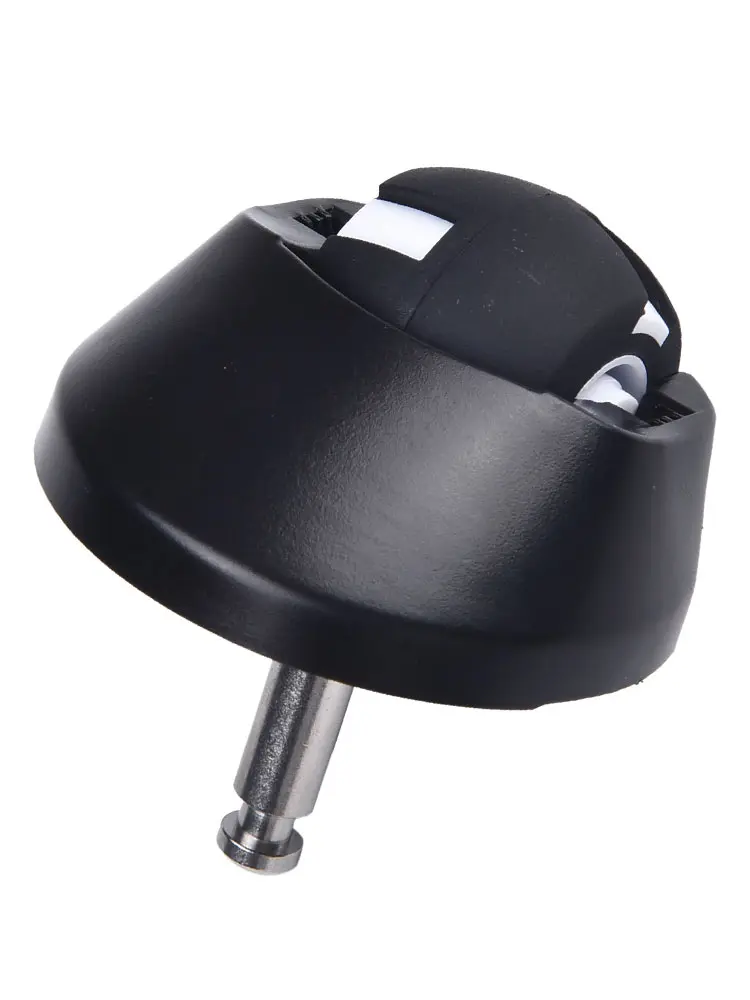
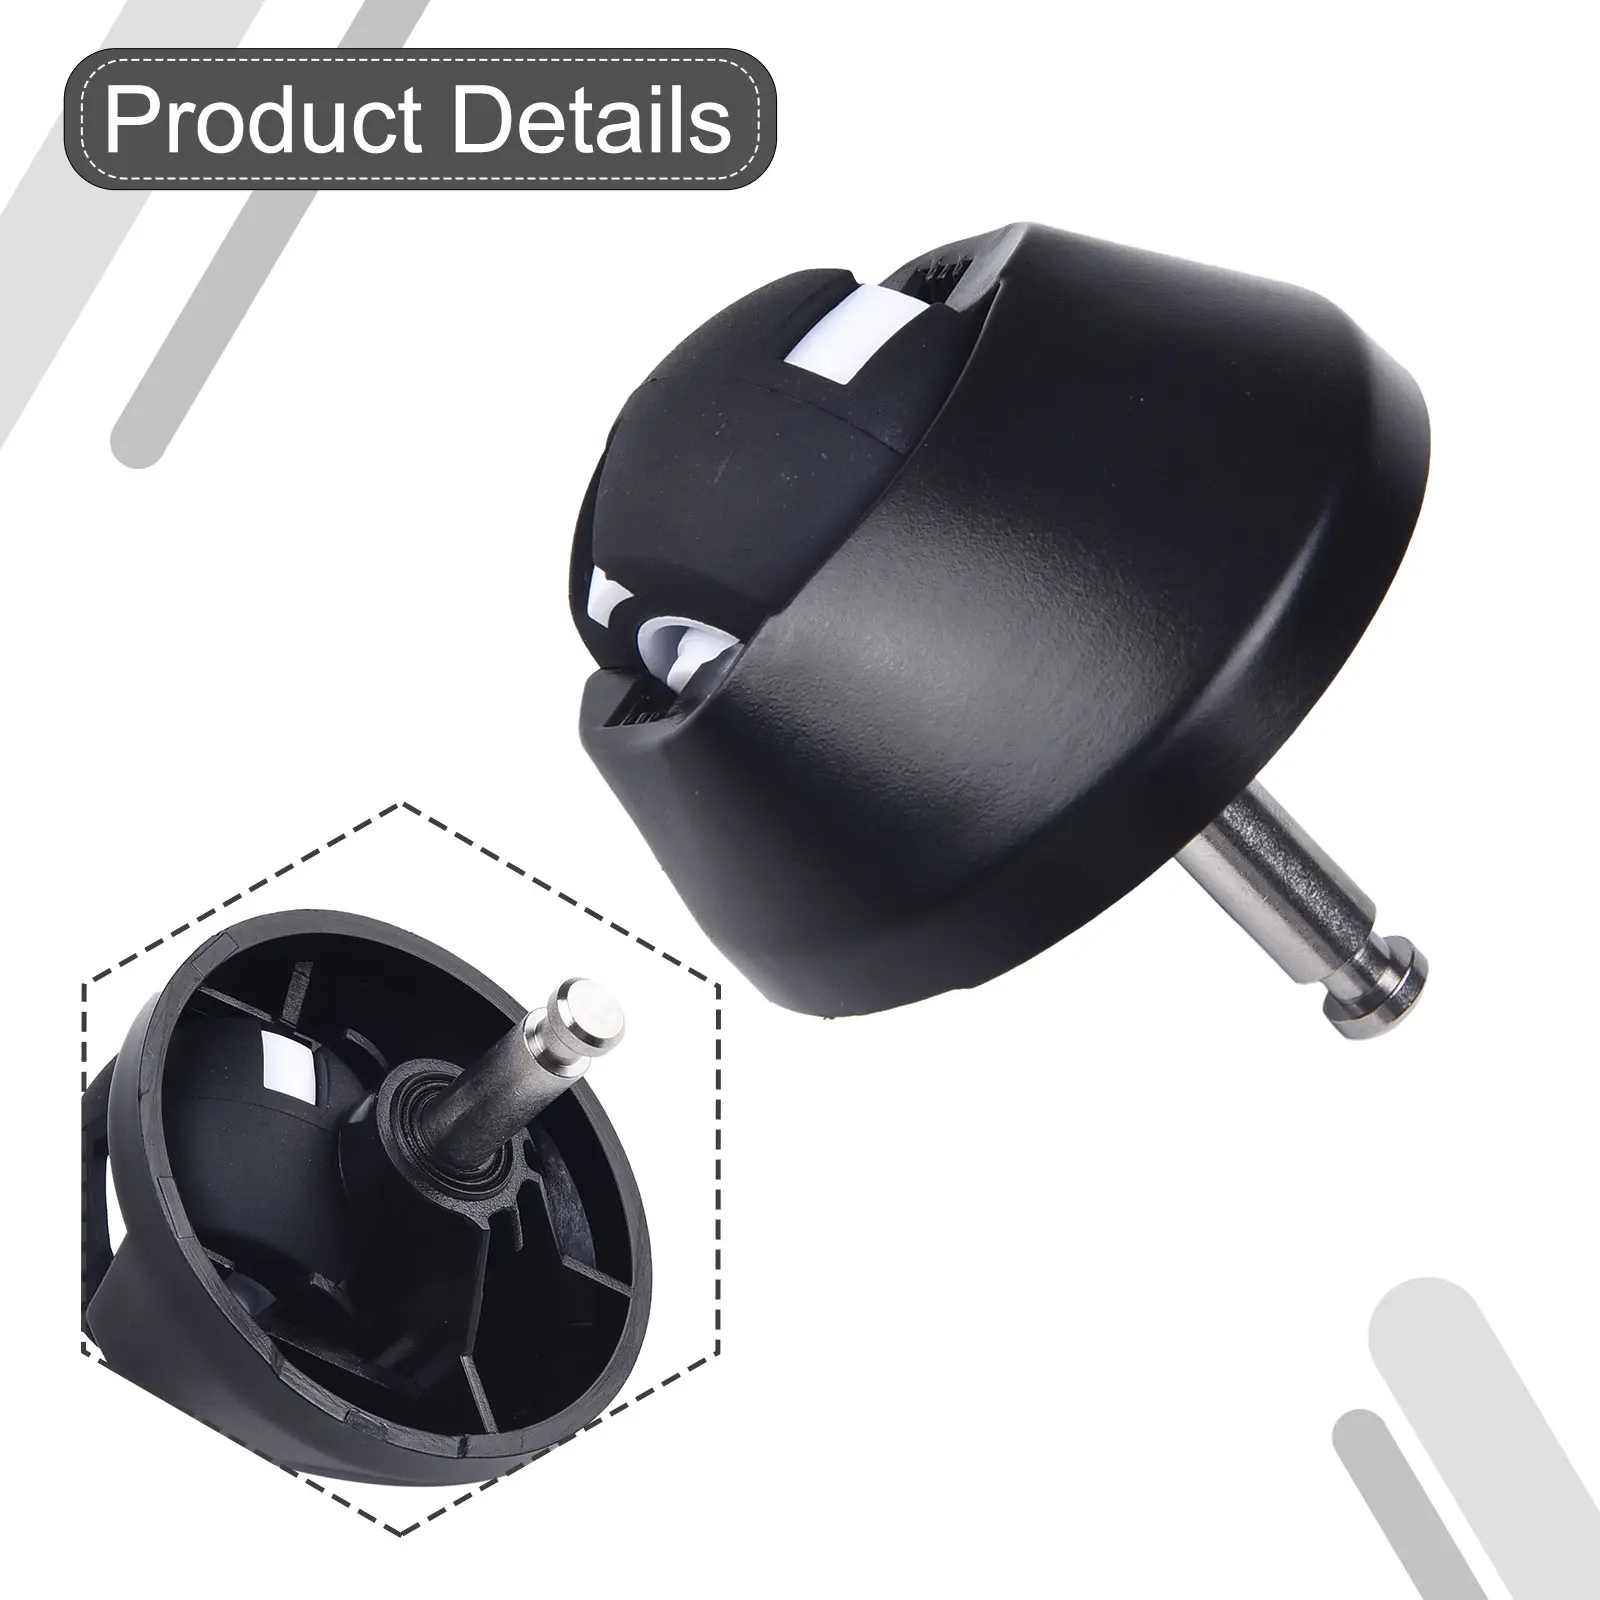
<p></p><div class="detailmodule_html"><div class="detail-desc-decorate-richtext"><h1><strong>Stepless speed regulation</strong></h1><p>Turn the knob clockwise to start the electric drill. If you continue to adjust, the rotation speed of the electric drill will gradually increase.</p><p>The adjustable speed range is 1000-12000 rpm.</p><p>When starting, it is necessary to turn the knob over 1/4 turn to start the motor.</p><p>The motor has a locked rotor protection. When locked, the rotation speed of the electric mill will decrease, and it will recover after avoiding locked rotor and stopping for about 5 seconds.</p></div></div><p></p><div class="detailmodule_html"><div class="detail-desc-decorate-richtext"></div></div><p></p><div class="detailmodule_html"><div class="detail-desc-decorate-richtext"><p>Product Name: Charging Speed Regulating Electric Mill</p><p>Rated voltage: 12V</p><p>Torque: 296mN. m (at 12V)</p><p>Clamping range: 0.3-6.5mm</p><p>Charging duration: 4 hours</p><p>No-load speed: 1000-12000rpm</p><p>Empty time: 90 minutes</p><p>Battery capacity: 1800mAh</p></div></div><p></p><div class="detailmodule_html"><div class="detail-desc-decorate-richtext"><h1><strong>Installation steps</strong></h1><p>1. Prepare the drill bit or grinding head and chuck key to be installed.</p><p>2. Loosen the collet well in the direction indicated by the arrow and adjust it to a suitable size.</p><p>3. Install the drill or grinding head that needs to be used.</p><p>4. Tighten the collet in the direction indicated by the arrow.</p></div></div><p></p>
$141.41
$67.52
- Category : Tools
- Brand : pioneer_tools_store_store Pioneer Tools Store Store
Colors
Sizes
-
+
<p></p><div class="detailmodule_html"><div class="detail-desc-decorate-richtext"><h1><strong>Stepless speed regulation</strong></h1><p>Turn the knob clockwise to start the electric drill. If you continue to adjust, the rotation speed of the electric drill will gradually increase.</p><p>The adjustable speed range is 1000-12000 rpm.</p><p>When starting, it is necessary to turn the knob over 1/4 turn to start the motor.</p><p>The motor has a locked rotor protection. When locked, the rotation speed of the electric mill will decrease, and it will recover after avoiding locked rotor and stopping for about 5 seconds.</p></div></div><p></p><div class="detailmodule_html"><div class="detail-desc-decorate-richtext"></div></div><p></p><div class="detailmodule_html"><div class="detail-desc-decorate-richtext"><p>Product Name: Charging Speed Regulating Electric Mill</p><p>Rated voltage: 12V</p><p>Torque: 296mN. m (at 12V)</p><p>Clamping range: 0.3-6.5mm</p><p>Charging duration: 4 hours</p><p>No-load speed: 1000-12000rpm</p><p>Empty time: 90 minutes</p><p>Battery capacity: 1800mAh</p></div></div><p></p><div class="detailmodule_html"><div class="detail-desc-decorate-richtext"><h1><strong>Installation steps</strong></h1><p>1. Prepare the drill bit or grinding head and chuck key to be installed.</p><p>2. Loosen the collet well in the direction indicated by the arrow and adjust it to a suitable size.</p><p>3. Install the drill or grinding head that needs to be used.</p><p>4. Tighten the collet in the direction indicated by the arrow.</p></div></div><p></p>
Related Product
Browse The Collection of Top Products.