
DC5-60V KR2401FB Intelligent Wireless Switch Receiver 433Mhz RF Relay Remote Control On Off Module 10A Self Locking Interlocking
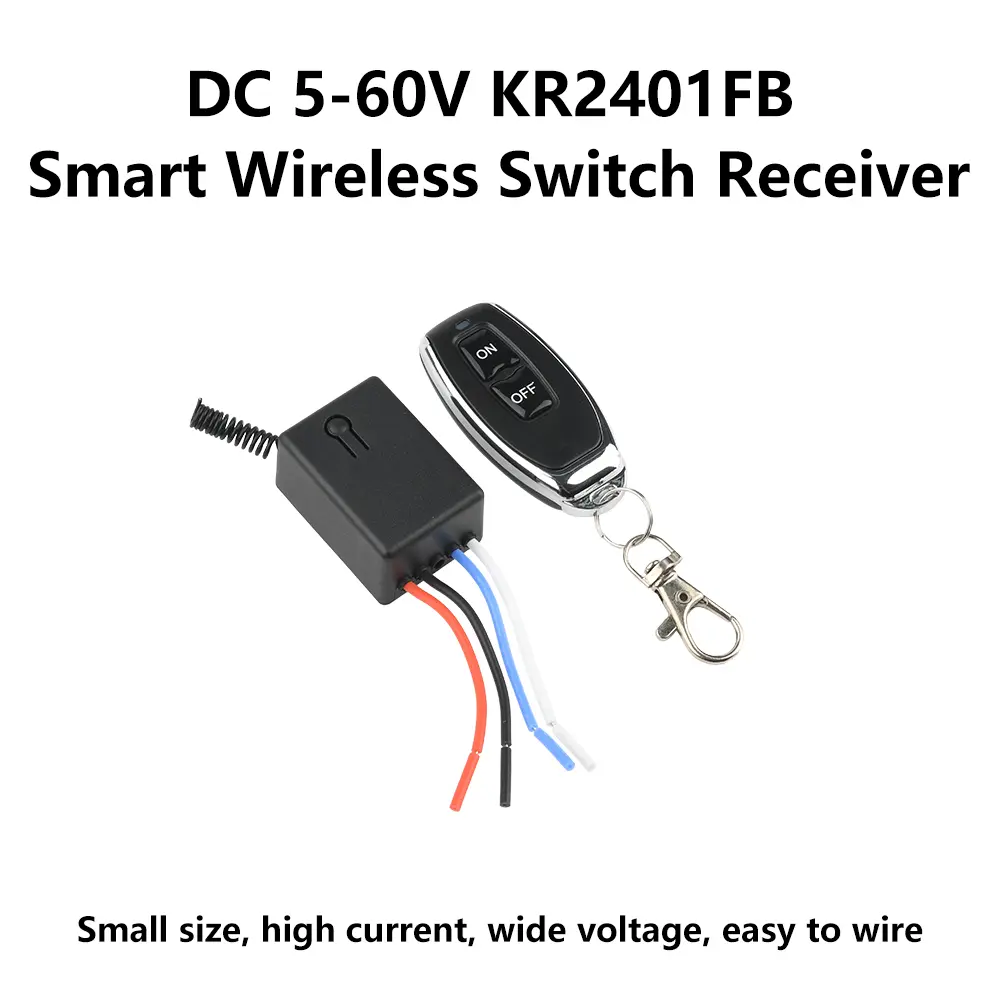
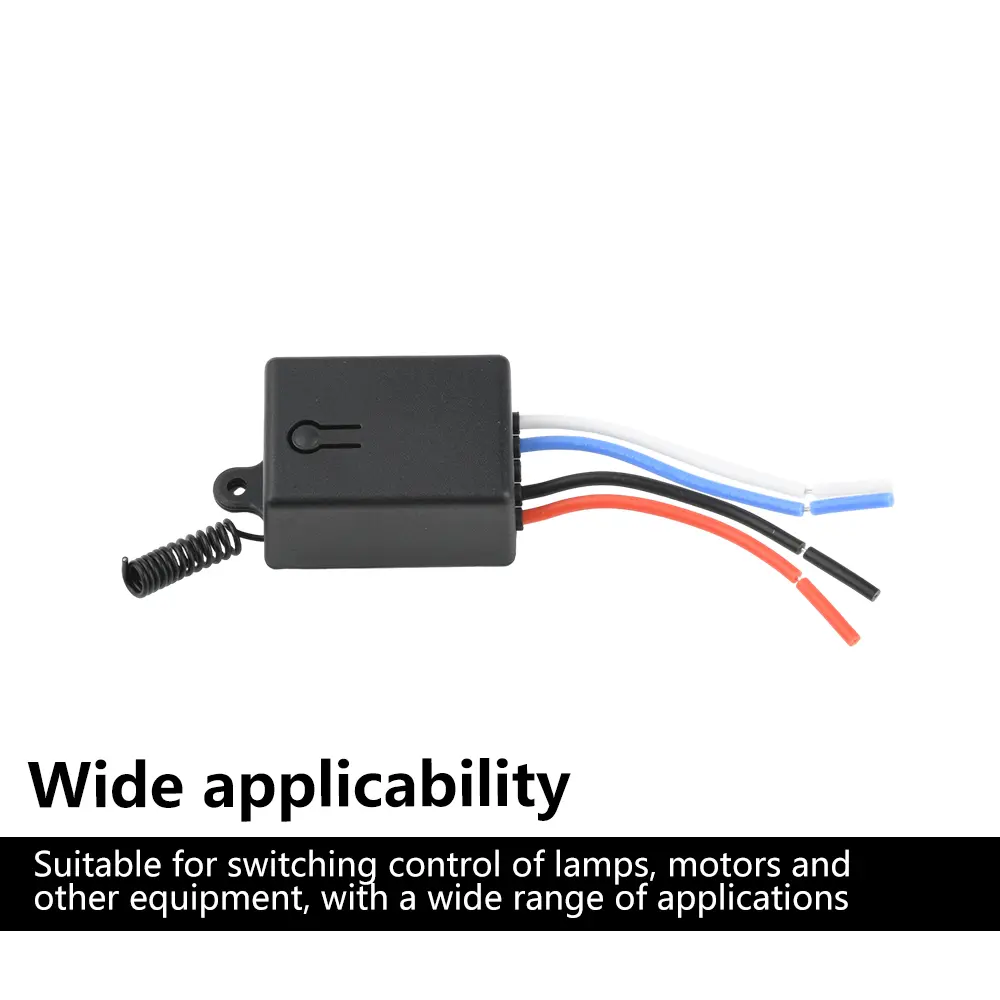
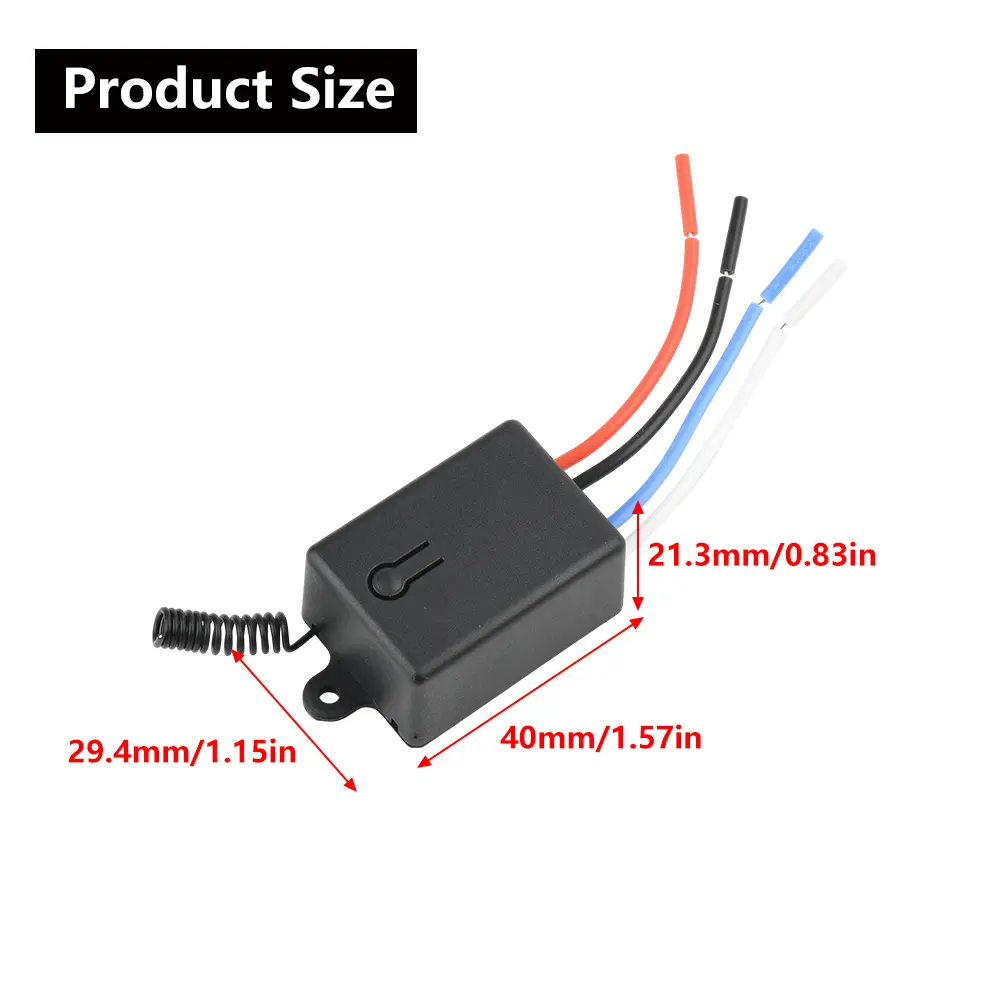
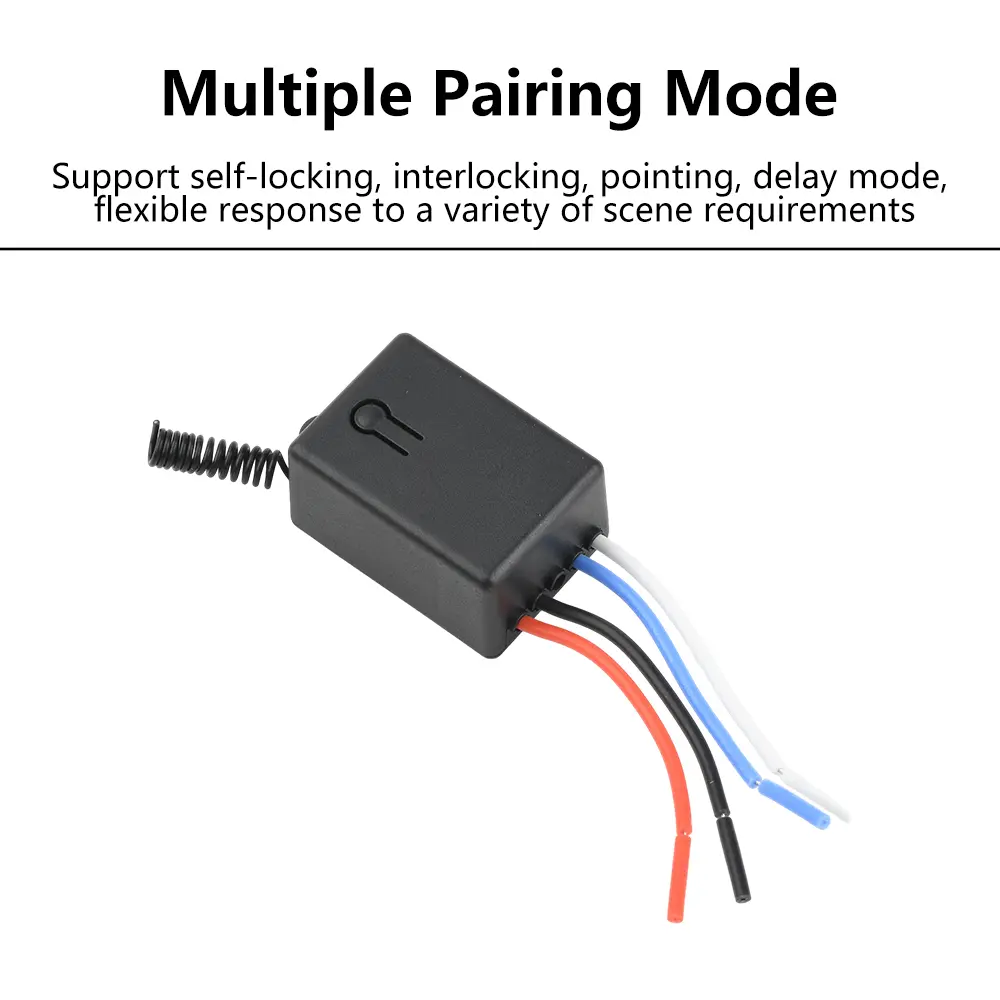
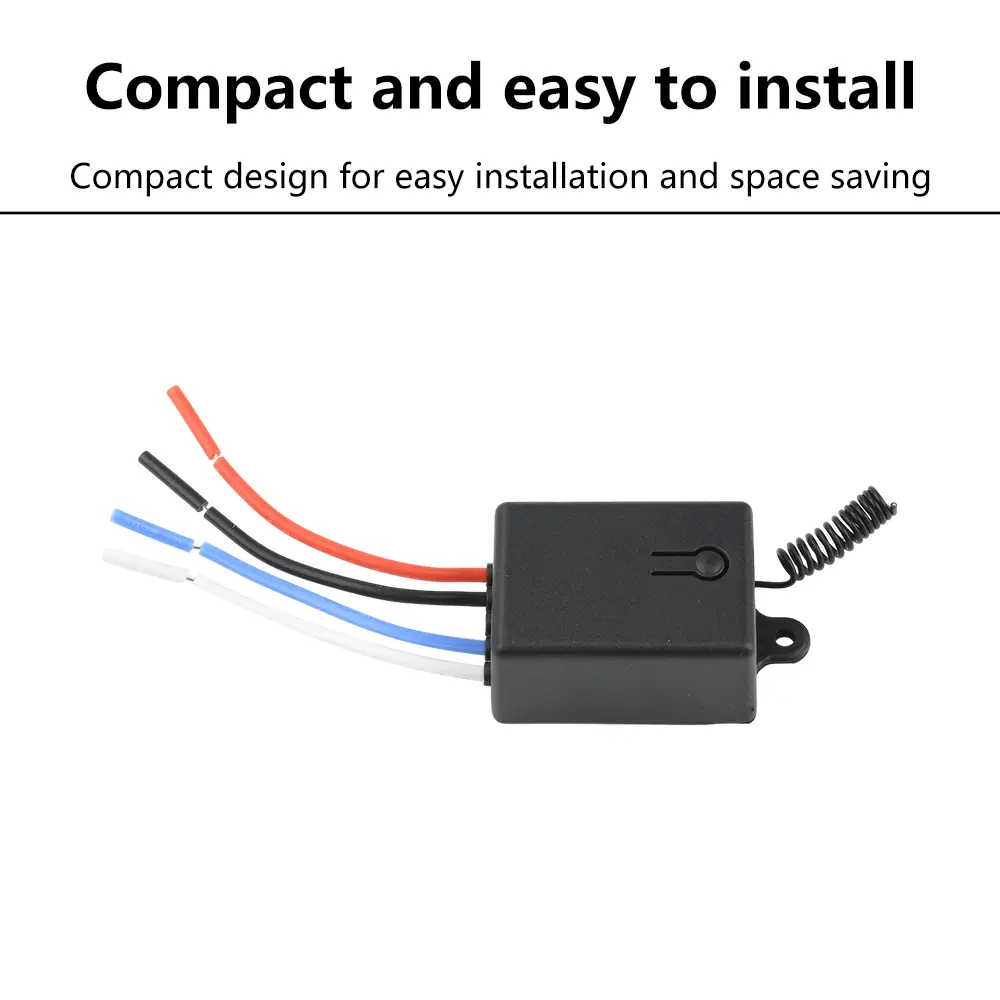
<div class="detailmodule_dynamic"><kse:widget data-widget-type="customText" id="1005000004088425" type="relation"></kse:widget></div><div class="detailmodule_html"><div class="detail-desc-decorate-richtext"><div><br/>Features:<br/>1. Compact and easy to install: Compact design for easy installation and space saving<br/>2. Wide voltage support: DC 5-60V, compatible with various power supply environments<br/>3. Wireless remote control: 433MHz RF wireless relay for convenient remote operation<br/>4. Multiple pairing modes: Supports self-locking, interlocking, momentary, and delayed modes to flexibly address various application requirements<br/>5. Wide applicability: Suitable for switch control of lighting fixtures, motors, and other devices, with a broad range of applications</div><br/><p>Parameter:<br/>Operating voltage: DC 5-60V<br/>Maximum relay contact current: 10A<br/>Frequency: 433MHz<br/>Control method: Remote control[built-in CR2016 button battery*1]<br/>Product dimensions: 40*29.4*21.3mm<br/>Cable length: Approximately 6cm</p><p>Package include:<br/>Receiver*1<br/>Remote control*1</p><div>Self-locking Mode Pairing Instructions <br/>Self-locking Mode: The same button on the remote control can control the power on/off of the receiver's output terminal. Pressing once powers on the receiver's output terminal, and pressing again powers off the receiver's output terminal. <br/>Setup Method: Press the receiver button twice in succession. The receiver's indicator light will remain lit, indicating the receiver has entered pairing mode. Then press the remote control button. Once pairing is successful, the indicator light will turn off.<br/>2. Interlock Mode Pairing Instructions <br/>Interlock Mode: Two buttons on the remote control control the power on and off of the receiver's output terminal. One button can only control the power on of the receiver's output terminal, while the other button can only control the power off of the receiver's output terminal.<br/>Setup Method: Press the receiver button three times in succession. The receiver's indicator light will remain lit, indicating that the receiver has entered pairing mode. Press the remote control button. The receiver's indicator light will flash and then remain lit. Hold down the other button on the remote control. Once pairing is successful, the indicator light will turn off. <br/>3. Momentary Mode Pairing Instructions<br/>Momentary Mode: Pressing and holding one button on the remote control powers on the receiver's output terminal, and releasing it powers off the receiver's output terminal.<br/>Setup Method: Press the receiver button once. The receiver indicator light stays on, indicating the receiver has entered pairing mode. Then press the remote control button. Once pairing is successful, the indicator light turns off.<br/>4. Delay Mode Setup Instructions<br/>Delay Mode: Press the remote control button. The receiver's output terminal remains powered for a set delay time (5s/10s/15s/20s) before powering off.<br/>Setup Method: Press the receiver button a certain number of times (4 times for 5s, 5 times for 10s, 6 times for 15s, 7 times for 20s). The receiver indicator light stays on, indicating the receiver is in pairing mode. Then press the remote control button. After successful pairing, the indicator light turns off.<br/>5. Reset Setting Instructions<br/>Press the receiver button continuously 8 times. The indicator light will flash, the receiver's output will be powered off, and all remote control data stored in its memory will be cleared, restoring it to its default power-on/power-off state.</div></div></div><br/>
$11.705
$6.17
- Category : Consumer Electronics
- Brand : diy_electronics_module_999_store DIY Electronics Module 999 Store
Colors
Sizes
-
+
<div class="detailmodule_dynamic"><kse:widget data-widget-type="customText" id="1005000004088425" type="relation"></kse:widget></div><div class="detailmodule_html"><div class="detail-desc-decorate-richtext"><div><br/>Features:<br/>1. Compact and easy to install: Compact design for easy installation and space saving<br/>2. Wide voltage support: DC 5-60V, compatible with various power supply environments<br/>3. Wireless remote control: 433MHz RF wireless relay for convenient remote operation<br/>4. Multiple pairing modes: Supports self-locking, interlocking, momentary, and delayed modes to flexibly address various application requirements<br/>5. Wide applicability: Suitable for switch control of lighting fixtures, motors, and other devices, with a broad range of applications</div><br/><p>Parameter:<br/>Operating voltage: DC 5-60V<br/>Maximum relay contact current: 10A<br/>Frequency: 433MHz<br/>Control method: Remote control[built-in CR2016 button battery*1]<br/>Product dimensions: 40*29.4*21.3mm<br/>Cable length: Approximately 6cm</p><p>Package include:<br/>Receiver*1<br/>Remote control*1</p><div>Self-locking Mode Pairing Instructions <br/>Self-locking Mode: The same button on the remote control can control the power on/off of the receiver's output terminal. Pressing once powers on the receiver's output terminal, and pressing again powers off the receiver's output terminal. <br/>Setup Method: Press the receiver button twice in succession. The receiver's indicator light will remain lit, indicating the receiver has entered pairing mode. Then press the remote control button. Once pairing is successful, the indicator light will turn off.<br/>2. Interlock Mode Pairing Instructions <br/>Interlock Mode: Two buttons on the remote control control the power on and off of the receiver's output terminal. One button can only control the power on of the receiver's output terminal, while the other button can only control the power off of the receiver's output terminal.<br/>Setup Method: Press the receiver button three times in succession. The receiver's indicator light will remain lit, indicating that the receiver has entered pairing mode. Press the remote control button. The receiver's indicator light will flash and then remain lit. Hold down the other button on the remote control. Once pairing is successful, the indicator light will turn off. <br/>3. Momentary Mode Pairing Instructions<br/>Momentary Mode: Pressing and holding one button on the remote control powers on the receiver's output terminal, and releasing it powers off the receiver's output terminal.<br/>Setup Method: Press the receiver button once. The receiver indicator light stays on, indicating the receiver has entered pairing mode. Then press the remote control button. Once pairing is successful, the indicator light turns off.<br/>4. Delay Mode Setup Instructions<br/>Delay Mode: Press the remote control button. The receiver's output terminal remains powered for a set delay time (5s/10s/15s/20s) before powering off.<br/>Setup Method: Press the receiver button a certain number of times (4 times for 5s, 5 times for 10s, 6 times for 15s, 7 times for 20s). The receiver indicator light stays on, indicating the receiver is in pairing mode. Then press the remote control button. After successful pairing, the indicator light turns off.<br/>5. Reset Setting Instructions<br/>Press the receiver button continuously 8 times. The indicator light will flash, the receiver's output will be powered off, and all remote control data stored in its memory will be cleared, restoring it to its default power-on/power-off state.</div></div></div><br/>