Hearing aid Diy kit Audio amplifier Practical teaching competition Electronic DIY Interest Production Parts
<div class="detailmodule_html"><div class="detail-desc-decorate-richtext"><p><span style="font-size: 16px; font-family: arial, helvetica, sans-serif;"></div></div>
<div class="detailmodule_dynamic"><kse:widget data-widget-type="relatedProduct" id="1005000000650092" title="" type="relation"></kse:widget></div>
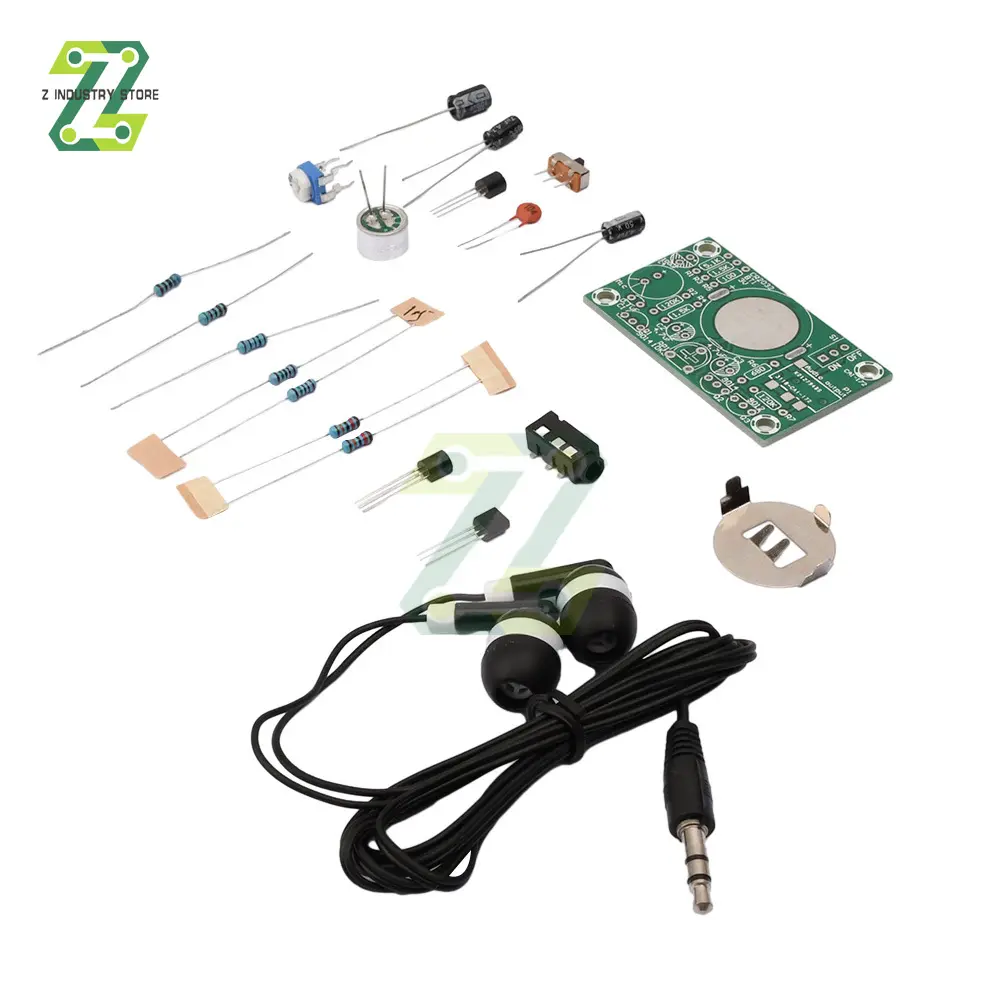
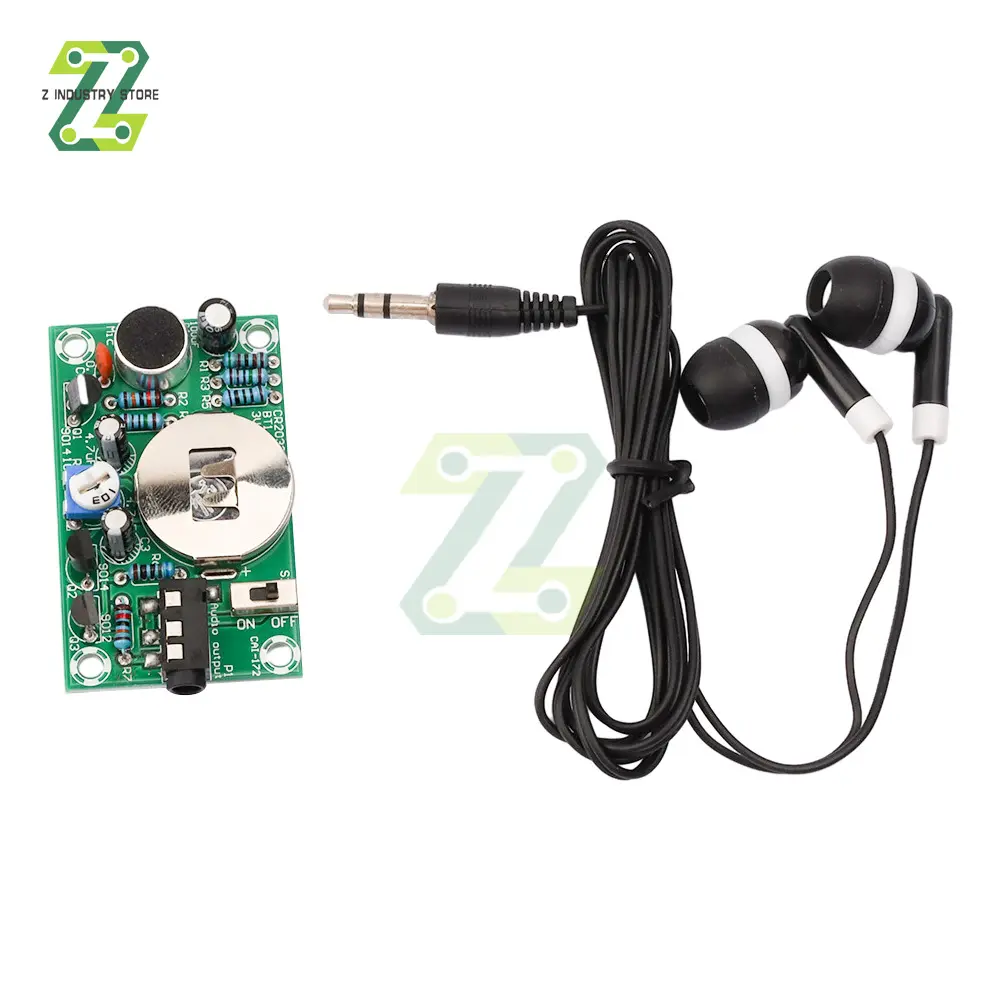
<div class="detailmodule_html"><div class="detail-desc-decorate-richtext"></span><br /><br /><span style="font-family: arial, helvetica, sans-serif;"><strong><span style="font-size: 16px;">Hearing aid Diy kit Audio amplifier Practical teaching competition Electronic DIY Interest Production Parts</span></strong></span><br /><br /><span style="font-size: 16px; font-family: arial, helvetica, sans-serif;"><span style="font-size: 18px; color: #ff0000;"><strong data-spm-anchor-id="a2g0o.detail.1000023.i0.57fclUr3lUr3BU">Description:<br /></strong></span>1.The hearing aid kit can receive sound from the surrounding environment and play it in real-time on the headphones</span><br /><span style="font-size: 16px; font-family: arial, helvetica, sans-serif;">2.Although the sound emitted by headphones is small, it is loud when placed in the ear, so it is very practical for people with certain hearing impairments</span><br /><span style="font-size: 16px; font-family: arial, helvetica, sans-serif;">3.The kit consists of a microphone, front low amplifier, power amplifier circuit, and headphone jack, which has the characteristic of high sound reception sensitivity</span><br /><span style="font-size: 16px; font-family: arial, helvetica, sans-serif;">4.Easy to make, low cost, and also an ideal foundation kit for learning analog circuits</span><br /><span style="font-size: 16px; font-family: arial, helvetica, sans-serif;">5.The kit can be used for practical training in electronic technology foundation and skills teaching, electronic skills teaching, electronic process teaching, digital circuit teaching, and practical training for electronic enthusiasts and beginners to enhance comprehensive practical abilities</span></p>
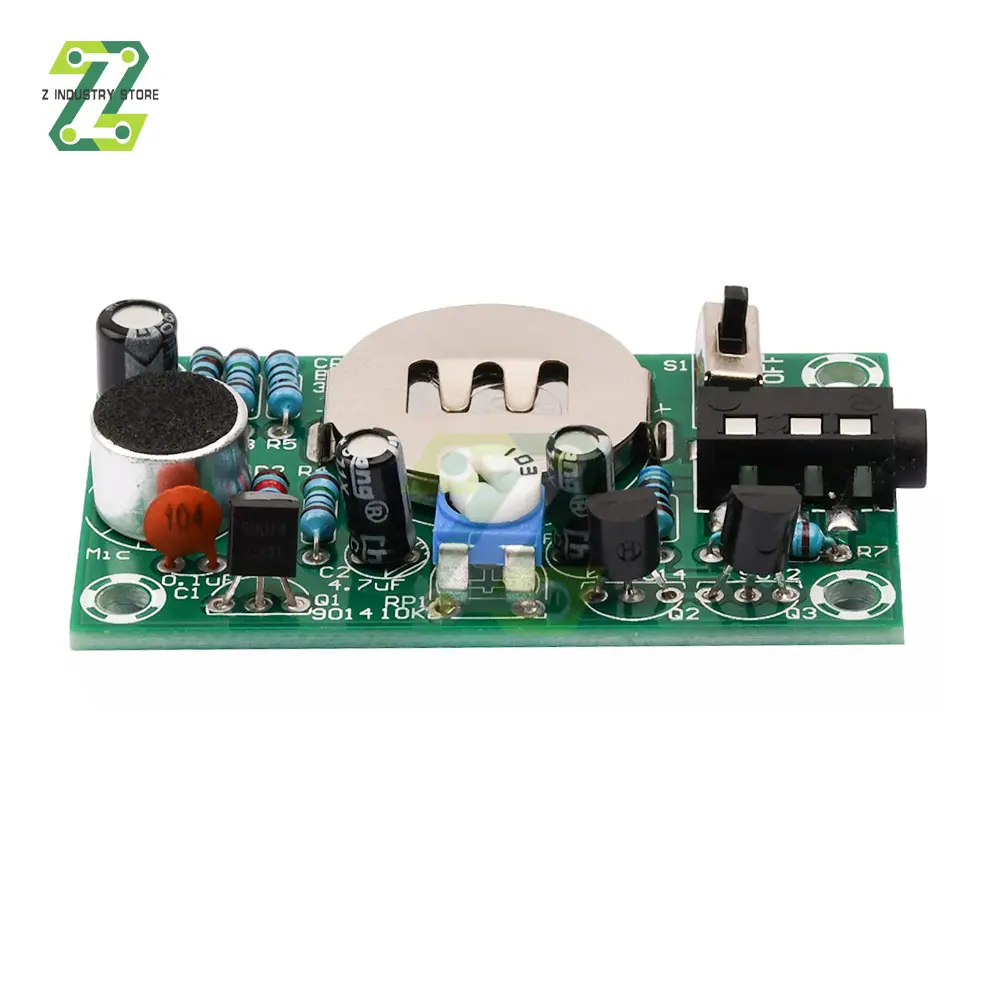
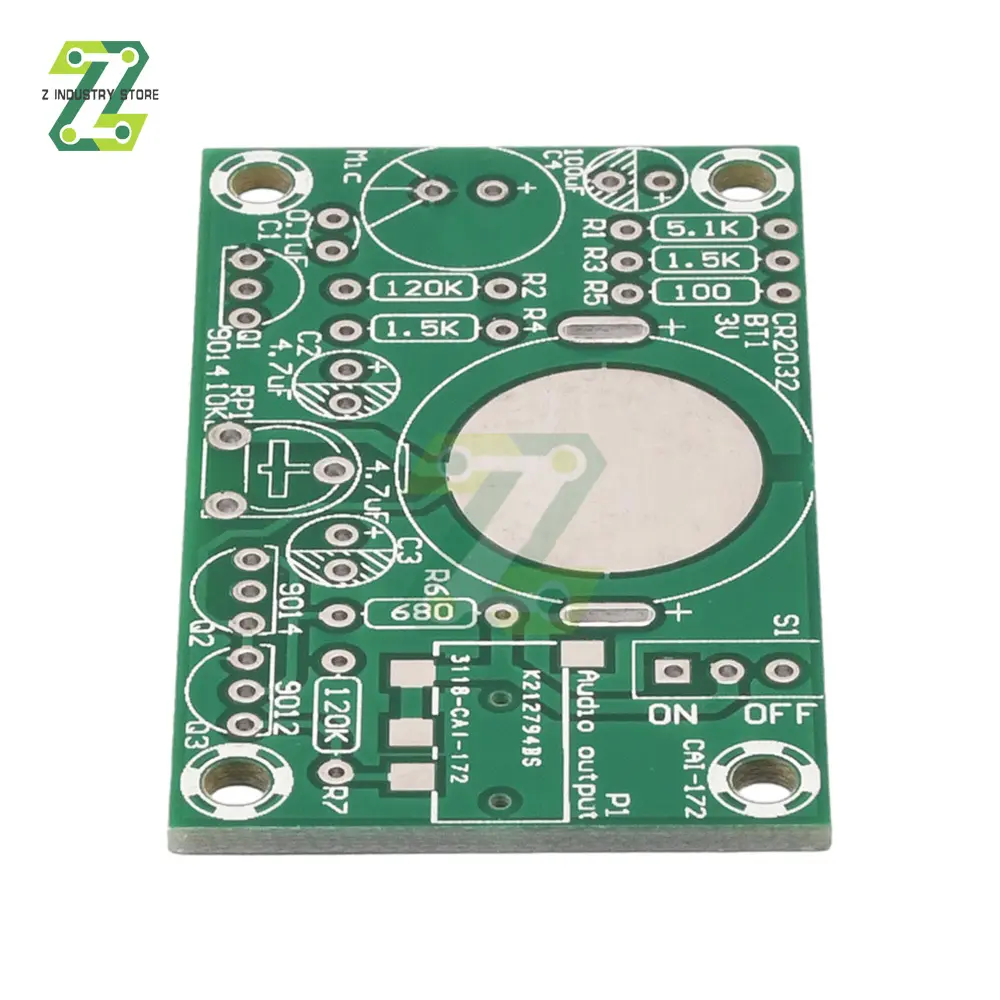
<p><span style="color: #ff0000;"><strong><span style="font-size: 18px; font-family: arial, helvetica, sans-serif;">Parameter:</span></strong></span><br /><span style="font-size: 16px; font-family: arial, helvetica, sans-serif;">Welding and component installation are the key to success. Please use high-quality soldering tin, with bright solder joints and no missing solder. Do not install components incorrectly, and follow a certain sequence during production. After installing one part of the components, install another part. Start installing low components, such as resistors, and then install high components.</span></p>
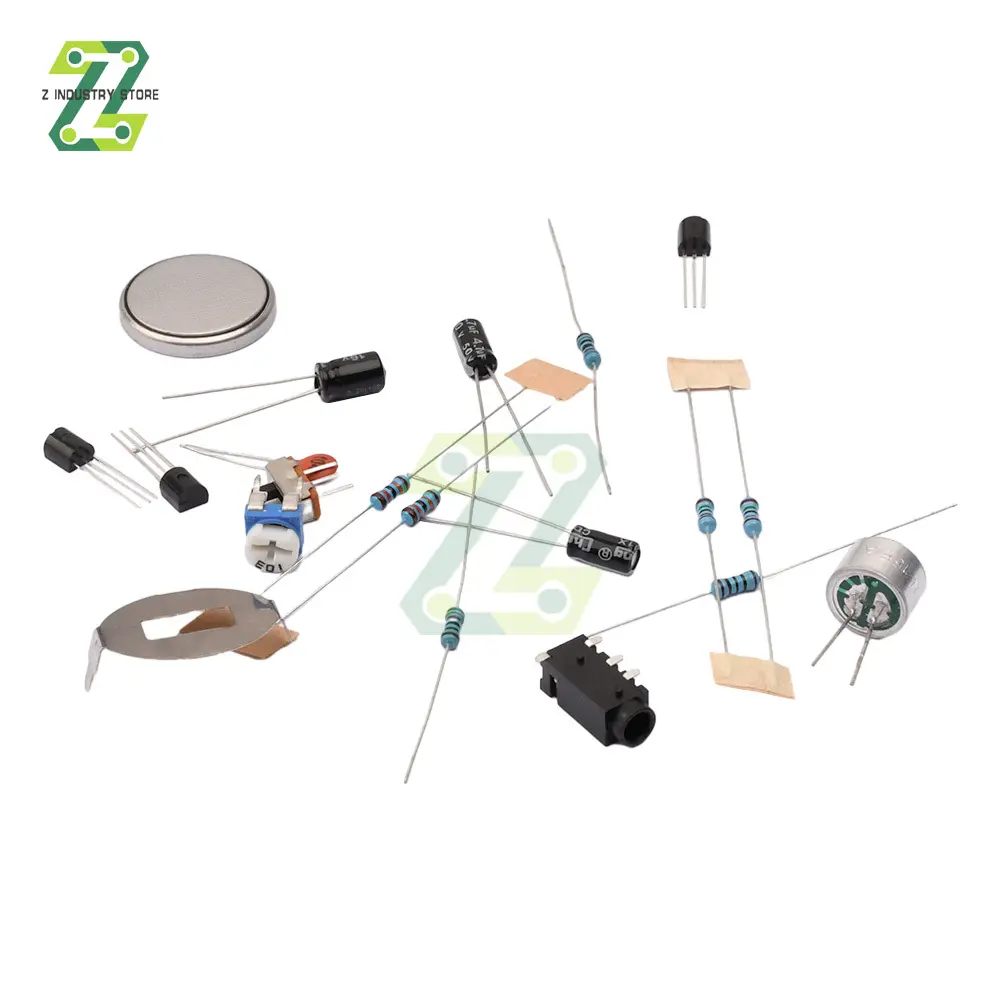
<p><span style="font-size: 16px; font-family: arial, helvetica, sans-serif;">1. Installing resistors: Resistors do not differentiate between positive and negative poles</span><br /><span style="font-size: 16px; font-family: arial, helvetica, sans-serif;">2. Installing ceramic capacitors: Ceramic capacitors do not have positive or negative electrodes</span><br /><span style="font-size: 16px; font-family: arial, helvetica, sans-serif;">3. Install the battery shrapnel, paying attention to the opening of the shrapnel facing outward (so that the battery can be installed), and finally install the battery</span><br /><span style="font-size: 16px; font-family: arial, helvetica, sans-serif;">4. Install the headphone holder and toggle switch (toggle switch does not need to be directional)</span><br /><span style="font-size: 16px; font-family: arial, helvetica, sans-serif;">5. Install an electrolytic capacitor, with the long leg of the capacitor being the positive pole</span><br /><span style="font-size: 16px; font-family: arial, helvetica, sans-serif;">6. Install the 104 potentiometer and transistor</span><br /><span style="font-size: 16px; font-family: arial, helvetica, sans-serif;">7. Install an electret microphone with the negative pin connected to the casing</span><br /><span style="font-size: 16px; font-family: arial, helvetica, sans-serif;">After installation, check again if the components are installed incorrectly and if they are well soldered. Then install the battery with the positive electrode facing upwards, insert the headphones, turn on the switch, adjust the potentiometer while listening to the sound.</span></p>
<p><span style="color: #ff0000;"><strong><span style="font-size: 18px; font-family: arial, helvetica, sans-serif;">Package include:</span></strong></span><br /><span style="font-size: 16px; font-family: arial, helvetica, sans-serif;">1pcs x Hearing aid Diy kit <br /><br /><br /></span></p></div></div>
$4.535
$3.98
- Category : Tools
- Brand : z_industry_store Z Industry Store
Colors
Sizes
-
+
<div class="detailmodule_html"><div class="detail-desc-decorate-richtext"><p><span style="font-size: 16px; font-family: arial, helvetica, sans-serif;"></div></div>
<div class="detailmodule_dynamic"><kse:widget data-widget-type="relatedProduct" id="1005000000650092" title="" type="relation"></kse:widget></div>
<div class="detailmodule_html"><div class="detail-desc-decorate-richtext"></span><br /><br /><span style="font-family: arial, helvetica, sans-serif;"><strong><span style="font-size: 16px;">Hearing aid Diy kit Audio amplifier Practical teaching competition Electronic DIY Interest Production Parts</span></strong></span><br /><br /><span style="font-size: 16px; font-family: arial, helvetica, sans-serif;"><span style="font-size: 18px; color: #ff0000;"><strong data-spm-anchor-id="a2g0o.detail.1000023.i0.57fclUr3lUr3BU">Description:<br /></strong></span>1.The hearing aid kit can receive sound from the surrounding environment and play it in real-time on the headphones</span><br /><span style="font-size: 16px; font-family: arial, helvetica, sans-serif;">2.Although the sound emitted by headphones is small, it is loud when placed in the ear, so it is very practical for people with certain hearing impairments</span><br /><span style="font-size: 16px; font-family: arial, helvetica, sans-serif;">3.The kit consists of a microphone, front low amplifier, power amplifier circuit, and headphone jack, which has the characteristic of high sound reception sensitivity</span><br /><span style="font-size: 16px; font-family: arial, helvetica, sans-serif;">4.Easy to make, low cost, and also an ideal foundation kit for learning analog circuits</span><br /><span style="font-size: 16px; font-family: arial, helvetica, sans-serif;">5.The kit can be used for practical training in electronic technology foundation and skills teaching, electronic skills teaching, electronic process teaching, digital circuit teaching, and practical training for electronic enthusiasts and beginners to enhance comprehensive practical abilities</span></p>
<p><span style="color: #ff0000;"><strong><span style="font-size: 18px; font-family: arial, helvetica, sans-serif;">Parameter:</span></strong></span><br /><span style="font-size: 16px; font-family: arial, helvetica, sans-serif;">Welding and component installation are the key to success. Please use high-quality soldering tin, with bright solder joints and no missing solder. Do not install components incorrectly, and follow a certain sequence during production. After installing one part of the components, install another part. Start installing low components, such as resistors, and then install high components.</span></p>
<p><span style="font-size: 16px; font-family: arial, helvetica, sans-serif;">1. Installing resistors: Resistors do not differentiate between positive and negative poles</span><br /><span style="font-size: 16px; font-family: arial, helvetica, sans-serif;">2. Installing ceramic capacitors: Ceramic capacitors do not have positive or negative electrodes</span><br /><span style="font-size: 16px; font-family: arial, helvetica, sans-serif;">3. Install the battery shrapnel, paying attention to the opening of the shrapnel facing outward (so that the battery can be installed), and finally install the battery</span><br /><span style="font-size: 16px; font-family: arial, helvetica, sans-serif;">4. Install the headphone holder and toggle switch (toggle switch does not need to be directional)</span><br /><span style="font-size: 16px; font-family: arial, helvetica, sans-serif;">5. Install an electrolytic capacitor, with the long leg of the capacitor being the positive pole</span><br /><span style="font-size: 16px; font-family: arial, helvetica, sans-serif;">6. Install the 104 potentiometer and transistor</span><br /><span style="font-size: 16px; font-family: arial, helvetica, sans-serif;">7. Install an electret microphone with the negative pin connected to the casing</span><br /><span style="font-size: 16px; font-family: arial, helvetica, sans-serif;">After installation, check again if the components are installed incorrectly and if they are well soldered. Then install the battery with the positive electrode facing upwards, insert the headphones, turn on the switch, adjust the potentiometer while listening to the sound.</span></p>
<p><span style="color: #ff0000;"><strong><span style="font-size: 18px; font-family: arial, helvetica, sans-serif;">Package include:</span></strong></span><br /><span style="font-size: 16px; font-family: arial, helvetica, sans-serif;">1pcs x Hearing aid Diy kit <br /><br /><br /></span></p></div></div>
Related Product
Browse The Collection of Top Products.