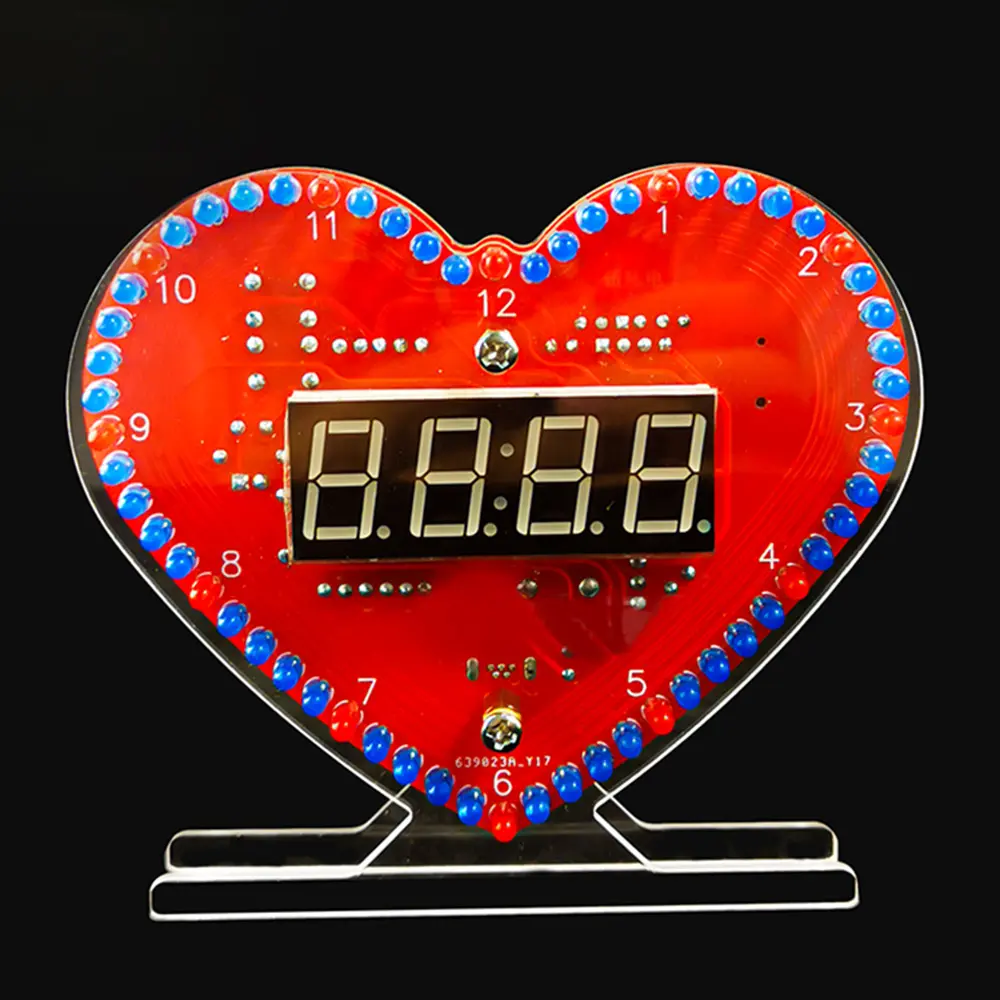
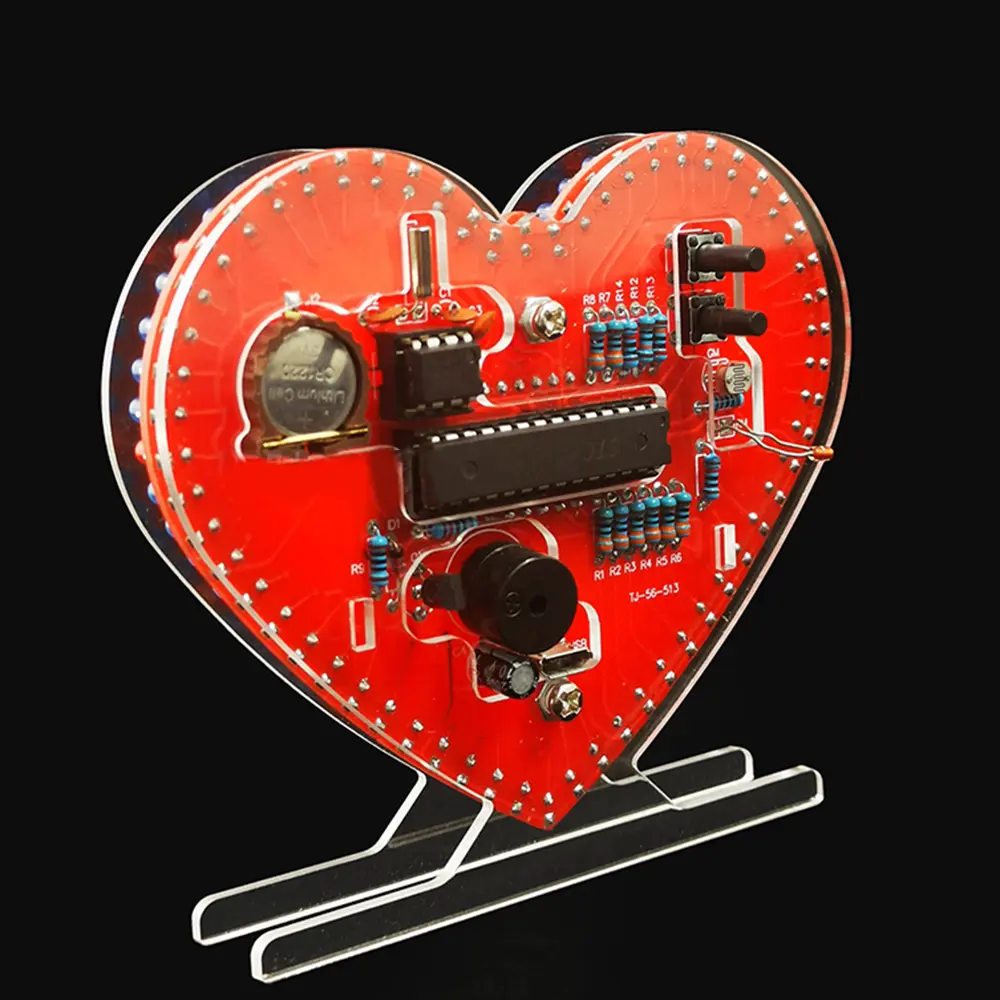
Heart Shaped 4-Digit DIY Clock Kits Date/Time/Temperature/Week Alarm Clock Music Soldering Suite for Girlfriend Valentine's Day
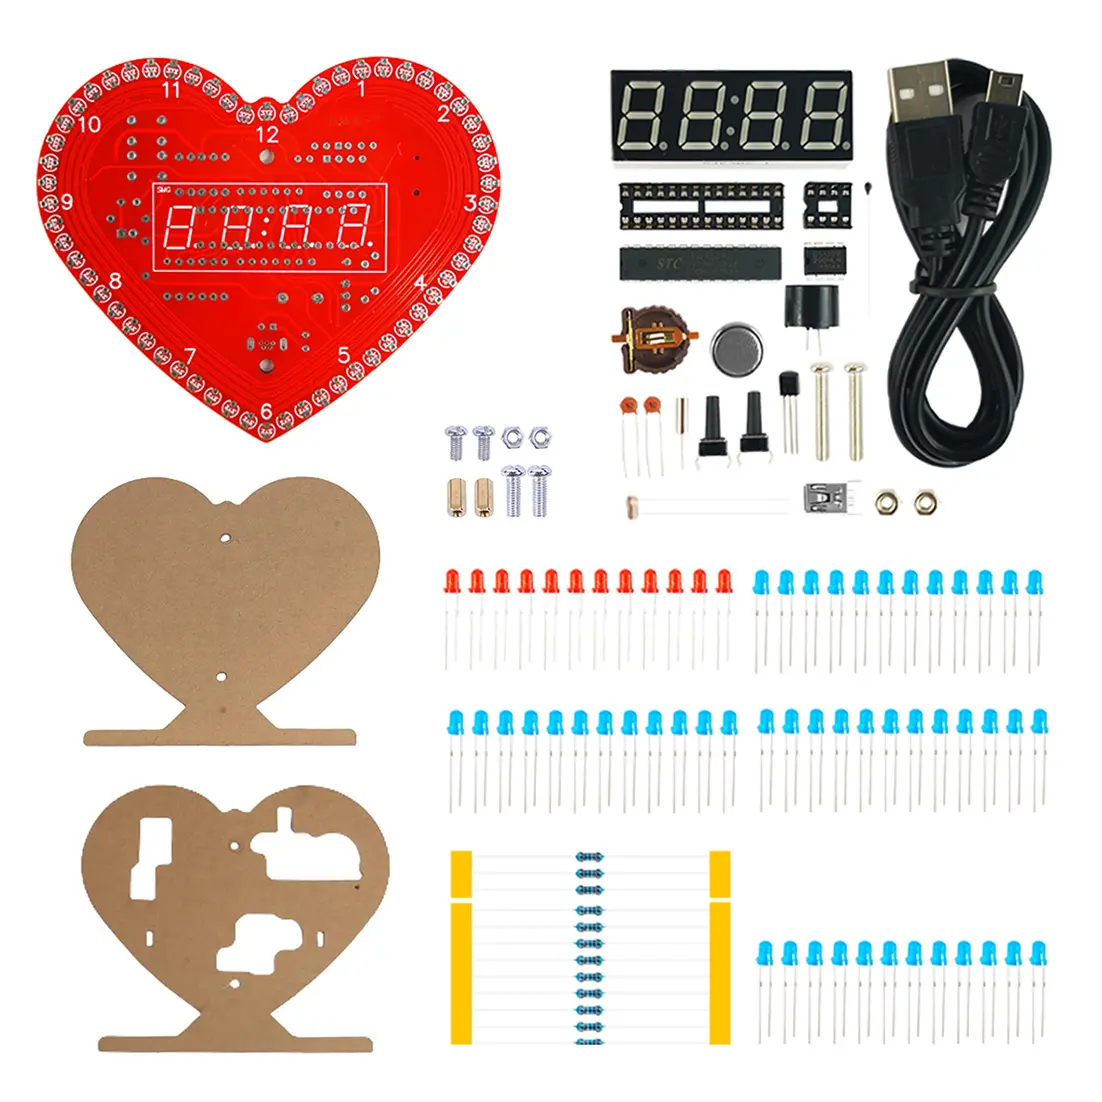
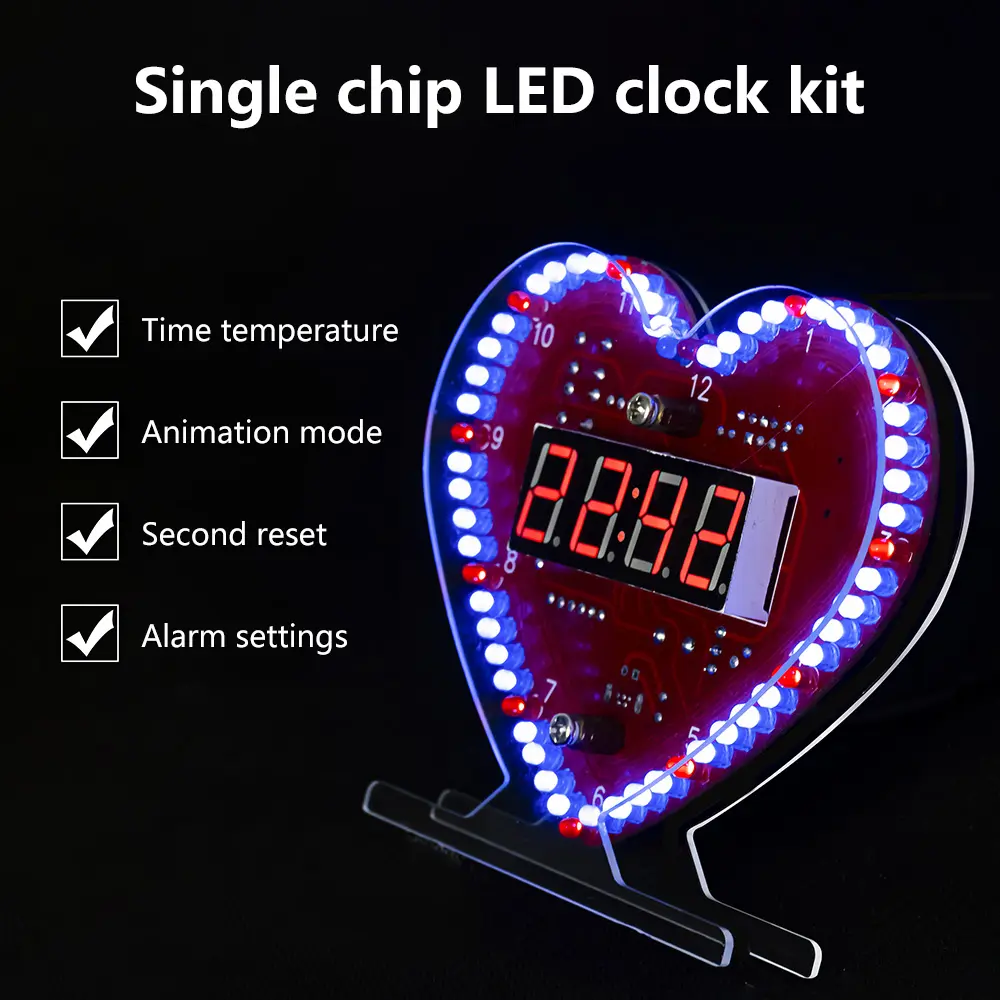
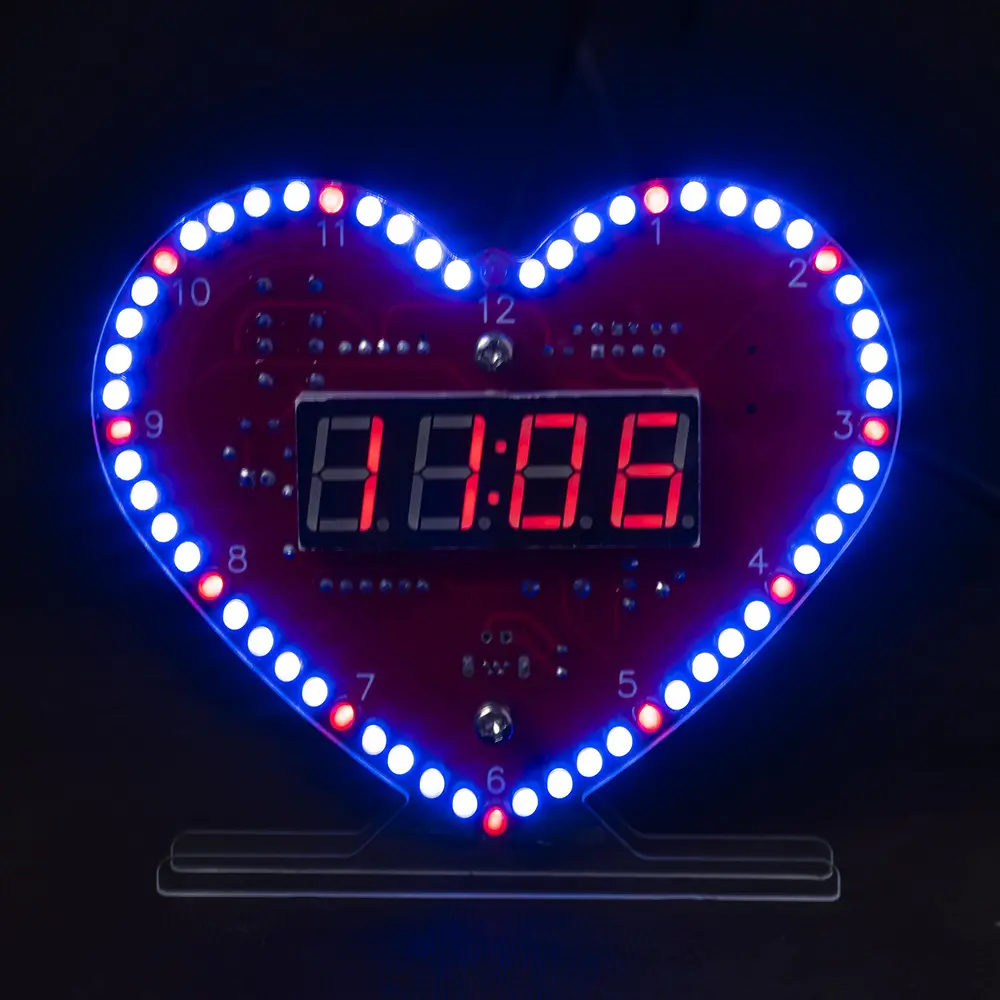
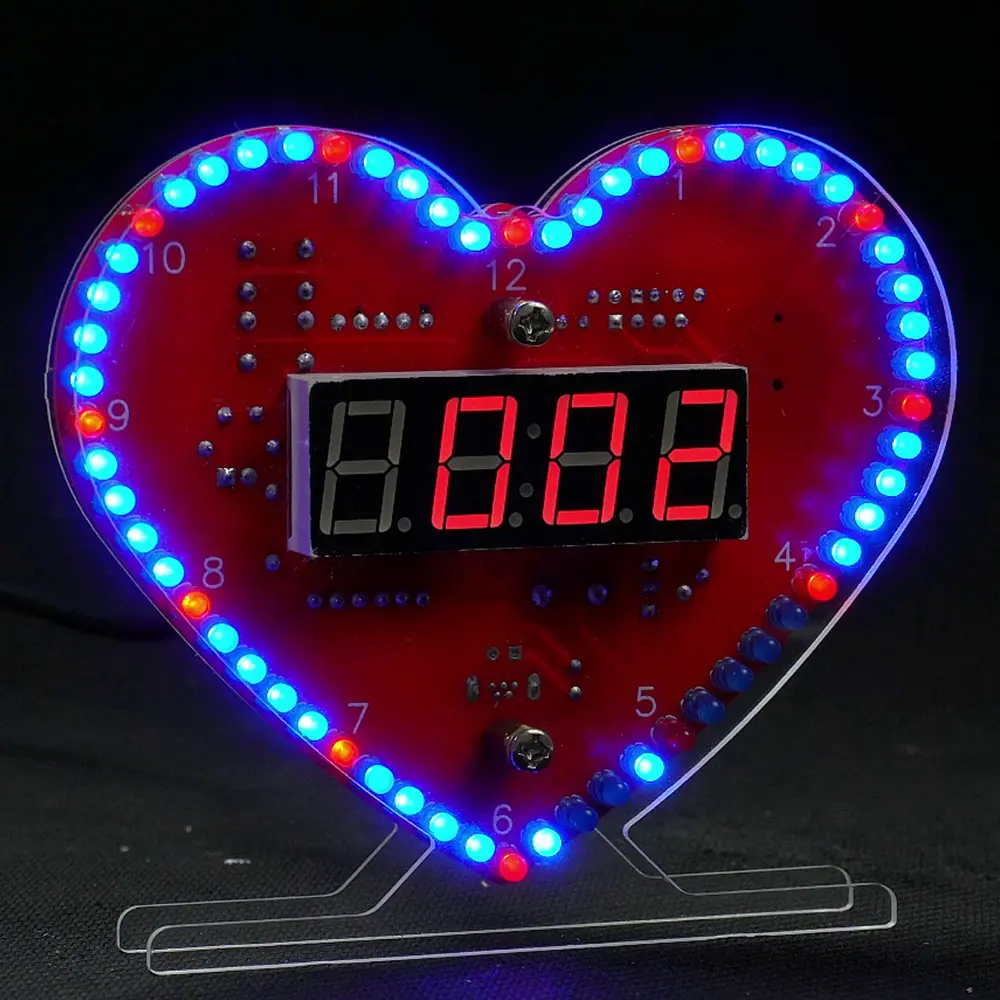
<div class="detailmodule_dynamic"><kse:widget data-widget-type="customText" id="1005000004422459" type="relation"></kse:widget></div><div class="detailmodule_html"><div class="detail-desc-decorate-richtext"><div><br/><span style="font-size:20px"><strong>Features:</strong></span><br/>1.The product is made of high-quality materials with guaranteed quality<br/>2.It is very suitable for DIY enthusiasts and can be used for electronic product teaching or circuit welding practice<br/>3.The power supply voltage is 5V DC, which can be powered by USB or external power supply<br/>4.The product comes with multiple animation modes, second reset function, alarm function, and time/temperature display<br/>5.Stable product performance and long service life</div><div><br/></div><p><span style="font-size:20px"><strong>Parameter:</strong></span><br/>Operating instructions for digital clocks:<br/>There are two touch switches S1 and S2 on the clock. When displaying the time, briefly press S2 to display the date. When displaying the date, press S2 again to display the week. When displaying the week, press S2 again to display the year. S1 is used to display temperature and alarm time. Press S1 once to display temperature, and then press again to display alarm time. Simultaneously pressing and holding S1 and S2 for a short time switches the display mode of the circle LED. There are a total of 6 display modes, one at a time, and cycling. Press and hold S1 and S2 for more than 3 seconds at the same time to enter the setting mode. The Nixie tube displays "Fu-1", which represents function 1. There are four functions in total: 1. Set the time, 2. Set the month and day, 3. Set the alarm clock time, 4. Set the hour alarm. When setting the alarm clock, the hour position can be set to 24. When set to 24 and saved, the alarm clock is turned off. In the setting mode, S1 switches the function number, S2 enters the corresponding function, and after entering the corresponding function, press S1 to increase the number of flashing bit segments, and S2 switches to the next bit segment. After switching to the last bit segment, press S2 again to save and exit the setting mode.<br/>Power supply voltage: 5V DC power supply (using Micro USB interface)</p><p><span style="font-size:20px"><strong>Package include:</strong></span><br/>DIY loose parts X1<br/><br/></p></div></div><p><br/></p>
$30.755
$29.915
- Category : Consumer Electronics
- Brand : diy_electronics_module_999_store DIY Electronics Module 999 Store
Colors
Sizes
-
+
<div class="detailmodule_dynamic"><kse:widget data-widget-type="customText" id="1005000004422459" type="relation"></kse:widget></div><div class="detailmodule_html"><div class="detail-desc-decorate-richtext"><div><br/><span style="font-size:20px"><strong>Features:</strong></span><br/>1.The product is made of high-quality materials with guaranteed quality<br/>2.It is very suitable for DIY enthusiasts and can be used for electronic product teaching or circuit welding practice<br/>3.The power supply voltage is 5V DC, which can be powered by USB or external power supply<br/>4.The product comes with multiple animation modes, second reset function, alarm function, and time/temperature display<br/>5.Stable product performance and long service life</div><div><br/></div><p><span style="font-size:20px"><strong>Parameter:</strong></span><br/>Operating instructions for digital clocks:<br/>There are two touch switches S1 and S2 on the clock. When displaying the time, briefly press S2 to display the date. When displaying the date, press S2 again to display the week. When displaying the week, press S2 again to display the year. S1 is used to display temperature and alarm time. Press S1 once to display temperature, and then press again to display alarm time. Simultaneously pressing and holding S1 and S2 for a short time switches the display mode of the circle LED. There are a total of 6 display modes, one at a time, and cycling. Press and hold S1 and S2 for more than 3 seconds at the same time to enter the setting mode. The Nixie tube displays "Fu-1", which represents function 1. There are four functions in total: 1. Set the time, 2. Set the month and day, 3. Set the alarm clock time, 4. Set the hour alarm. When setting the alarm clock, the hour position can be set to 24. When set to 24 and saved, the alarm clock is turned off. In the setting mode, S1 switches the function number, S2 enters the corresponding function, and after entering the corresponding function, press S1 to increase the number of flashing bit segments, and S2 switches to the next bit segment. After switching to the last bit segment, press S2 again to save and exit the setting mode.<br/>Power supply voltage: 5V DC power supply (using Micro USB interface)</p><p><span style="font-size:20px"><strong>Package include:</strong></span><br/>DIY loose parts X1<br/><br/></p></div></div><p><br/></p>