QC4.0 QC3.0 LED Color Display USB PD Fast Charge 22.5W Micro/Type-C/Type-A1/Type-A2/L Mobile Power Bank 18650 Charging Module
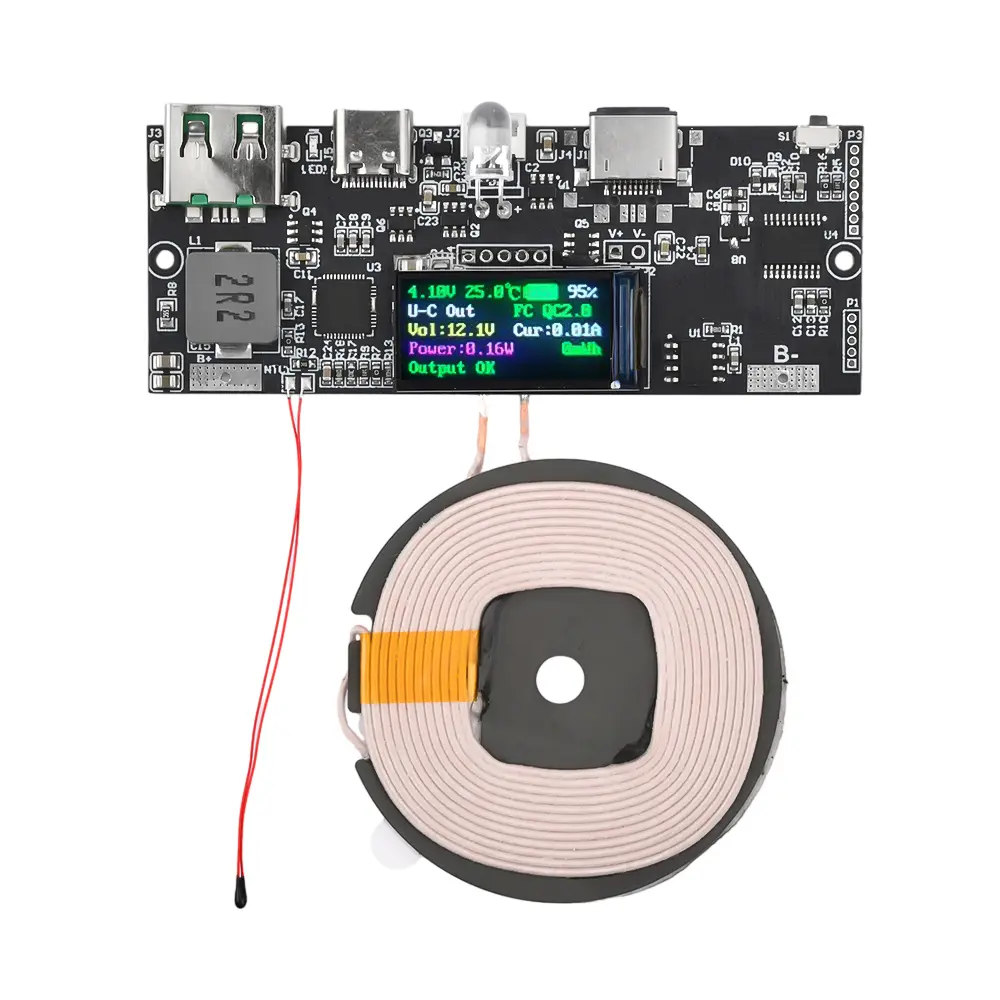
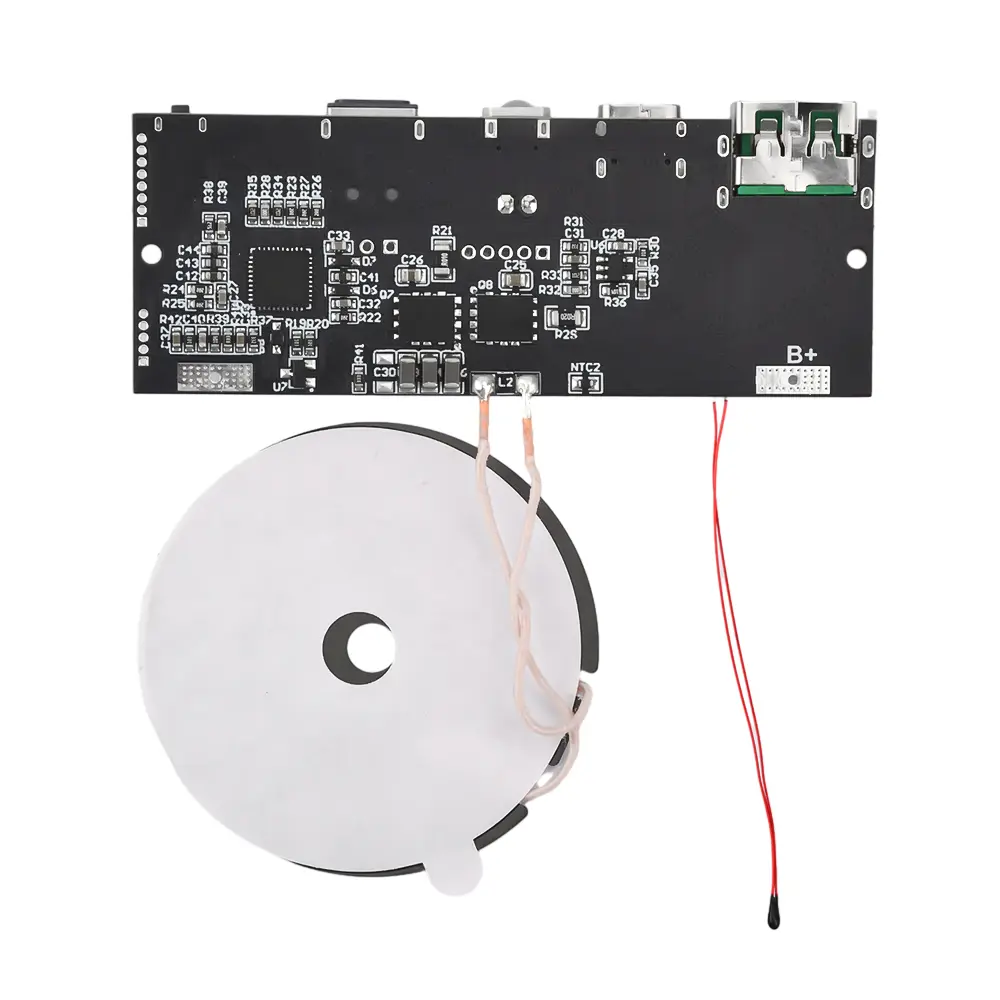
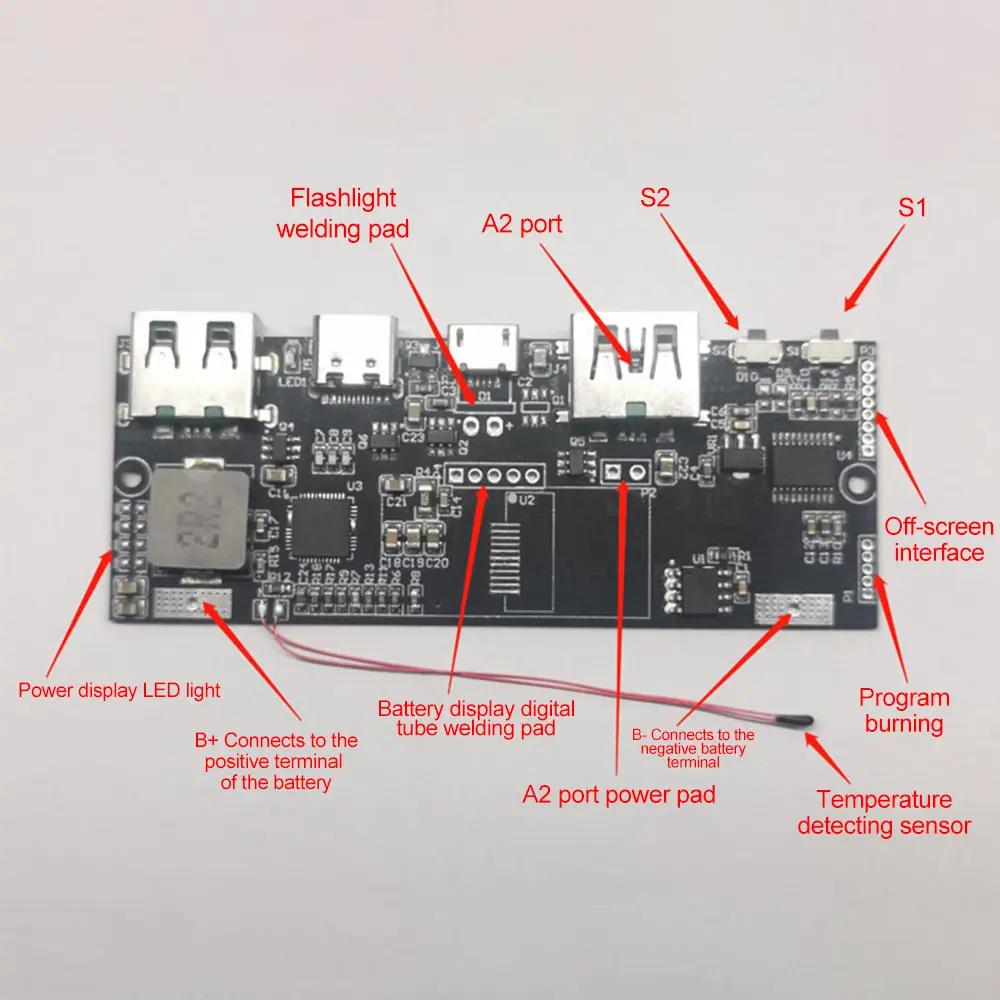
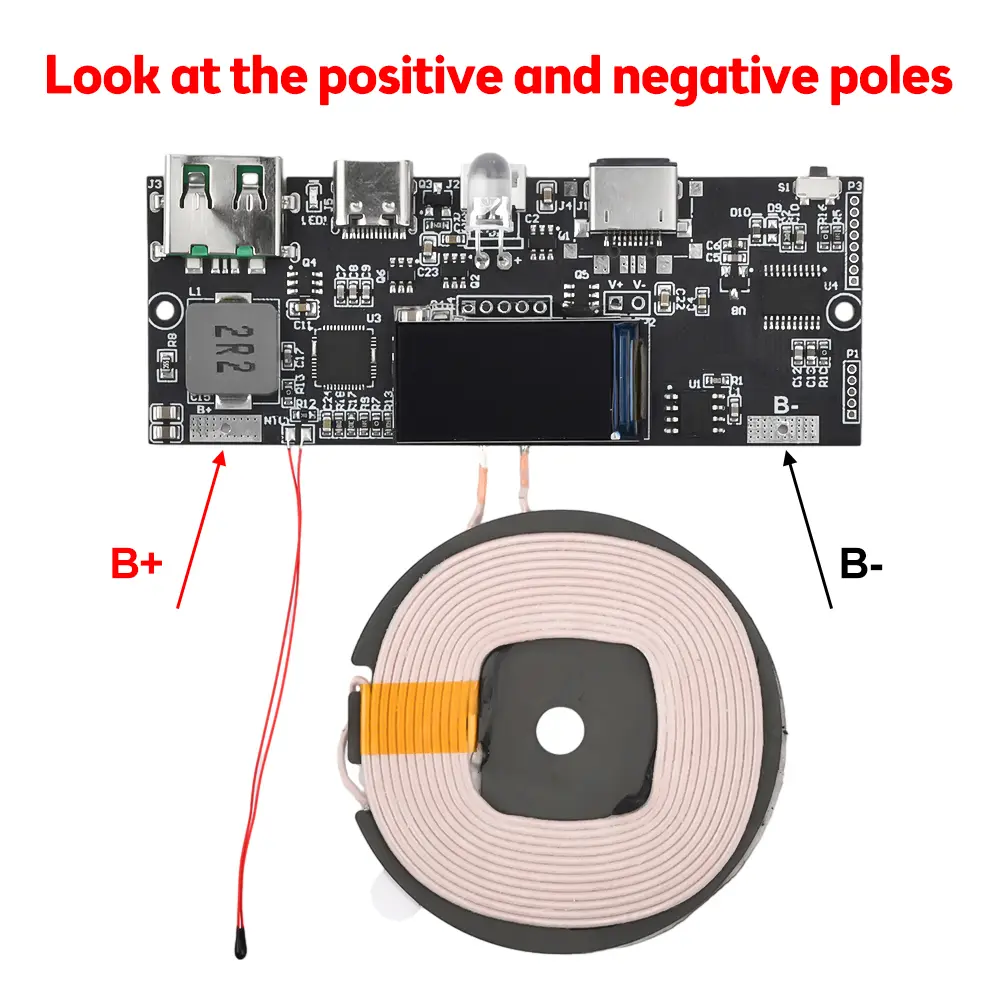
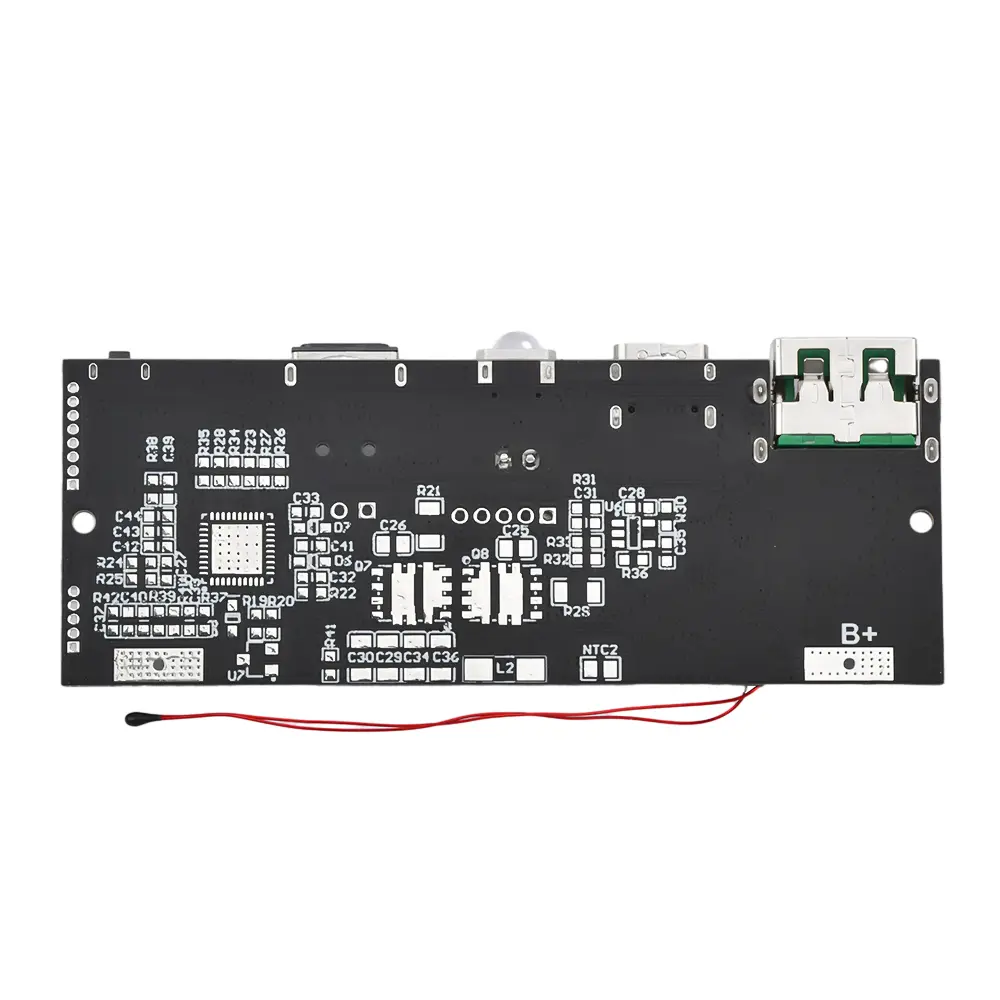
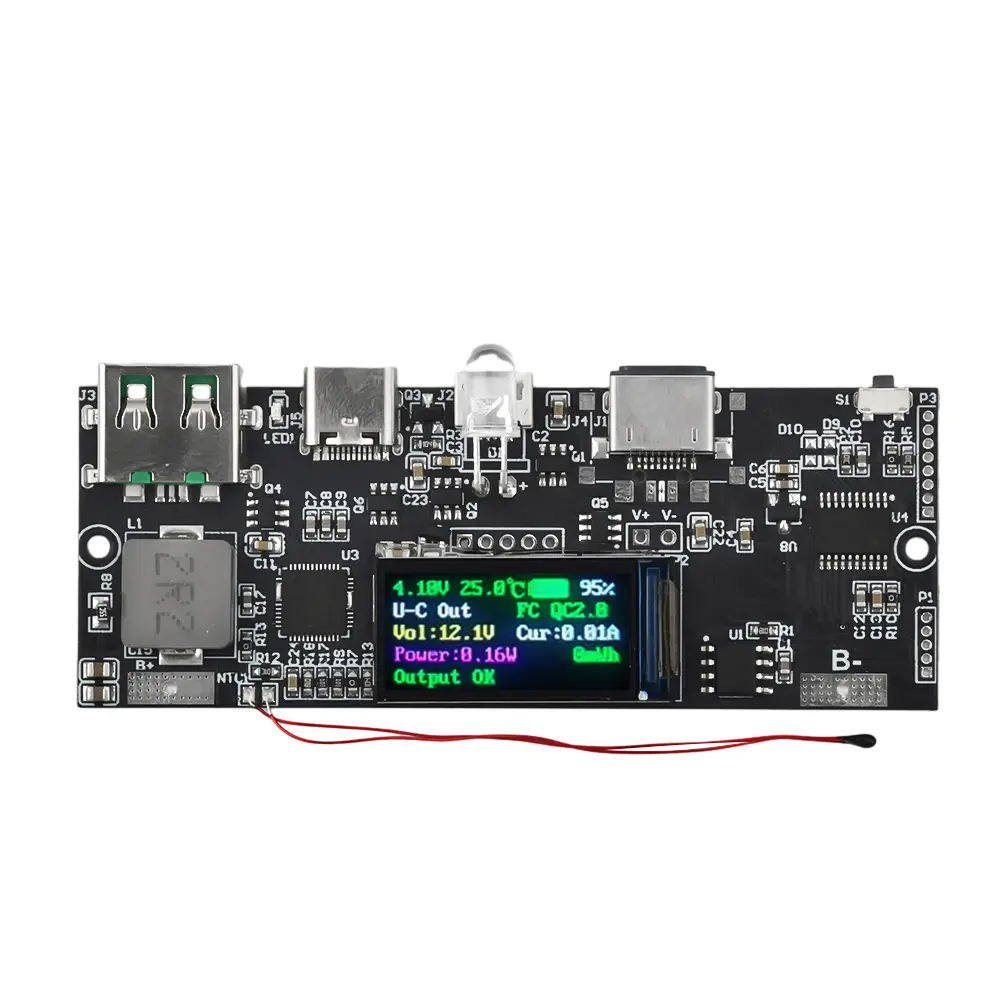
<div class="detailmodule_html"><div class="detail-desc-decorate-richtext"><div class="detailmodule_dynamic"></div><div class="detailmodule_html"><div class="detail-desc-decorate-richtext"><span style="font-size:20px"><strong>Product features:</strong></span><br/>1. Color screen display, with 3 options and models to choose from<br/>2. The 22.5W program for this model has been updated. The maximum output power of each protocol can be adjusted to the maximum input power of 21W, and the maximum output power of 22.5W. Not only does SCP output 22.5W, but protocols such as QC and PD are also adjusted to the maximum 22.5W.<br/>Both Type-A USB sockets are designed with 5P high current USB sockets, with thicker and wider copper contacts to increase overcurrent capacity and reduce heat generation and losses.<br/>4. Support SCP and VOOC high current output<br/>5. The fast charging indicator light is on, indicating recognition of the fast charging protocol and not necessarily high-power charging<br/>6. There are four parameter displays in the first line of the screen, namely: battery voltage, external temperature display (battery temperature), battery icon display, battery percentage, battery percentage is fixed in white, and the left three will change colors based on voltage temperature and battery level<br/><br/><span style="font-size:20px"><strong>Product parameters:</strong></span><br/>The motherboard has 5 default USB ports, Type-C, L-port, Micro USB, Type-A1, Type-A2<br/>The L port supports PD2.0 fast charging input.<br/>Type-C supports AFC/FCP/SCP/PE1.1/PD3.0/PD2.0/QC4+/QC4/QC3.0/QC2.0 fast charging input;<br/>Support PPS/PD3.0/PD2.0/AFC/FCP/PE2.0/PE1.1/QC4/QC4/QC3.0/QC2.0/SFCP fast charging output.<br/>Type-A1/Type-A2<br/>Supports PPS/PD3.0/PD2.0/AFC/FCP/PE2.0/PE1.1/VooC/QC4+/QC4/QC3.0/QC2.0/SCP/SFCP output Micro USB supports AFC/FCP/PE1.1/QC3.0/QC2.0 fast charging input;<br/>Type-C supports bidirectional fast charging of input and output. Input support 5V/9V/12V voltage PPS output support 5-5.9V@3A 、 5-11V@2A ,<br/>PD3.0/PD2.0 output support 5V@3A 、 9V@2.4A 、 12V@1.75A 。<br/>QC2.0 output support 5V@3.2A 、 9V@2.4A 、 12V@1.75A 。<br/>QC3.0 supports 5V-12V output voltage, 200mV/Step.<br/>AFC output supports 5V/9V/12V. Input supports 5V/9V voltage.<br/>FCP output supports 5V/9V/12V. Input supports 5V/9V voltage.<br/>SCP output support 5V@4.5A 。 Input support 5.5V@3A 。<br/>PE2.0 output supports 5V to 12V, 500mV/Step.<br/>PE1.1 output supports 5V/7V/9V/12V. Input supports 5V/9V voltage.<br/>SFCP output supports 5V/9V/12V.<br/>VOOC output support 5V@4A 。<br/>Support Type-A1/Type-A2/Type-C ports for simultaneous external discharge. maximum 5V@4.2A<br/>The back of the board with wireless charging will be soldered with components, while the back of the board without wireless charging will not be soldered,<br/>Key function: (S1 only, S2 currently has no function, and will not be welded by default)<br/>Short press: Power the wireless charger with wireless charging. Open A1 port output without wireless charging. Double click: Force shutdown.<br/>Long press: Turn on and long press to turn off the low current mode. Turn off the flashlight by long pressing the switch. (The low current function can charge small current devices such as watches, Bluetooth, etc. without turning off within 2 hours. In fact, it does not detect the output of too small current. The output of too large current is still protected. It does not mean that it is low-power charging when turned on, and the low current mode ≠ low-power charging.)<br/><br/><span style="font-size:20px"><strong>Specifications:</strong></span><br/>Example: 1A+1B+1C+1L represents 1 large USB, 1 micro USB port, 1 Type-c, and 1 L female port.<br/>GXJA0785-002 has an L port:<br/>Single motherboard, with flashlight, low current, without wireless charging: Short press the button to open the USB-A1 port, long press the switch for low current when turning on, long press the switch when turning off the flashlight, a total of 4 ports for 1A+1B+1C+1L<br/>GXJA0785-001 without L port:<br/>Single motherboard, with flashlight, low current, without wireless charging: Short press the button to open the USB-A1 port, long press the switch for low current when turning on, long press the switch when turning off, and long press the flashlight when turning off. There are a total of 4 ports for 2A+1B+1C<br/>GXJA0785-003 with wireless charging:<br/>Single motherboard, with flashlight, low current, and wireless charging: Short press the button to open the USB-A1 port, long press the switch for low current when turning on, long press the switch when turning off, and long press the flashlight when turning off. There are a total of 4 ports, 1A+1B+1C+1L<br/><br/><span style="color:rgb(255, 0, 0);font-size:20px"><strong>be careful:</strong></span><br/>1. Components are only soldered on the back with wireless charging, while components without wireless charging are not soldered<br/>2. The default welding apple female port with wireless charging cannot be welded to a large USB port, and can be left soldered;<br/>3. Default welding large USB port without wireless charging.<br/>4. The flashlight is welded with lamp beads by default and does not need to be removable. It can only be turned on and off when turned off, and cannot be turned on or off when turned on.<br/>5. The A2 welding pad is not used by default, and should not be connected here unless there are special circumstances. The S1 switch is useful, but the S2 switch has no function and is not soldered by default. The received physical object shall prevail.<br/>6. The screen external interface can be used to connect the screen with a flat cable, which is not suitable for welding by ordinary people. If necessary, it can be customized<br/>7. Nixie tube pad and LED light pad are not welded by default,<br/>8. The positive and negative poles of the battery must not be reversed<br/><br/><span style="font-size:20px"><strong>Resistance:</strong></span><br/>R8 sets the resistance for the battery capacity. If the battery capacity is not significantly different during later replacement, it can be ignored. If the difference is too large, please replace the resistance again. The calculation formula for the resistance value is: Q=(total battery capacity mAh+2000) * 5/3. For example, a resistance of 30000mAh should be (30000+2000) * 5/3=533332. A similar resistance can be found to replace it, such as 53K.<br/>Display screen description: (Currently, only those with wireless can switch to English, while others default to Chinese)<br/>The left side of the second line displays port outputs, including USB-A1 output, USB-A2 output, Type-C output, Type-C input, USB-B input, USB-L input, multi port output, and both charging and discharging. (Default white)<br/>The second line displays the current input or output protocol on the right. (Default green)<br/>The left side of the third line displays the current input or output voltage. (Default yellow)<br/>The current input or output current is displayed on the right side of the third line. (Default white)<br/>The left side of the fourth line displays the current input or output power. (Default Purple)<br/>On the right side of the fourth line, the current input or input capacity statistics will be displayed (reset after screen rest) (default green)<br/>The left side of the fifth line displays the current status and various reminders: the battery voltage is too high, and the battery temperature is too high. USB port short circuit/overcurrent. USB-L port overvoltage, USB-C port overvoltage, USB-B port overvoltage, battery undervoltage. Port output normal, port input normal, input output normal, small current turned on/off, small current mode<br/>The right side of the fifth line displays the wireless charging status: wireless standby, wireless charging, wireless fast charging, wireless abnormal.<br/>The status display of wireless charging may sometimes be inaccurate, mainly by reading the light display of the wireless charging module for judgment. Sometimes, interference may cause judgment errors, so everyone should not dwell on this display. For example, during normal fast charging, wireless fast charging is displayed, and suddenly it will jump to display wireless standby, and then jump back to wireless fast charging. It only occasionally appears and only takes one or two seconds to re adapt correctly, which does not affect usage.<br/><br/><span style="font-size:20px"><strong>matters needing attention:</strong></span><br/>1: The wire connecting the battery to the motherboard needs to be able to withstand a current of 10A, with a minimum of 1 square meter of copper wire and 1.5 square meters of regular wire. There is no need to be too coarse, but it cannot be too fine as it can pose a safety hazard. (Because the battery terminal current is high)<br/>It is recommended to use 16AWG cable, and a small section will be provided by default (not guaranteed)<br/>2: The motherboard comes with a protective chip, and the battery cannot be equipped with a protective board. If there is one, please remove the protective board and connect the battery cells directly to the motherboard. (Because the built-in ones generally cannot have excessive current, they are protected as soon as the output power is high)<br/>3: For those who use crocodile clip motherboard testing, please do not charge your phone and do not ask why. In short, it cannot be used in this way. To charge a mobile phone, it must be soldered and soldered (many buyers are disobedient. Whenever there is a problem, they can tell me how my motherboard is broken, how the motherboard cannot charge quickly, how the motherboard will power off and restart, etc. Please follow the instructions and don't be complacent.)<br/>4: The battery uses a 3.7V/4.2V 18650/polymer/ternary lithium battery, which can be used with large monomers. Multiple batteries can be connected in parallel, but iron lithium batteries, disposable dry batteries, nickel hydrogen, lead-acid batteries, nickel cadmium batteries, etc. cannot be used. The battery cannot be connected in series. The first time you power on, there will be inaccurate battery display. Please discharge the battery and then fully charge it.<br/>5: The motherboard must have a preset battery capacity, so the approximate battery capacity to be connected must be noted or explained to customer service. Otherwise, a preset of 20000mAh will be taken for the shell, and a preset of 10000mAh will be taken for a single motherboard without a shell. Alternatively, the resistor can be replaced later on.<br/>6: Support OPPO flash charging, support Huawei super fast charging, different protocols have different powers, understand clearly before shooting. This solution has been sold for a long time, except for some phones that do not support fast charging. (Unsupported phones are because the phone's own protocol is not publicly available and cannot be used by third parties. To use them, you can only go to the official website of each phone to buy them.)<br/>7: Our 22.5W motherboards are all of the same solution, with the same protocol and comprehensive functions. The only difference is that the board shape is different, and there are more functions for the color screen. The output and input power will be increased by default.<br/><br/><span style="font-size:20px"><strong>Product List:</strong></span><br/>1X module<br/><br/></div></div></div></div><p><br/></p>
$57.92
$32.75
- Category : Consumer Electronics
- Brand : diy_electronics_module_999_store DIY Electronics Module 999 Store
Colors
Sizes
-
+
<div class="detailmodule_html"><div class="detail-desc-decorate-richtext"><div class="detailmodule_dynamic"></div><div class="detailmodule_html"><div class="detail-desc-decorate-richtext"><span style="font-size:20px"><strong>Product features:</strong></span><br/>1. Color screen display, with 3 options and models to choose from<br/>2. The 22.5W program for this model has been updated. The maximum output power of each protocol can be adjusted to the maximum input power of 21W, and the maximum output power of 22.5W. Not only does SCP output 22.5W, but protocols such as QC and PD are also adjusted to the maximum 22.5W.<br/>Both Type-A USB sockets are designed with 5P high current USB sockets, with thicker and wider copper contacts to increase overcurrent capacity and reduce heat generation and losses.<br/>4. Support SCP and VOOC high current output<br/>5. The fast charging indicator light is on, indicating recognition of the fast charging protocol and not necessarily high-power charging<br/>6. There are four parameter displays in the first line of the screen, namely: battery voltage, external temperature display (battery temperature), battery icon display, battery percentage, battery percentage is fixed in white, and the left three will change colors based on voltage temperature and battery level<br/><br/><span style="font-size:20px"><strong>Product parameters:</strong></span><br/>The motherboard has 5 default USB ports, Type-C, L-port, Micro USB, Type-A1, Type-A2<br/>The L port supports PD2.0 fast charging input.<br/>Type-C supports AFC/FCP/SCP/PE1.1/PD3.0/PD2.0/QC4+/QC4/QC3.0/QC2.0 fast charging input;<br/>Support PPS/PD3.0/PD2.0/AFC/FCP/PE2.0/PE1.1/QC4/QC4/QC3.0/QC2.0/SFCP fast charging output.<br/>Type-A1/Type-A2<br/>Supports PPS/PD3.0/PD2.0/AFC/FCP/PE2.0/PE1.1/VooC/QC4+/QC4/QC3.0/QC2.0/SCP/SFCP output Micro USB supports AFC/FCP/PE1.1/QC3.0/QC2.0 fast charging input;<br/>Type-C supports bidirectional fast charging of input and output. Input support 5V/9V/12V voltage PPS output support 5-5.9V@3A 、 5-11V@2A ,<br/>PD3.0/PD2.0 output support 5V@3A 、 9V@2.4A 、 12V@1.75A 。<br/>QC2.0 output support 5V@3.2A 、 9V@2.4A 、 12V@1.75A 。<br/>QC3.0 supports 5V-12V output voltage, 200mV/Step.<br/>AFC output supports 5V/9V/12V. Input supports 5V/9V voltage.<br/>FCP output supports 5V/9V/12V. Input supports 5V/9V voltage.<br/>SCP output support 5V@4.5A 。 Input support 5.5V@3A 。<br/>PE2.0 output supports 5V to 12V, 500mV/Step.<br/>PE1.1 output supports 5V/7V/9V/12V. Input supports 5V/9V voltage.<br/>SFCP output supports 5V/9V/12V.<br/>VOOC output support 5V@4A 。<br/>Support Type-A1/Type-A2/Type-C ports for simultaneous external discharge. maximum 5V@4.2A<br/>The back of the board with wireless charging will be soldered with components, while the back of the board without wireless charging will not be soldered,<br/>Key function: (S1 only, S2 currently has no function, and will not be welded by default)<br/>Short press: Power the wireless charger with wireless charging. Open A1 port output without wireless charging. Double click: Force shutdown.<br/>Long press: Turn on and long press to turn off the low current mode. Turn off the flashlight by long pressing the switch. (The low current function can charge small current devices such as watches, Bluetooth, etc. without turning off within 2 hours. In fact, it does not detect the output of too small current. The output of too large current is still protected. It does not mean that it is low-power charging when turned on, and the low current mode ≠ low-power charging.)<br/><br/><span style="font-size:20px"><strong>Specifications:</strong></span><br/>Example: 1A+1B+1C+1L represents 1 large USB, 1 micro USB port, 1 Type-c, and 1 L female port.<br/>GXJA0785-002 has an L port:<br/>Single motherboard, with flashlight, low current, without wireless charging: Short press the button to open the USB-A1 port, long press the switch for low current when turning on, long press the switch when turning off the flashlight, a total of 4 ports for 1A+1B+1C+1L<br/>GXJA0785-001 without L port:<br/>Single motherboard, with flashlight, low current, without wireless charging: Short press the button to open the USB-A1 port, long press the switch for low current when turning on, long press the switch when turning off, and long press the flashlight when turning off. There are a total of 4 ports for 2A+1B+1C<br/>GXJA0785-003 with wireless charging:<br/>Single motherboard, with flashlight, low current, and wireless charging: Short press the button to open the USB-A1 port, long press the switch for low current when turning on, long press the switch when turning off, and long press the flashlight when turning off. There are a total of 4 ports, 1A+1B+1C+1L<br/><br/><span style="color:rgb(255, 0, 0);font-size:20px"><strong>be careful:</strong></span><br/>1. Components are only soldered on the back with wireless charging, while components without wireless charging are not soldered<br/>2. The default welding apple female port with wireless charging cannot be welded to a large USB port, and can be left soldered;<br/>3. Default welding large USB port without wireless charging.<br/>4. The flashlight is welded with lamp beads by default and does not need to be removable. It can only be turned on and off when turned off, and cannot be turned on or off when turned on.<br/>5. The A2 welding pad is not used by default, and should not be connected here unless there are special circumstances. The S1 switch is useful, but the S2 switch has no function and is not soldered by default. The received physical object shall prevail.<br/>6. The screen external interface can be used to connect the screen with a flat cable, which is not suitable for welding by ordinary people. If necessary, it can be customized<br/>7. Nixie tube pad and LED light pad are not welded by default,<br/>8. The positive and negative poles of the battery must not be reversed<br/><br/><span style="font-size:20px"><strong>Resistance:</strong></span><br/>R8 sets the resistance for the battery capacity. If the battery capacity is not significantly different during later replacement, it can be ignored. If the difference is too large, please replace the resistance again. The calculation formula for the resistance value is: Q=(total battery capacity mAh+2000) * 5/3. For example, a resistance of 30000mAh should be (30000+2000) * 5/3=533332. A similar resistance can be found to replace it, such as 53K.<br/>Display screen description: (Currently, only those with wireless can switch to English, while others default to Chinese)<br/>The left side of the second line displays port outputs, including USB-A1 output, USB-A2 output, Type-C output, Type-C input, USB-B input, USB-L input, multi port output, and both charging and discharging. (Default white)<br/>The second line displays the current input or output protocol on the right. (Default green)<br/>The left side of the third line displays the current input or output voltage. (Default yellow)<br/>The current input or output current is displayed on the right side of the third line. (Default white)<br/>The left side of the fourth line displays the current input or output power. (Default Purple)<br/>On the right side of the fourth line, the current input or input capacity statistics will be displayed (reset after screen rest) (default green)<br/>The left side of the fifth line displays the current status and various reminders: the battery voltage is too high, and the battery temperature is too high. USB port short circuit/overcurrent. USB-L port overvoltage, USB-C port overvoltage, USB-B port overvoltage, battery undervoltage. Port output normal, port input normal, input output normal, small current turned on/off, small current mode<br/>The right side of the fifth line displays the wireless charging status: wireless standby, wireless charging, wireless fast charging, wireless abnormal.<br/>The status display of wireless charging may sometimes be inaccurate, mainly by reading the light display of the wireless charging module for judgment. Sometimes, interference may cause judgment errors, so everyone should not dwell on this display. For example, during normal fast charging, wireless fast charging is displayed, and suddenly it will jump to display wireless standby, and then jump back to wireless fast charging. It only occasionally appears and only takes one or two seconds to re adapt correctly, which does not affect usage.<br/><br/><span style="font-size:20px"><strong>matters needing attention:</strong></span><br/>1: The wire connecting the battery to the motherboard needs to be able to withstand a current of 10A, with a minimum of 1 square meter of copper wire and 1.5 square meters of regular wire. There is no need to be too coarse, but it cannot be too fine as it can pose a safety hazard. (Because the battery terminal current is high)<br/>It is recommended to use 16AWG cable, and a small section will be provided by default (not guaranteed)<br/>2: The motherboard comes with a protective chip, and the battery cannot be equipped with a protective board. If there is one, please remove the protective board and connect the battery cells directly to the motherboard. (Because the built-in ones generally cannot have excessive current, they are protected as soon as the output power is high)<br/>3: For those who use crocodile clip motherboard testing, please do not charge your phone and do not ask why. In short, it cannot be used in this way. To charge a mobile phone, it must be soldered and soldered (many buyers are disobedient. Whenever there is a problem, they can tell me how my motherboard is broken, how the motherboard cannot charge quickly, how the motherboard will power off and restart, etc. Please follow the instructions and don't be complacent.)<br/>4: The battery uses a 3.7V/4.2V 18650/polymer/ternary lithium battery, which can be used with large monomers. Multiple batteries can be connected in parallel, but iron lithium batteries, disposable dry batteries, nickel hydrogen, lead-acid batteries, nickel cadmium batteries, etc. cannot be used. The battery cannot be connected in series. The first time you power on, there will be inaccurate battery display. Please discharge the battery and then fully charge it.<br/>5: The motherboard must have a preset battery capacity, so the approximate battery capacity to be connected must be noted or explained to customer service. Otherwise, a preset of 20000mAh will be taken for the shell, and a preset of 10000mAh will be taken for a single motherboard without a shell. Alternatively, the resistor can be replaced later on.<br/>6: Support OPPO flash charging, support Huawei super fast charging, different protocols have different powers, understand clearly before shooting. This solution has been sold for a long time, except for some phones that do not support fast charging. (Unsupported phones are because the phone's own protocol is not publicly available and cannot be used by third parties. To use them, you can only go to the official website of each phone to buy them.)<br/>7: Our 22.5W motherboards are all of the same solution, with the same protocol and comprehensive functions. The only difference is that the board shape is different, and there are more functions for the color screen. The output and input power will be increased by default.<br/><br/><span style="font-size:20px"><strong>Product List:</strong></span><br/>1X module<br/><br/></div></div></div></div><p><br/></p>