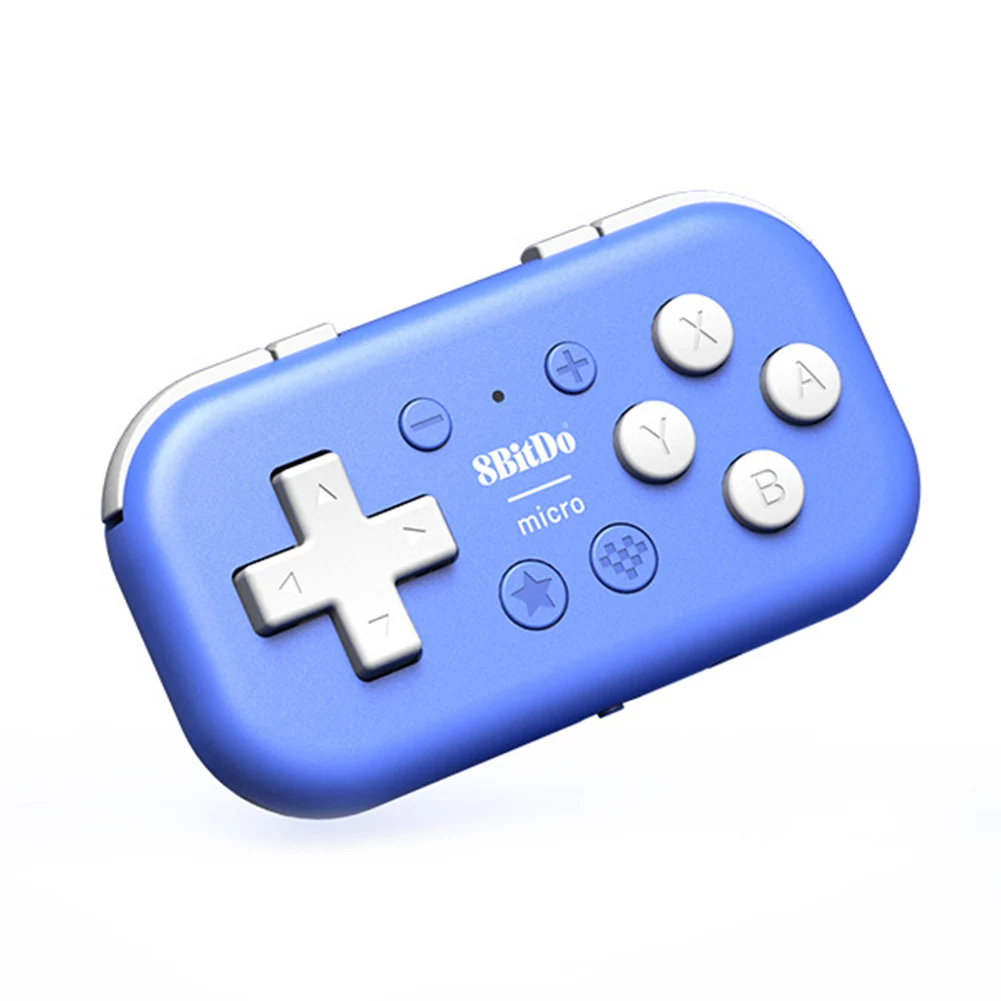
TY-3839 Wireless Bluetooth Hall linear joystick Gamepad For switch/PS3 android IOS Win7 PC Game Controller Mechanical key press
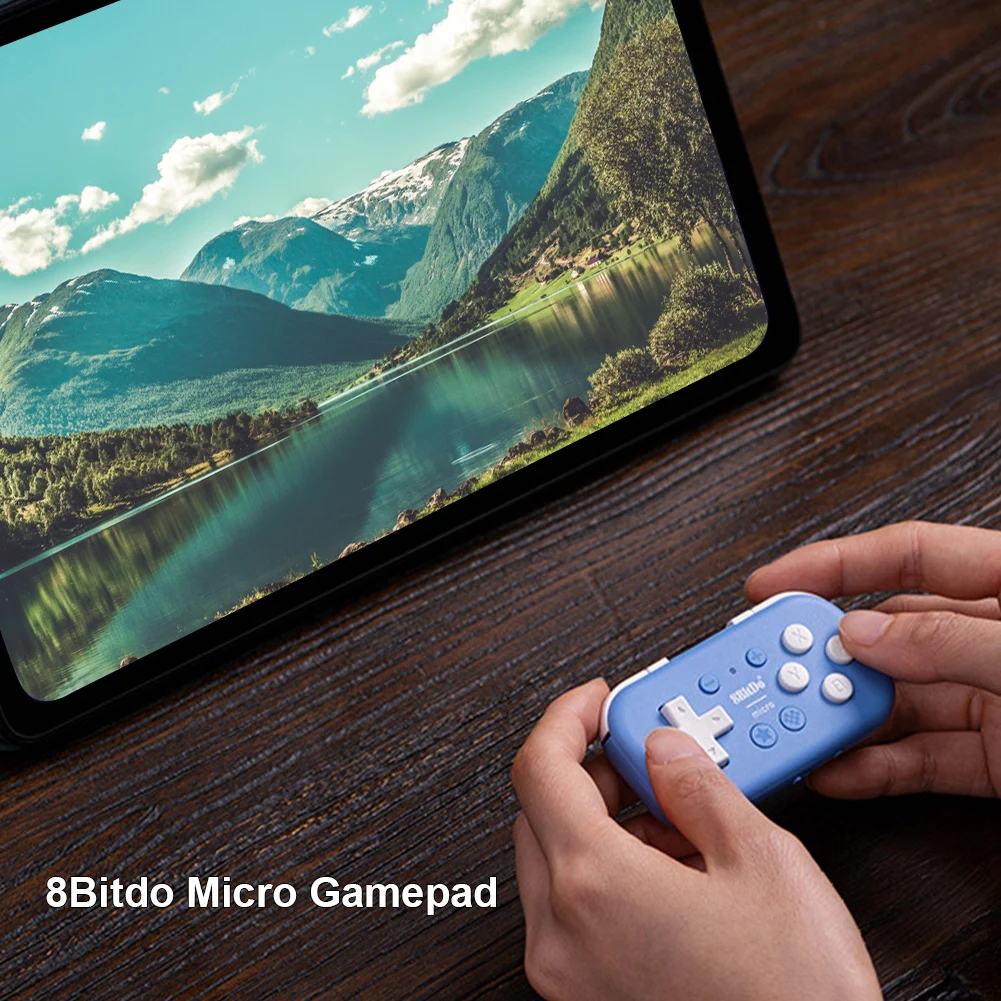
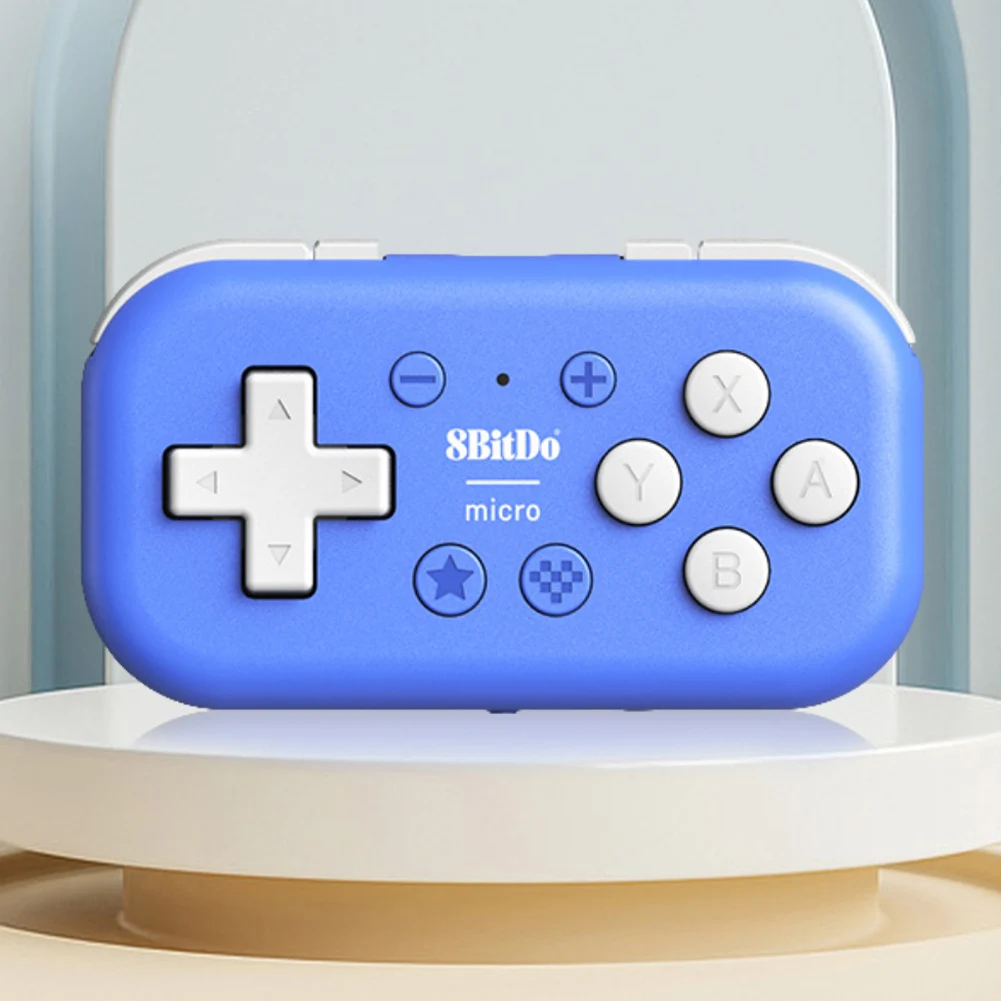
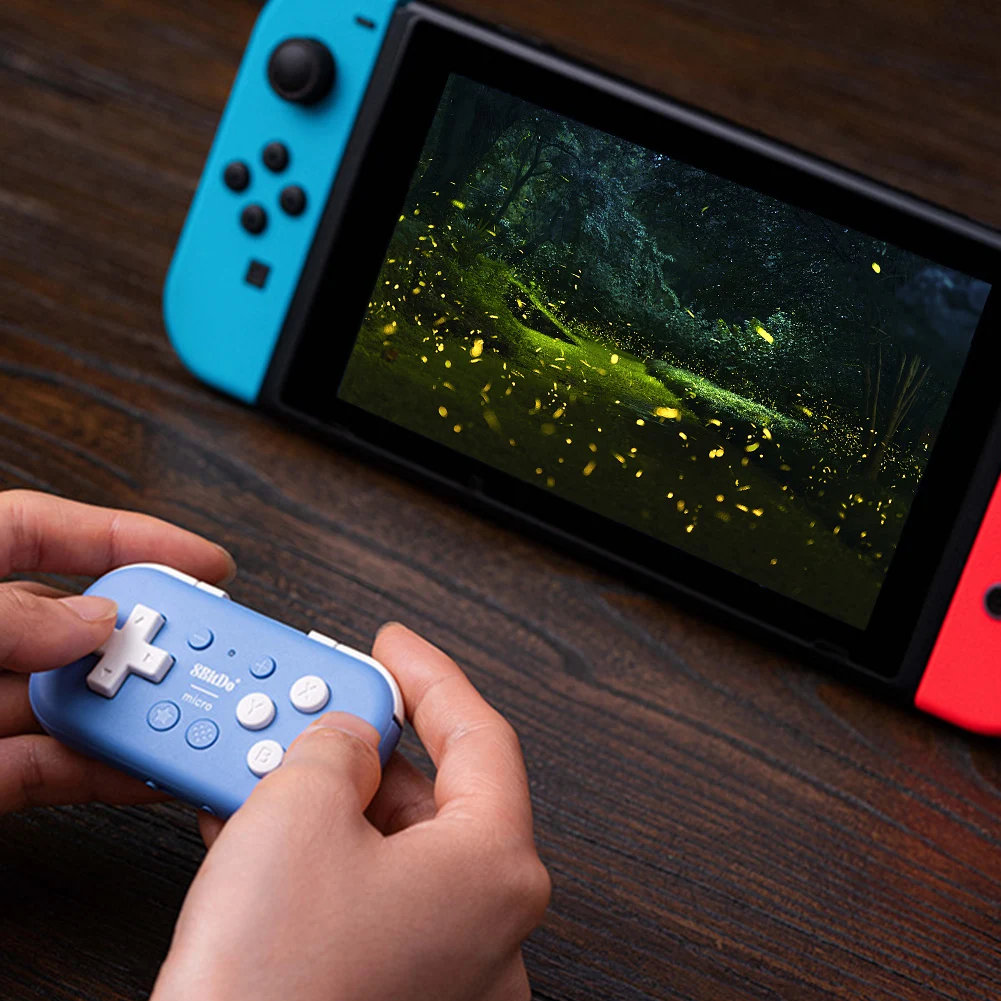
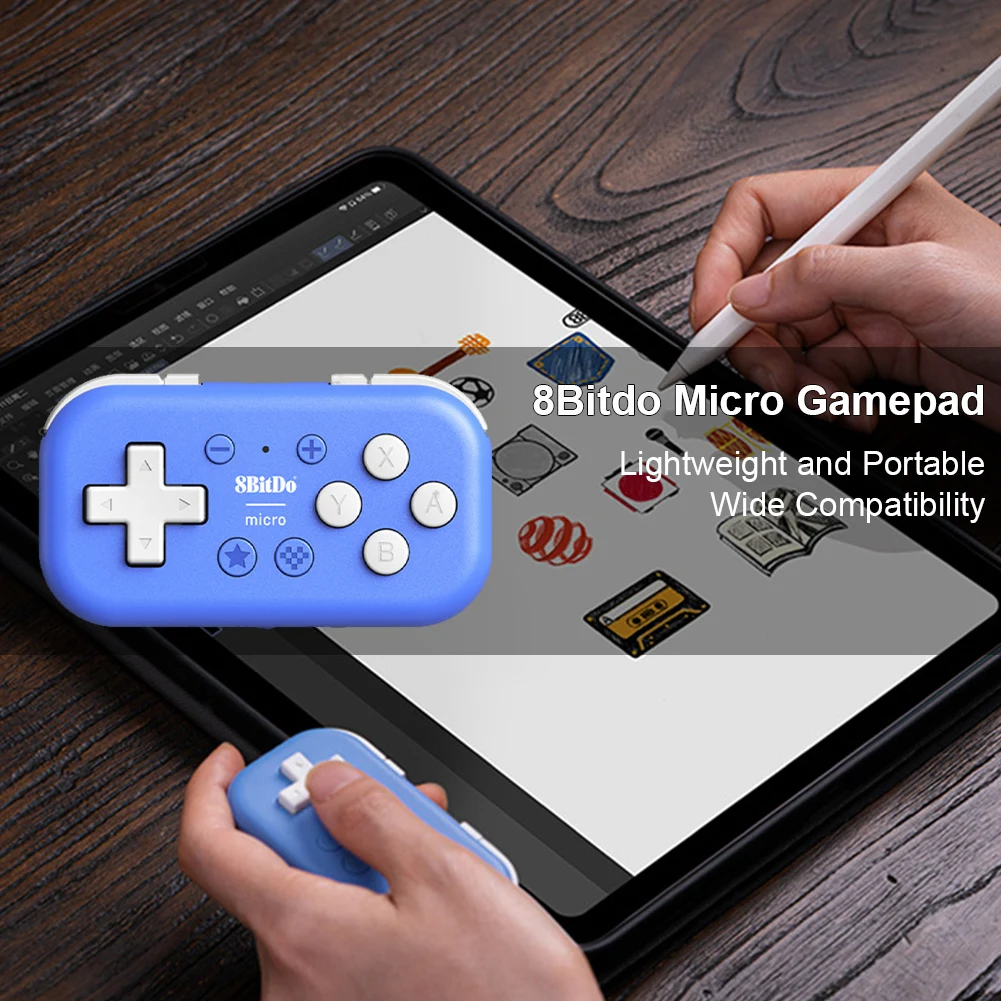
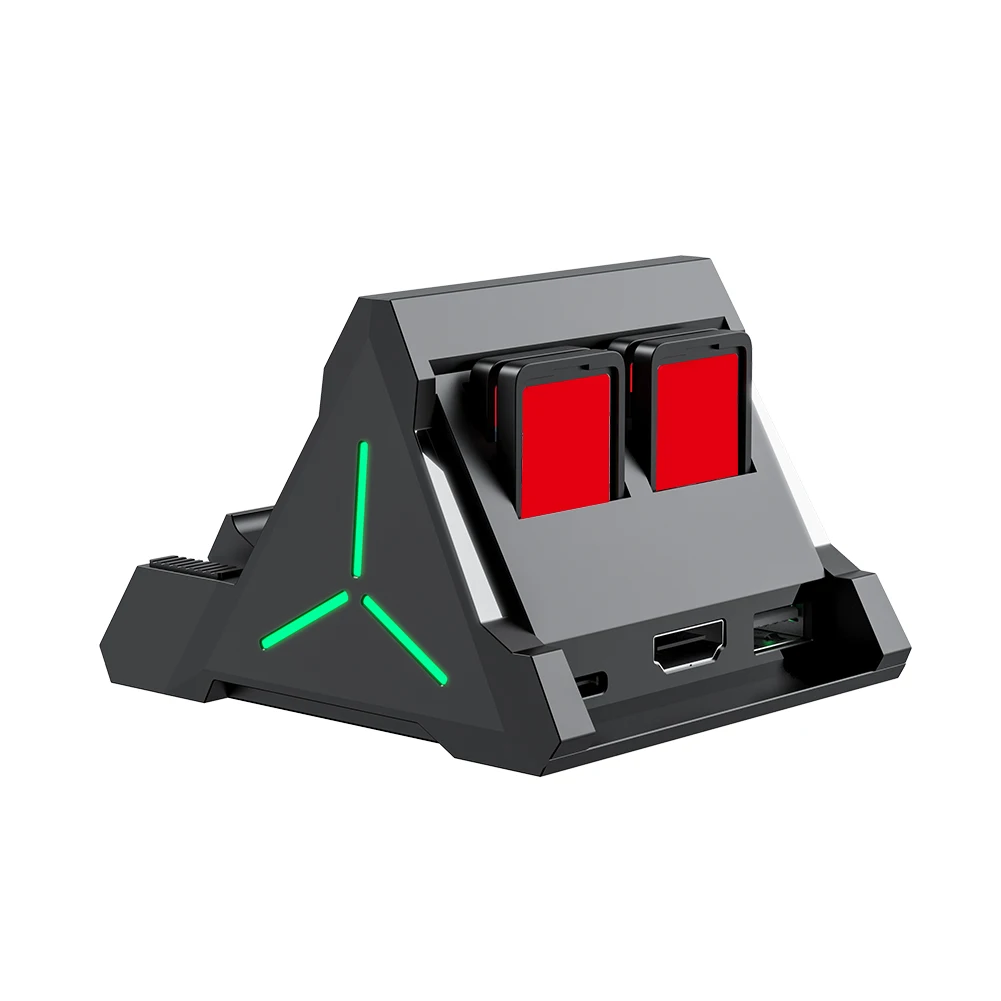
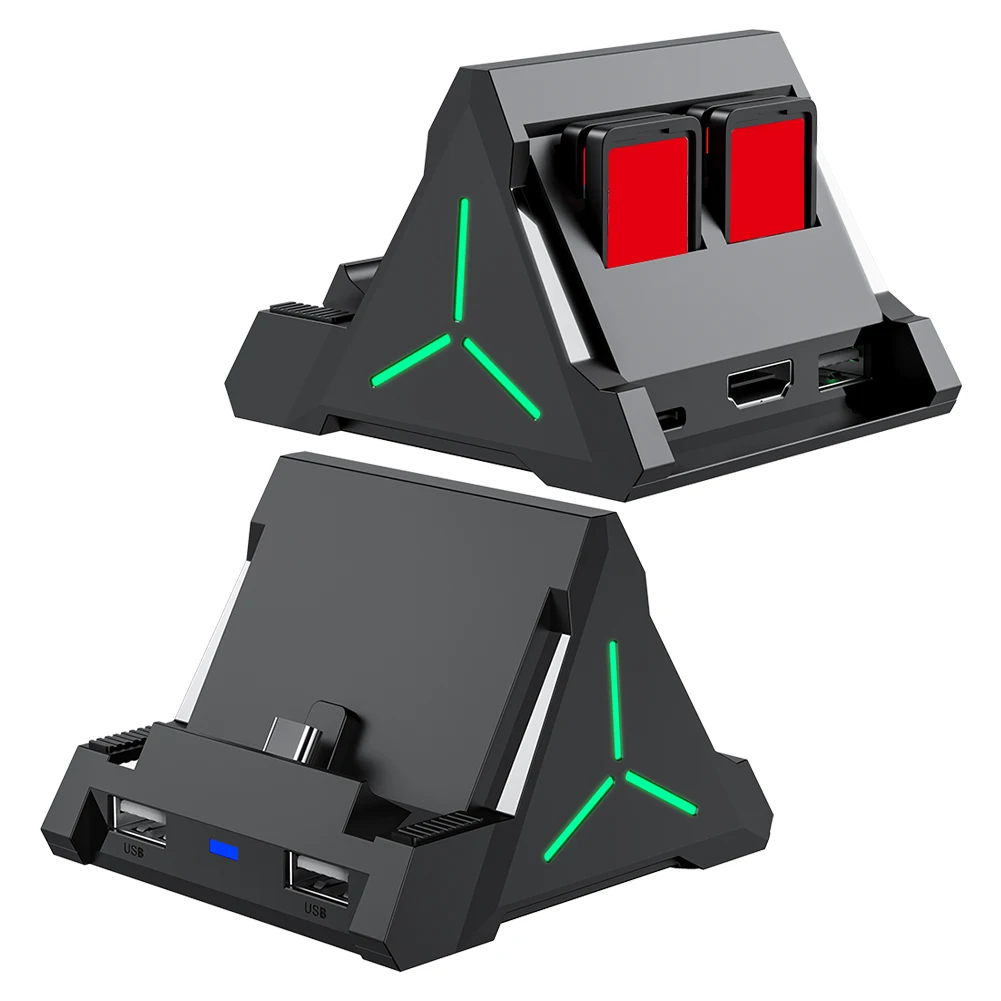
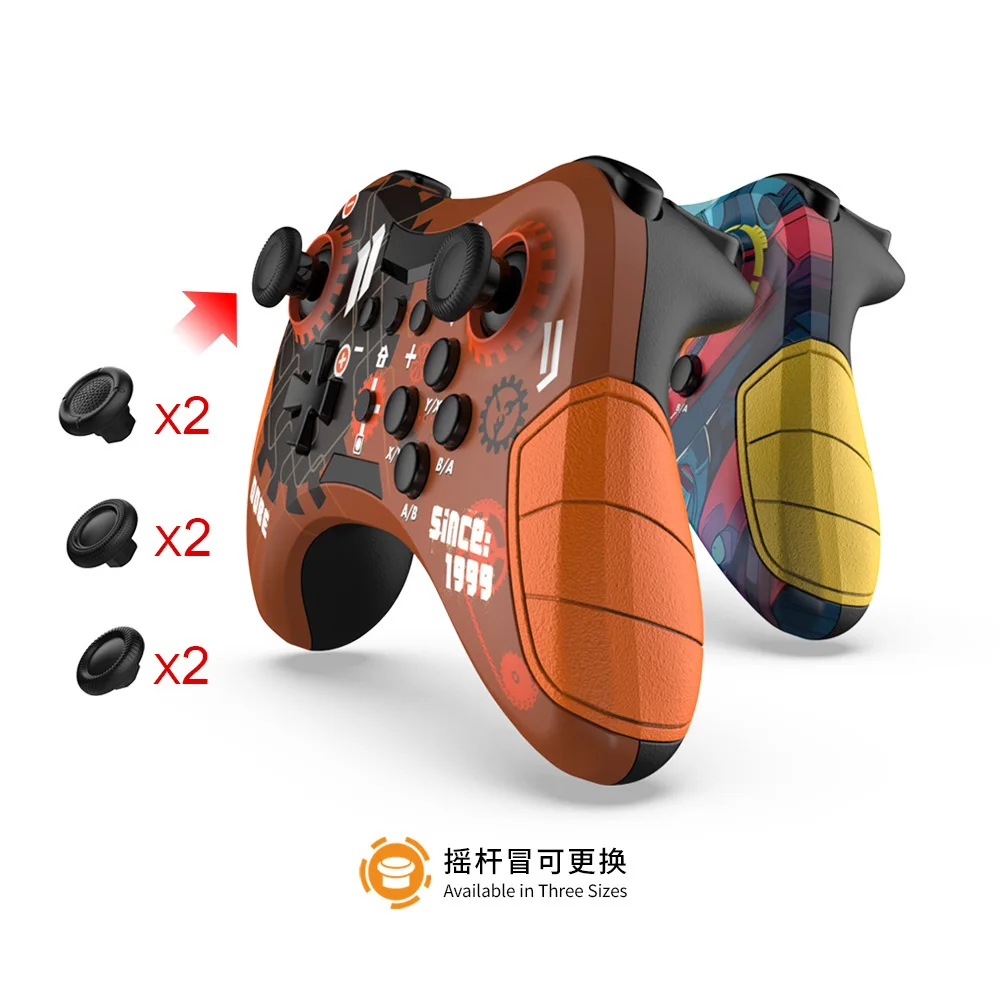
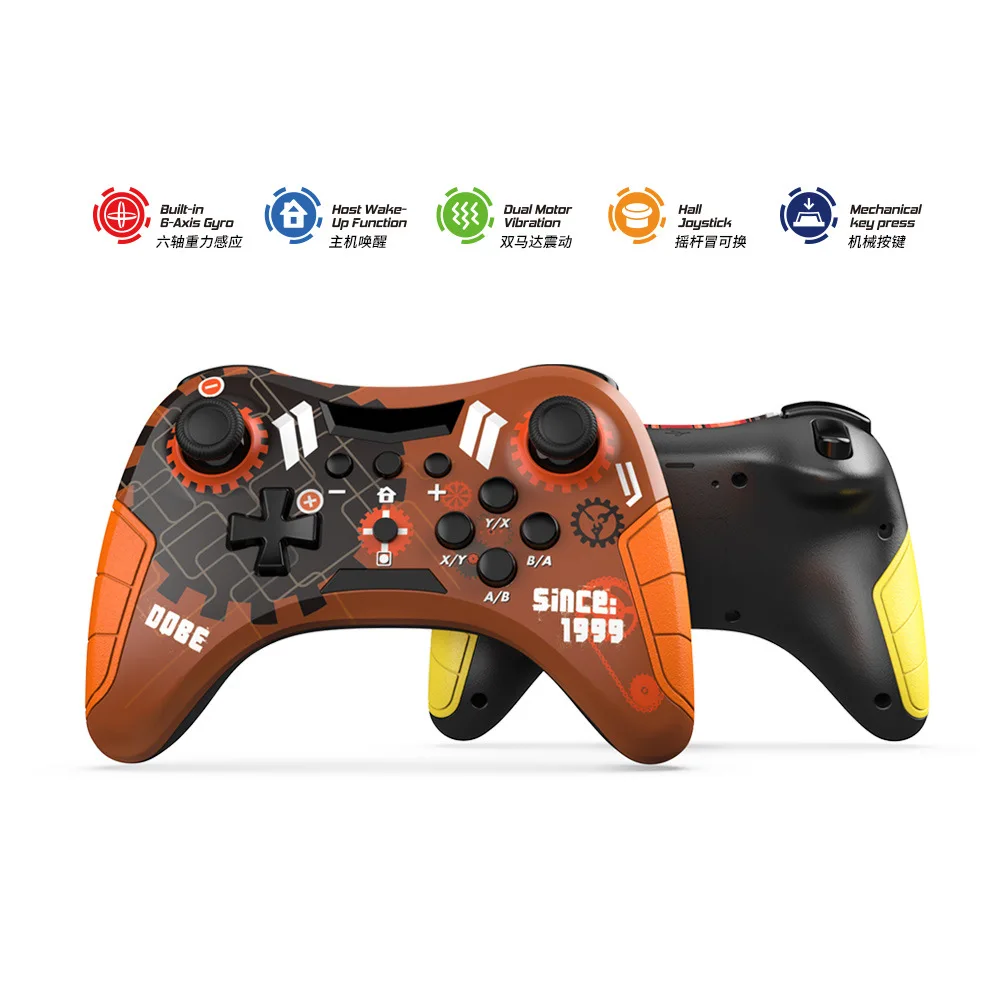
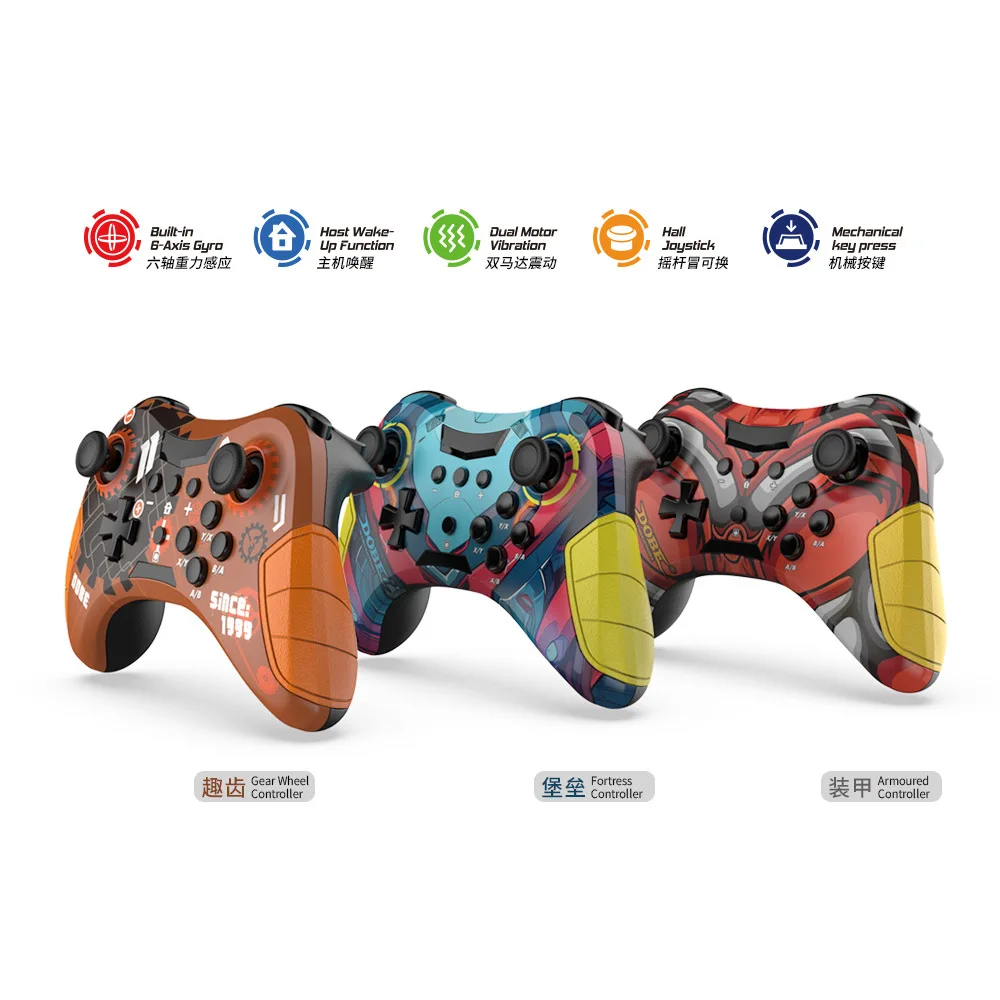
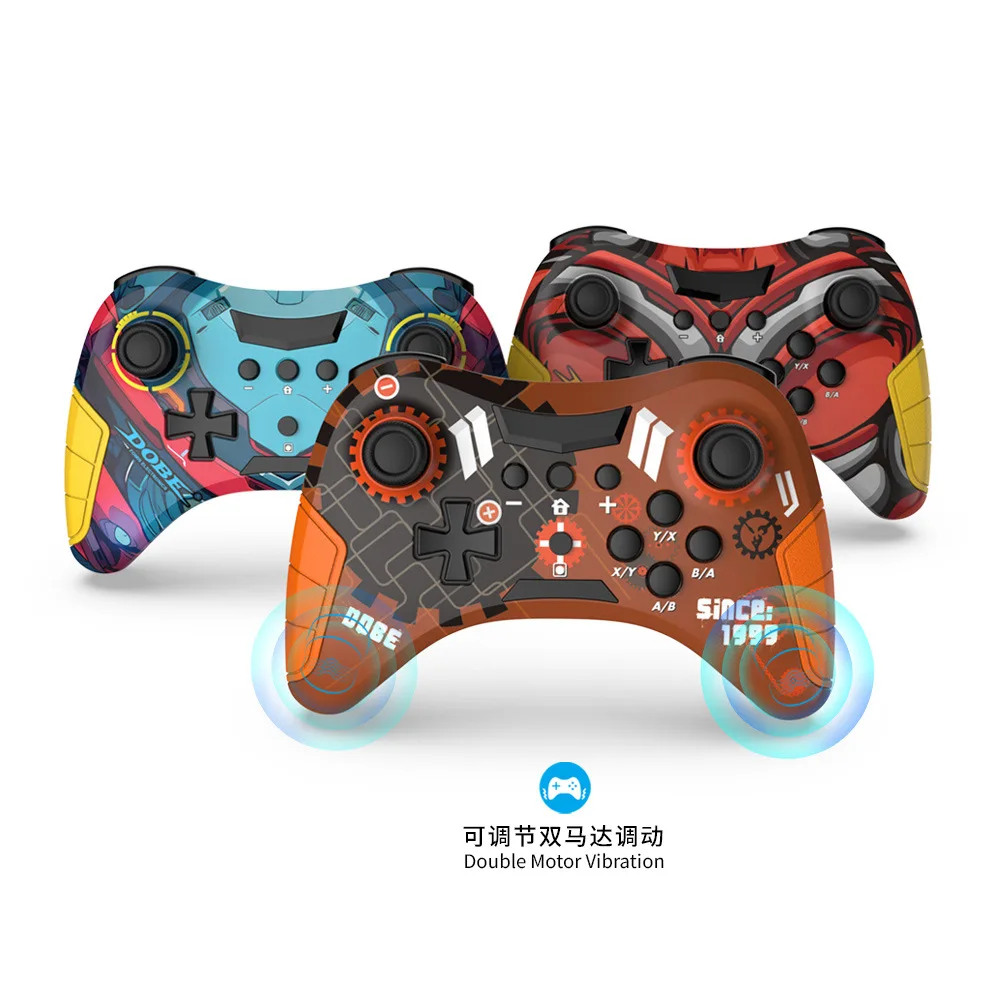
<div class="detailmodule_html"><div class="detail-desc-decorate-richtext"><p style="font-family:"Open Sans", Roboto, Arial, Helvetica, sans-serif, SimSun;font-size:14px;font-weight:400;letter-spacing:normal;line-height:inherit;text-align:start;white-space:normal;color:rgb(34, 34, 34);margin:0px;margin-bottom:0px;margin-top:0px;margin-left:0px;margin-right:0px;padding:0px;padding-bottom:0px;padding-top:0px;padding-left:0px;padding-right:0px;box-sizing:border-box" align="start">All mobile games do not support the following functions: wake-up, vibration, and six axis gyroscope</p><p style="font-family:"Open Sans", Roboto, Arial, Helvetica, sans-serif, SimSun;font-size:14px;font-weight:400;letter-spacing:normal;line-height:inherit;text-align:start;white-space:normal;color:rgb(34, 34, 34);margin:0px;margin-bottom:0px;margin-top:0px;margin-left:0px;margin-right:0px;padding:0px;padding-bottom:0px;padding-top:0px;padding-left:0px;padding-right:0px;box-sizing:border-box" align="start">1. Supports Bluetooth and N-S/Android standard mode. Direct connection mode (supports Android 6.0 and above)/computer (Windows 7 and above system)/iOS 13 and above standard mode/Switch host platform wireless connection.</p><p style="font-family:"Open Sans", Roboto, Arial, Helvetica, sans-serif, SimSun;font-size:14px;font-weight:400;letter-spacing:normal;line-height:inherit;text-align:start;white-space:normal;color:rgb(34, 34, 34);margin:0px;margin-bottom:0px;margin-top:0px;margin-left:0px;margin-right:0px;padding:0px;padding-bottom:0px;padding-top:0px;padding-left:0px;padding-right:0px;box-sizing:border-box" align="start">2. Support wired connection between data cable and N-S host, P-3/smart TV/TV box.</p><p style="font-family:"Open Sans", Roboto, Arial, Helvetica, sans-serif, SimSun;font-size:14px;font-weight:400;letter-spacing:normal;line-height:inherit;text-align:start;white-space:normal;color:rgb(34, 34, 34);margin:0px;margin-bottom:0px;margin-top:0px;margin-left:0px;margin-right:0px;padding:0px;padding-bottom:0px;padding-top:0px;padding-left:0px;padding-right:0px;box-sizing:border-box" align="start">3. Equipped with adjustable motor vibration and six axis gyroscope function.</p><p style="font-family:"Open Sans", Roboto, Arial, Helvetica, sans-serif, SimSun;font-size:14px;font-weight:400;letter-spacing:normal;line-height:inherit;text-align:start;white-space:normal;color:rgb(34, 34, 34);margin:0px;margin-bottom:0px;margin-top:0px;margin-left:0px;margin-right:0px;padding:0px;padding-bottom:0px;padding-top:0px;padding-left:0px;padding-right:0px;box-sizing:border-box" align="start">4. Support host wake-up function and pairing key connection.</p><p style="font-family:"Open Sans", Roboto, Arial, Helvetica, sans-serif, SimSun;font-size:14px;font-weight:400;letter-spacing:normal;line-height:inherit;text-align:start;white-space:normal;color:rgb(34, 34, 34);margin:0px;margin-bottom:0px;margin-top:0px;margin-left:0px;margin-right:0px;padding:0px;padding-bottom:0px;padding-top:0px;padding-left:0px;padding-right:0px;box-sizing:border-box" align="start">5. Charging indicator light.</p><p><br/></p><p style="font-family:"Open Sans", Roboto, Arial, Helvetica, sans-serif, SimSun;font-size:14px;font-weight:400;letter-spacing:normal;line-height:inherit;text-align:start;white-space:normal;color:rgb(34, 34, 34);margin:0px;margin-bottom:0px;margin-top:0px;margin-left:0px;margin-right:0px;padding:0px;padding-bottom:0px;padding-top:0px;padding-left:0px;padding-right:0px;box-sizing:border-box" align="start">Power on instructions, wake-up, and reconnection mode:</p><p style="font-family:"Open Sans", Roboto, Arial, Helvetica, sans-serif, SimSun;font-size:14px;font-weight:400;letter-spacing:normal;line-height:inherit;text-align:start;white-space:normal;color:rgb(34, 34, 34);margin:0px;margin-bottom:0px;margin-top:0px;margin-left:0px;margin-right:0px;padding:0px;padding-bottom:0px;padding-top:0px;padding-left:0px;padding-right:0px;box-sizing:border-box" align="start">1. Short press the HOME button to turn on the device; Press and hold the HOME button for 5 seconds to turn off the controller.</p><p style="font-family:"Open Sans", Roboto, Arial, Helvetica, sans-serif, SimSun;font-size:14px;font-weight:400;letter-spacing:normal;line-height:inherit;text-align:start;white-space:normal;color:rgb(34, 34, 34);margin:0px;margin-bottom:0px;margin-top:0px;margin-left:0px;margin-right:0px;padding:0px;padding-bottom:0px;padding-top:0px;padding-left:0px;padding-right:0px;box-sizing:border-box" align="start">2. When the host and controller are in sleep mode, short press the HOME button on the controller to wake them up; After being awakened, it will automatically connect to the previously paired host and reconnect. If the reconnection is unsuccessful after 10 seconds, it will automatically sleep.</p><p><br/></p><p style="font-family:"Open Sans", Roboto, Arial, Helvetica, sans-serif, SimSun;font-size:14px;font-weight:400;letter-spacing:normal;line-height:inherit;text-align:start;white-space:normal;color:rgb(34, 34, 34);margin:0px;margin-bottom:0px;margin-top:0px;margin-left:0px;margin-right:0px;padding:0px;padding-bottom:0px;padding-top:0px;padding-left:0px;padding-right:0px;box-sizing:border-box" align="start">Charging indicator and charging characteristics:</p><p style="font-family:"Open Sans", Roboto, Arial, Helvetica, sans-serif, SimSun;font-size:14px;font-weight:400;letter-spacing:normal;line-height:inherit;text-align:start;white-space:normal;color:rgb(34, 34, 34);margin:0px;margin-bottom:0px;margin-top:0px;margin-left:0px;margin-right:0px;padding:0px;padding-bottom:0px;padding-top:0px;padding-left:0px;padding-right:0px;box-sizing:border-box" align="start">1. Channel light charging indicator: During standby charging, all LED indicators in the channel flash slowly to indicate charging status, and all channel lights remain on when fully charged.</p><p style="font-family:"Open Sans", Roboto, Arial, Helvetica, sans-serif, SimSun;font-size:14px;font-weight:400;letter-spacing:normal;line-height:inherit;text-align:start;white-space:normal;color:rgb(34, 34, 34);margin:0px;margin-bottom:0px;margin-top:0px;margin-left:0px;margin-right:0px;padding:0px;padding-bottom:0px;padding-top:0px;padding-left:0px;padding-right:0px;box-sizing:border-box" align="start">2. The slow flashing of the corresponding connection indicator light in the connected state indicates that it is charging, and the corresponding connection indicator light remains on when fully charged.</p><p style="font-family:"Open Sans", Roboto, Arial, Helvetica, sans-serif, SimSun;font-size:14px;font-weight:400;letter-spacing:normal;line-height:inherit;text-align:start;white-space:normal;color:rgb(34, 34, 34);margin:0px;margin-bottom:0px;margin-top:0px;margin-left:0px;margin-right:0px;padding:0px;padding-bottom:0px;padding-top:0px;padding-left:0px;padding-right:0px;box-sizing:border-box" align="start">3. Power indicator light at the front end of the handle: When the handle is inserted into the charging cable, the indicator light lights up, indicating that the handle is disconnected from charging</p><p style="font-family:"Open Sans", Roboto, Arial, Helvetica, sans-serif, SimSun;font-size:14px;font-weight:400;letter-spacing:normal;line-height:inherit;text-align:start;white-space:normal;color:rgb(34, 34, 34);margin:0px;margin-bottom:0px;margin-top:0px;margin-left:0px;margin-right:0px;padding:0px;padding-bottom:0px;padding-top:0px;padding-left:0px;padding-right:0px;box-sizing:border-box" align="start">The indicator light turns off.</p><p><br/></p><p style="font-family:"Open Sans", Roboto, Arial, Helvetica, sans-serif, SimSun;font-size:14px;font-weight:400;letter-spacing:normal;line-height:inherit;text-align:start;white-space:normal;color:rgb(34, 34, 34);margin:0px;margin-bottom:0px;margin-top:0px;margin-left:0px;margin-right:0px;padding:0px;padding-bottom:0px;padding-top:0px;padding-left:0px;padding-right:0px;box-sizing:border-box" align="start">Switch wired connection mode:</p><p style="font-family:"Open Sans", Roboto, Arial, Helvetica, sans-serif, SimSun;font-size:14px;font-weight:400;letter-spacing:normal;line-height:inherit;text-align:start;white-space:normal;color:rgb(34, 34, 34);margin:0px;margin-bottom:0px;margin-top:0px;margin-left:0px;margin-right:0px;padding:0px;padding-bottom:0px;padding-top:0px;padding-left:0px;padding-right:0px;box-sizing:border-box" align="start">1. Before using wired connection, please confirm that the N-S host's system: 'Settings' ->' Controller and Sensor '->' Wired Connection for Pro Controller 'is turned on;</p><p style="font-family:"Open Sans", Roboto, Arial, Helvetica, sans-serif, SimSun;font-size:14px;font-weight:400;letter-spacing:normal;line-height:inherit;text-align:start;white-space:normal;color:rgb(34, 34, 34);margin:0px;margin-bottom:0px;margin-top:0px;margin-left:0px;margin-right:0px;padding:0px;padding-bottom:0px;padding-top:0px;padding-left:0px;padding-right:0px;box-sizing:border-box" align="start">2. The controller can be used as a wired controller by connecting it to the N-S base through a USB data cable, and the corresponding indicator light on the controller will flash and display;</p><p style="font-family:"Open Sans", Roboto, Arial, Helvetica, sans-serif, SimSun;font-size:14px;font-weight:400;letter-spacing:normal;line-height:inherit;text-align:start;white-space:normal;color:rgb(34, 34, 34);margin:0px;margin-bottom:0px;margin-top:0px;margin-left:0px;margin-right:0px;padding:0px;padding-bottom:0px;padding-top:0px;padding-left:0px;padding-right:0px;box-sizing:border-box" align="start">3. Unplug the USB cable, the controller will switch to wireless mode and automatically reconnect with the host, with corresponding instructions</p><p style="font-family:"Open Sans", Roboto, Arial, Helvetica, sans-serif, SimSun;font-size:14px;font-weight:400;letter-spacing:normal;line-height:inherit;text-align:start;white-space:normal;color:rgb(34, 34, 34);margin:0px;margin-bottom:0px;margin-top:0px;margin-left:0px;margin-right:0px;padding:0px;padding-bottom:0px;padding-top:0px;padding-left:0px;padding-right:0px;box-sizing:border-box" align="start">The light is constantly on for display.</p><p><br/><br/></p><p style="font-family:"Open Sans", Roboto, Arial, Helvetica, sans-serif, SimSun;font-size:14px;font-weight:400;letter-spacing:normal;line-height:inherit;text-align:start;white-space:normal;color:rgb(34, 34, 34);margin:0px;margin-bottom:0px;margin-top:0px;margin-left:0px;margin-right:0px;padding:0px;padding-bottom:0px;padding-top:0px;padding-left:0px;padding-right:0px;box-sizing:border-box" align="start">Switch wireless connection mode:</p><p style="font-family:"Open Sans", Roboto, Arial, Helvetica, sans-serif, SimSun;font-size:14px;font-weight:400;letter-spacing:normal;line-height:inherit;text-align:start;white-space:normal;color:rgb(34, 34, 34);margin:0px;margin-bottom:0px;margin-top:0px;margin-left:0px;margin-right:0px;padding:0px;padding-bottom:0px;padding-top:0px;padding-left:0px;padding-right:0px;box-sizing:border-box" align="start">1. Before using wireless connection, please confirm that the N-S host's system is in pairing mode: 'Handle'>'Change Grip/Order';</p><p style="font-family:"Open Sans", Roboto, Arial, Helvetica, sans-serif, SimSun;font-size:14px;font-weight:400;letter-spacing:normal;line-height:inherit;text-align:start;white-space:normal;color:rgb(34, 34, 34);margin:0px;margin-bottom:0px;margin-top:0px;margin-left:0px;margin-right:0px;padding:0px;padding-bottom:0px;padding-top:0px;padding-left:0px;padding-right:0px;box-sizing:border-box" align="start">2. On the controller, press the "B"+"Home" keys for 2 seconds to turn on the controller and enter pairing mode. The LED1-LED4 on the controller will start running quickly. When a single light stays on, the controller is successfully paired with the host. Short press HOME to reconnect, and LED1-LED4 will race slowly. After successful reconnection, the corresponding indicator light will remain on.</p><p><br/></p><p style="font-family:"Open Sans", Roboto, Arial, Helvetica, sans-serif, SimSun;font-size:14px;font-weight:400;letter-spacing:normal;line-height:inherit;text-align:start;white-space:normal;color:rgb(34, 34, 34);margin:0px;margin-bottom:0px;margin-top:0px;margin-left:0px;margin-right:0px;padding:0px;padding-bottom:0px;padding-top:0px;padding-left:0px;padding-right:0px;box-sizing:border-box" align="start">PC Bluetooth connection (xinput) mode:</p><p style="font-family:"Open Sans", Roboto, Arial, Helvetica, sans-serif, SimSun;font-size:14px;font-weight:400;letter-spacing:normal;line-height:inherit;text-align:start;white-space:normal;color:rgb(34, 34, 34);margin:0px;margin-bottom:0px;margin-top:0px;margin-left:0px;margin-right:0px;padding:0px;padding-bottom:0px;padding-top:0px;padding-left:0px;padding-right:0px;box-sizing:border-box" align="start">1. Press "A"+"HOME" for 2 seconds to enter Bluetooth search mode. At the same time, in the Bluetooth "Available Devices" list of the WIN10 device, find the Bluetooth name Gamepad and pair it. When pairing, LED2 and LED3 flash rapidly. After successful pairing, LED2 and LED3 remain on.</p><p style="font-family:"Open Sans", Roboto, Arial, Helvetica, sans-serif, SimSun;font-size:14px;font-weight:400;letter-spacing:normal;line-height:inherit;text-align:start;white-space:normal;color:rgb(34, 34, 34);margin:0px;margin-bottom:0px;margin-top:0px;margin-left:0px;margin-right:0px;padding:0px;padding-bottom:0px;padding-top:0px;padding-left:0px;padding-right:0px;box-sizing:border-box" align="start">2. Open the Steam login account, click on (Steam - Settings - Controllers - Common Controller Settings), check the support options, and view the name of the detected controller (wireless XINPUT mode WIN10 system displays as X-B ONE controller).</p><p style="font-family:"Open Sans", Roboto, Arial, Helvetica, sans-serif, SimSun;font-size:14px;font-weight:400;letter-spacing:normal;line-height:inherit;text-align:start;white-space:normal;color:rgb(34, 34, 34);margin:0px;margin-bottom:0px;margin-top:0px;margin-left:0px;margin-right:0px;padding:0px;padding-bottom:0px;padding-top:0px;padding-left:0px;padding-right:0px;box-sizing:border-box" align="start">3. Notebook wired connection controller, Bluetooth name X-B360 Controller for Windows.</p><p><br/></p><p style="font-family:"Open Sans", Roboto, Arial, Helvetica, sans-serif, SimSun;font-size:14px;font-weight:400;letter-spacing:normal;line-height:inherit;text-align:start;white-space:normal;color:rgb(34, 34, 34);margin:0px;margin-bottom:0px;margin-top:0px;margin-left:0px;margin-right:0px;padding:0px;padding-bottom:0px;padding-top:0px;padding-left:0px;padding-right:0px;box-sizing:border-box" align="start">Product parameters</p><p style="font-family:"Open Sans", Roboto, Arial, Helvetica, sans-serif, SimSun;font-size:14px;font-weight:400;letter-spacing:normal;line-height:inherit;text-align:start;white-space:normal;color:rgb(34, 34, 34);margin:0px;margin-bottom:0px;margin-top:0px;margin-left:0px;margin-right:0px;padding:0px;padding-bottom:0px;padding-top:0px;padding-left:0px;padding-right:0px;box-sizing:border-box" align="start">1. Battery capacity: 500mAh</p><p style="font-family:"Open Sans", Roboto, Arial, Helvetica, sans-serif, SimSun;font-size:14px;font-weight:400;letter-spacing:normal;line-height:inherit;text-align:start;white-space:normal;color:rgb(34, 34, 34);margin:0px;margin-bottom:0px;margin-top:0px;margin-left:0px;margin-right:0px;padding:0px;padding-bottom:0px;padding-top:0px;padding-left:0px;padding-right:0px;box-sizing:border-box" align="start">2. Charging current: ≤ 250mA</p><p style="font-family:"Open Sans", Roboto, Arial, Helvetica, sans-serif, SimSun;font-size:14px;font-weight:400;letter-spacing:normal;line-height:inherit;text-align:start;white-space:normal;color:rgb(34, 34, 34);margin:0px;margin-bottom:0px;margin-top:0px;margin-left:0px;margin-right:0px;padding:0px;padding-bottom:0px;padding-top:0px;padding-left:0px;padding-right:0px;box-sizing:border-box" align="start">3. Charging voltage: Standard 5V</p><p style="font-family:"Open Sans", Roboto, Arial, Helvetica, sans-serif, SimSun;font-size:14px;font-weight:400;letter-spacing:normal;line-height:inherit;text-align:start;white-space:normal;color:rgb(34, 34, 34);margin:0px;margin-bottom:0px;margin-top:0px;margin-left:0px;margin-right:0px;padding:0px;padding-bottom:0px;padding-top:0px;padding-left:0px;padding-right:0px;box-sizing:border-box" align="start">4. Maximum operating current: ≤ 140mA</p><p style="font-family:"Open Sans", Roboto, Arial, Helvetica, sans-serif, SimSun;font-size:14px;font-weight:400;letter-spacing:normal;line-height:inherit;text-align:start;white-space:normal;color:rgb(34, 34, 34);margin:0px;margin-bottom:0px;margin-top:0px;margin-left:0px;margin-right:0px;padding:0px;padding-bottom:0px;padding-top:0px;padding-left:0px;padding-right:0px;box-sizing:border-box" align="start">5. Static working current: ≤ 20uA</p><p><br/></p><p style="font-family:"Open Sans", Roboto, Arial, Helvetica, sans-serif, SimSun;font-size:14px;font-weight:400;letter-spacing:normal;line-height:inherit;text-align:start;white-space:normal;color:rgb(34, 34, 34);margin:0px;margin-bottom:0px;margin-top:0px;margin-left:0px;margin-right:0px;padding:0px;padding-bottom:0px;padding-top:0px;padding-left:0px;padding-right:0px;box-sizing:border-box" align="start"></p><p><br/></p></div></div>
$52.94
$50.39
- Category : Consumer Electronics
- Brand : game_01_store Game 01 Store
Colors
Sizes
-
+
<div class="detailmodule_html"><div class="detail-desc-decorate-richtext"><p style="font-family:"Open Sans", Roboto, Arial, Helvetica, sans-serif, SimSun;font-size:14px;font-weight:400;letter-spacing:normal;line-height:inherit;text-align:start;white-space:normal;color:rgb(34, 34, 34);margin:0px;margin-bottom:0px;margin-top:0px;margin-left:0px;margin-right:0px;padding:0px;padding-bottom:0px;padding-top:0px;padding-left:0px;padding-right:0px;box-sizing:border-box" align="start">All mobile games do not support the following functions: wake-up, vibration, and six axis gyroscope</p><p style="font-family:"Open Sans", Roboto, Arial, Helvetica, sans-serif, SimSun;font-size:14px;font-weight:400;letter-spacing:normal;line-height:inherit;text-align:start;white-space:normal;color:rgb(34, 34, 34);margin:0px;margin-bottom:0px;margin-top:0px;margin-left:0px;margin-right:0px;padding:0px;padding-bottom:0px;padding-top:0px;padding-left:0px;padding-right:0px;box-sizing:border-box" align="start">1. Supports Bluetooth and N-S/Android standard mode. Direct connection mode (supports Android 6.0 and above)/computer (Windows 7 and above system)/iOS 13 and above standard mode/Switch host platform wireless connection.</p><p style="font-family:"Open Sans", Roboto, Arial, Helvetica, sans-serif, SimSun;font-size:14px;font-weight:400;letter-spacing:normal;line-height:inherit;text-align:start;white-space:normal;color:rgb(34, 34, 34);margin:0px;margin-bottom:0px;margin-top:0px;margin-left:0px;margin-right:0px;padding:0px;padding-bottom:0px;padding-top:0px;padding-left:0px;padding-right:0px;box-sizing:border-box" align="start">2. Support wired connection between data cable and N-S host, P-3/smart TV/TV box.</p><p style="font-family:"Open Sans", Roboto, Arial, Helvetica, sans-serif, SimSun;font-size:14px;font-weight:400;letter-spacing:normal;line-height:inherit;text-align:start;white-space:normal;color:rgb(34, 34, 34);margin:0px;margin-bottom:0px;margin-top:0px;margin-left:0px;margin-right:0px;padding:0px;padding-bottom:0px;padding-top:0px;padding-left:0px;padding-right:0px;box-sizing:border-box" align="start">3. Equipped with adjustable motor vibration and six axis gyroscope function.</p><p style="font-family:"Open Sans", Roboto, Arial, Helvetica, sans-serif, SimSun;font-size:14px;font-weight:400;letter-spacing:normal;line-height:inherit;text-align:start;white-space:normal;color:rgb(34, 34, 34);margin:0px;margin-bottom:0px;margin-top:0px;margin-left:0px;margin-right:0px;padding:0px;padding-bottom:0px;padding-top:0px;padding-left:0px;padding-right:0px;box-sizing:border-box" align="start">4. Support host wake-up function and pairing key connection.</p><p style="font-family:"Open Sans", Roboto, Arial, Helvetica, sans-serif, SimSun;font-size:14px;font-weight:400;letter-spacing:normal;line-height:inherit;text-align:start;white-space:normal;color:rgb(34, 34, 34);margin:0px;margin-bottom:0px;margin-top:0px;margin-left:0px;margin-right:0px;padding:0px;padding-bottom:0px;padding-top:0px;padding-left:0px;padding-right:0px;box-sizing:border-box" align="start">5. Charging indicator light.</p><p><br/></p><p style="font-family:"Open Sans", Roboto, Arial, Helvetica, sans-serif, SimSun;font-size:14px;font-weight:400;letter-spacing:normal;line-height:inherit;text-align:start;white-space:normal;color:rgb(34, 34, 34);margin:0px;margin-bottom:0px;margin-top:0px;margin-left:0px;margin-right:0px;padding:0px;padding-bottom:0px;padding-top:0px;padding-left:0px;padding-right:0px;box-sizing:border-box" align="start">Power on instructions, wake-up, and reconnection mode:</p><p style="font-family:"Open Sans", Roboto, Arial, Helvetica, sans-serif, SimSun;font-size:14px;font-weight:400;letter-spacing:normal;line-height:inherit;text-align:start;white-space:normal;color:rgb(34, 34, 34);margin:0px;margin-bottom:0px;margin-top:0px;margin-left:0px;margin-right:0px;padding:0px;padding-bottom:0px;padding-top:0px;padding-left:0px;padding-right:0px;box-sizing:border-box" align="start">1. Short press the HOME button to turn on the device; Press and hold the HOME button for 5 seconds to turn off the controller.</p><p style="font-family:"Open Sans", Roboto, Arial, Helvetica, sans-serif, SimSun;font-size:14px;font-weight:400;letter-spacing:normal;line-height:inherit;text-align:start;white-space:normal;color:rgb(34, 34, 34);margin:0px;margin-bottom:0px;margin-top:0px;margin-left:0px;margin-right:0px;padding:0px;padding-bottom:0px;padding-top:0px;padding-left:0px;padding-right:0px;box-sizing:border-box" align="start">2. When the host and controller are in sleep mode, short press the HOME button on the controller to wake them up; After being awakened, it will automatically connect to the previously paired host and reconnect. If the reconnection is unsuccessful after 10 seconds, it will automatically sleep.</p><p><br/></p><p style="font-family:"Open Sans", Roboto, Arial, Helvetica, sans-serif, SimSun;font-size:14px;font-weight:400;letter-spacing:normal;line-height:inherit;text-align:start;white-space:normal;color:rgb(34, 34, 34);margin:0px;margin-bottom:0px;margin-top:0px;margin-left:0px;margin-right:0px;padding:0px;padding-bottom:0px;padding-top:0px;padding-left:0px;padding-right:0px;box-sizing:border-box" align="start">Charging indicator and charging characteristics:</p><p style="font-family:"Open Sans", Roboto, Arial, Helvetica, sans-serif, SimSun;font-size:14px;font-weight:400;letter-spacing:normal;line-height:inherit;text-align:start;white-space:normal;color:rgb(34, 34, 34);margin:0px;margin-bottom:0px;margin-top:0px;margin-left:0px;margin-right:0px;padding:0px;padding-bottom:0px;padding-top:0px;padding-left:0px;padding-right:0px;box-sizing:border-box" align="start">1. Channel light charging indicator: During standby charging, all LED indicators in the channel flash slowly to indicate charging status, and all channel lights remain on when fully charged.</p><p style="font-family:"Open Sans", Roboto, Arial, Helvetica, sans-serif, SimSun;font-size:14px;font-weight:400;letter-spacing:normal;line-height:inherit;text-align:start;white-space:normal;color:rgb(34, 34, 34);margin:0px;margin-bottom:0px;margin-top:0px;margin-left:0px;margin-right:0px;padding:0px;padding-bottom:0px;padding-top:0px;padding-left:0px;padding-right:0px;box-sizing:border-box" align="start">2. The slow flashing of the corresponding connection indicator light in the connected state indicates that it is charging, and the corresponding connection indicator light remains on when fully charged.</p><p style="font-family:"Open Sans", Roboto, Arial, Helvetica, sans-serif, SimSun;font-size:14px;font-weight:400;letter-spacing:normal;line-height:inherit;text-align:start;white-space:normal;color:rgb(34, 34, 34);margin:0px;margin-bottom:0px;margin-top:0px;margin-left:0px;margin-right:0px;padding:0px;padding-bottom:0px;padding-top:0px;padding-left:0px;padding-right:0px;box-sizing:border-box" align="start">3. Power indicator light at the front end of the handle: When the handle is inserted into the charging cable, the indicator light lights up, indicating that the handle is disconnected from charging</p><p style="font-family:"Open Sans", Roboto, Arial, Helvetica, sans-serif, SimSun;font-size:14px;font-weight:400;letter-spacing:normal;line-height:inherit;text-align:start;white-space:normal;color:rgb(34, 34, 34);margin:0px;margin-bottom:0px;margin-top:0px;margin-left:0px;margin-right:0px;padding:0px;padding-bottom:0px;padding-top:0px;padding-left:0px;padding-right:0px;box-sizing:border-box" align="start">The indicator light turns off.</p><p><br/></p><p style="font-family:"Open Sans", Roboto, Arial, Helvetica, sans-serif, SimSun;font-size:14px;font-weight:400;letter-spacing:normal;line-height:inherit;text-align:start;white-space:normal;color:rgb(34, 34, 34);margin:0px;margin-bottom:0px;margin-top:0px;margin-left:0px;margin-right:0px;padding:0px;padding-bottom:0px;padding-top:0px;padding-left:0px;padding-right:0px;box-sizing:border-box" align="start">Switch wired connection mode:</p><p style="font-family:"Open Sans", Roboto, Arial, Helvetica, sans-serif, SimSun;font-size:14px;font-weight:400;letter-spacing:normal;line-height:inherit;text-align:start;white-space:normal;color:rgb(34, 34, 34);margin:0px;margin-bottom:0px;margin-top:0px;margin-left:0px;margin-right:0px;padding:0px;padding-bottom:0px;padding-top:0px;padding-left:0px;padding-right:0px;box-sizing:border-box" align="start">1. Before using wired connection, please confirm that the N-S host's system: 'Settings' ->' Controller and Sensor '->' Wired Connection for Pro Controller 'is turned on;</p><p style="font-family:"Open Sans", Roboto, Arial, Helvetica, sans-serif, SimSun;font-size:14px;font-weight:400;letter-spacing:normal;line-height:inherit;text-align:start;white-space:normal;color:rgb(34, 34, 34);margin:0px;margin-bottom:0px;margin-top:0px;margin-left:0px;margin-right:0px;padding:0px;padding-bottom:0px;padding-top:0px;padding-left:0px;padding-right:0px;box-sizing:border-box" align="start">2. The controller can be used as a wired controller by connecting it to the N-S base through a USB data cable, and the corresponding indicator light on the controller will flash and display;</p><p style="font-family:"Open Sans", Roboto, Arial, Helvetica, sans-serif, SimSun;font-size:14px;font-weight:400;letter-spacing:normal;line-height:inherit;text-align:start;white-space:normal;color:rgb(34, 34, 34);margin:0px;margin-bottom:0px;margin-top:0px;margin-left:0px;margin-right:0px;padding:0px;padding-bottom:0px;padding-top:0px;padding-left:0px;padding-right:0px;box-sizing:border-box" align="start">3. Unplug the USB cable, the controller will switch to wireless mode and automatically reconnect with the host, with corresponding instructions</p><p style="font-family:"Open Sans", Roboto, Arial, Helvetica, sans-serif, SimSun;font-size:14px;font-weight:400;letter-spacing:normal;line-height:inherit;text-align:start;white-space:normal;color:rgb(34, 34, 34);margin:0px;margin-bottom:0px;margin-top:0px;margin-left:0px;margin-right:0px;padding:0px;padding-bottom:0px;padding-top:0px;padding-left:0px;padding-right:0px;box-sizing:border-box" align="start">The light is constantly on for display.</p><p><br/><br/></p><p style="font-family:"Open Sans", Roboto, Arial, Helvetica, sans-serif, SimSun;font-size:14px;font-weight:400;letter-spacing:normal;line-height:inherit;text-align:start;white-space:normal;color:rgb(34, 34, 34);margin:0px;margin-bottom:0px;margin-top:0px;margin-left:0px;margin-right:0px;padding:0px;padding-bottom:0px;padding-top:0px;padding-left:0px;padding-right:0px;box-sizing:border-box" align="start">Switch wireless connection mode:</p><p style="font-family:"Open Sans", Roboto, Arial, Helvetica, sans-serif, SimSun;font-size:14px;font-weight:400;letter-spacing:normal;line-height:inherit;text-align:start;white-space:normal;color:rgb(34, 34, 34);margin:0px;margin-bottom:0px;margin-top:0px;margin-left:0px;margin-right:0px;padding:0px;padding-bottom:0px;padding-top:0px;padding-left:0px;padding-right:0px;box-sizing:border-box" align="start">1. Before using wireless connection, please confirm that the N-S host's system is in pairing mode: 'Handle'>'Change Grip/Order';</p><p style="font-family:"Open Sans", Roboto, Arial, Helvetica, sans-serif, SimSun;font-size:14px;font-weight:400;letter-spacing:normal;line-height:inherit;text-align:start;white-space:normal;color:rgb(34, 34, 34);margin:0px;margin-bottom:0px;margin-top:0px;margin-left:0px;margin-right:0px;padding:0px;padding-bottom:0px;padding-top:0px;padding-left:0px;padding-right:0px;box-sizing:border-box" align="start">2. On the controller, press the "B"+"Home" keys for 2 seconds to turn on the controller and enter pairing mode. The LED1-LED4 on the controller will start running quickly. When a single light stays on, the controller is successfully paired with the host. Short press HOME to reconnect, and LED1-LED4 will race slowly. After successful reconnection, the corresponding indicator light will remain on.</p><p><br/></p><p style="font-family:"Open Sans", Roboto, Arial, Helvetica, sans-serif, SimSun;font-size:14px;font-weight:400;letter-spacing:normal;line-height:inherit;text-align:start;white-space:normal;color:rgb(34, 34, 34);margin:0px;margin-bottom:0px;margin-top:0px;margin-left:0px;margin-right:0px;padding:0px;padding-bottom:0px;padding-top:0px;padding-left:0px;padding-right:0px;box-sizing:border-box" align="start">PC Bluetooth connection (xinput) mode:</p><p style="font-family:"Open Sans", Roboto, Arial, Helvetica, sans-serif, SimSun;font-size:14px;font-weight:400;letter-spacing:normal;line-height:inherit;text-align:start;white-space:normal;color:rgb(34, 34, 34);margin:0px;margin-bottom:0px;margin-top:0px;margin-left:0px;margin-right:0px;padding:0px;padding-bottom:0px;padding-top:0px;padding-left:0px;padding-right:0px;box-sizing:border-box" align="start">1. Press "A"+"HOME" for 2 seconds to enter Bluetooth search mode. At the same time, in the Bluetooth "Available Devices" list of the WIN10 device, find the Bluetooth name Gamepad and pair it. When pairing, LED2 and LED3 flash rapidly. After successful pairing, LED2 and LED3 remain on.</p><p style="font-family:"Open Sans", Roboto, Arial, Helvetica, sans-serif, SimSun;font-size:14px;font-weight:400;letter-spacing:normal;line-height:inherit;text-align:start;white-space:normal;color:rgb(34, 34, 34);margin:0px;margin-bottom:0px;margin-top:0px;margin-left:0px;margin-right:0px;padding:0px;padding-bottom:0px;padding-top:0px;padding-left:0px;padding-right:0px;box-sizing:border-box" align="start">2. Open the Steam login account, click on (Steam - Settings - Controllers - Common Controller Settings), check the support options, and view the name of the detected controller (wireless XINPUT mode WIN10 system displays as X-B ONE controller).</p><p style="font-family:"Open Sans", Roboto, Arial, Helvetica, sans-serif, SimSun;font-size:14px;font-weight:400;letter-spacing:normal;line-height:inherit;text-align:start;white-space:normal;color:rgb(34, 34, 34);margin:0px;margin-bottom:0px;margin-top:0px;margin-left:0px;margin-right:0px;padding:0px;padding-bottom:0px;padding-top:0px;padding-left:0px;padding-right:0px;box-sizing:border-box" align="start">3. Notebook wired connection controller, Bluetooth name X-B360 Controller for Windows.</p><p><br/></p><p style="font-family:"Open Sans", Roboto, Arial, Helvetica, sans-serif, SimSun;font-size:14px;font-weight:400;letter-spacing:normal;line-height:inherit;text-align:start;white-space:normal;color:rgb(34, 34, 34);margin:0px;margin-bottom:0px;margin-top:0px;margin-left:0px;margin-right:0px;padding:0px;padding-bottom:0px;padding-top:0px;padding-left:0px;padding-right:0px;box-sizing:border-box" align="start">Product parameters</p><p style="font-family:"Open Sans", Roboto, Arial, Helvetica, sans-serif, SimSun;font-size:14px;font-weight:400;letter-spacing:normal;line-height:inherit;text-align:start;white-space:normal;color:rgb(34, 34, 34);margin:0px;margin-bottom:0px;margin-top:0px;margin-left:0px;margin-right:0px;padding:0px;padding-bottom:0px;padding-top:0px;padding-left:0px;padding-right:0px;box-sizing:border-box" align="start">1. Battery capacity: 500mAh</p><p style="font-family:"Open Sans", Roboto, Arial, Helvetica, sans-serif, SimSun;font-size:14px;font-weight:400;letter-spacing:normal;line-height:inherit;text-align:start;white-space:normal;color:rgb(34, 34, 34);margin:0px;margin-bottom:0px;margin-top:0px;margin-left:0px;margin-right:0px;padding:0px;padding-bottom:0px;padding-top:0px;padding-left:0px;padding-right:0px;box-sizing:border-box" align="start">2. Charging current: ≤ 250mA</p><p style="font-family:"Open Sans", Roboto, Arial, Helvetica, sans-serif, SimSun;font-size:14px;font-weight:400;letter-spacing:normal;line-height:inherit;text-align:start;white-space:normal;color:rgb(34, 34, 34);margin:0px;margin-bottom:0px;margin-top:0px;margin-left:0px;margin-right:0px;padding:0px;padding-bottom:0px;padding-top:0px;padding-left:0px;padding-right:0px;box-sizing:border-box" align="start">3. Charging voltage: Standard 5V</p><p style="font-family:"Open Sans", Roboto, Arial, Helvetica, sans-serif, SimSun;font-size:14px;font-weight:400;letter-spacing:normal;line-height:inherit;text-align:start;white-space:normal;color:rgb(34, 34, 34);margin:0px;margin-bottom:0px;margin-top:0px;margin-left:0px;margin-right:0px;padding:0px;padding-bottom:0px;padding-top:0px;padding-left:0px;padding-right:0px;box-sizing:border-box" align="start">4. Maximum operating current: ≤ 140mA</p><p style="font-family:"Open Sans", Roboto, Arial, Helvetica, sans-serif, SimSun;font-size:14px;font-weight:400;letter-spacing:normal;line-height:inherit;text-align:start;white-space:normal;color:rgb(34, 34, 34);margin:0px;margin-bottom:0px;margin-top:0px;margin-left:0px;margin-right:0px;padding:0px;padding-bottom:0px;padding-top:0px;padding-left:0px;padding-right:0px;box-sizing:border-box" align="start">5. Static working current: ≤ 20uA</p><p><br/></p><p style="font-family:"Open Sans", Roboto, Arial, Helvetica, sans-serif, SimSun;font-size:14px;font-weight:400;letter-spacing:normal;line-height:inherit;text-align:start;white-space:normal;color:rgb(34, 34, 34);margin:0px;margin-bottom:0px;margin-top:0px;margin-left:0px;margin-right:0px;padding:0px;padding-bottom:0px;padding-top:0px;padding-left:0px;padding-right:0px;box-sizing:border-box" align="start"></p><p><br/></p></div></div>
Related Product
Browse The Collection of Top Products.